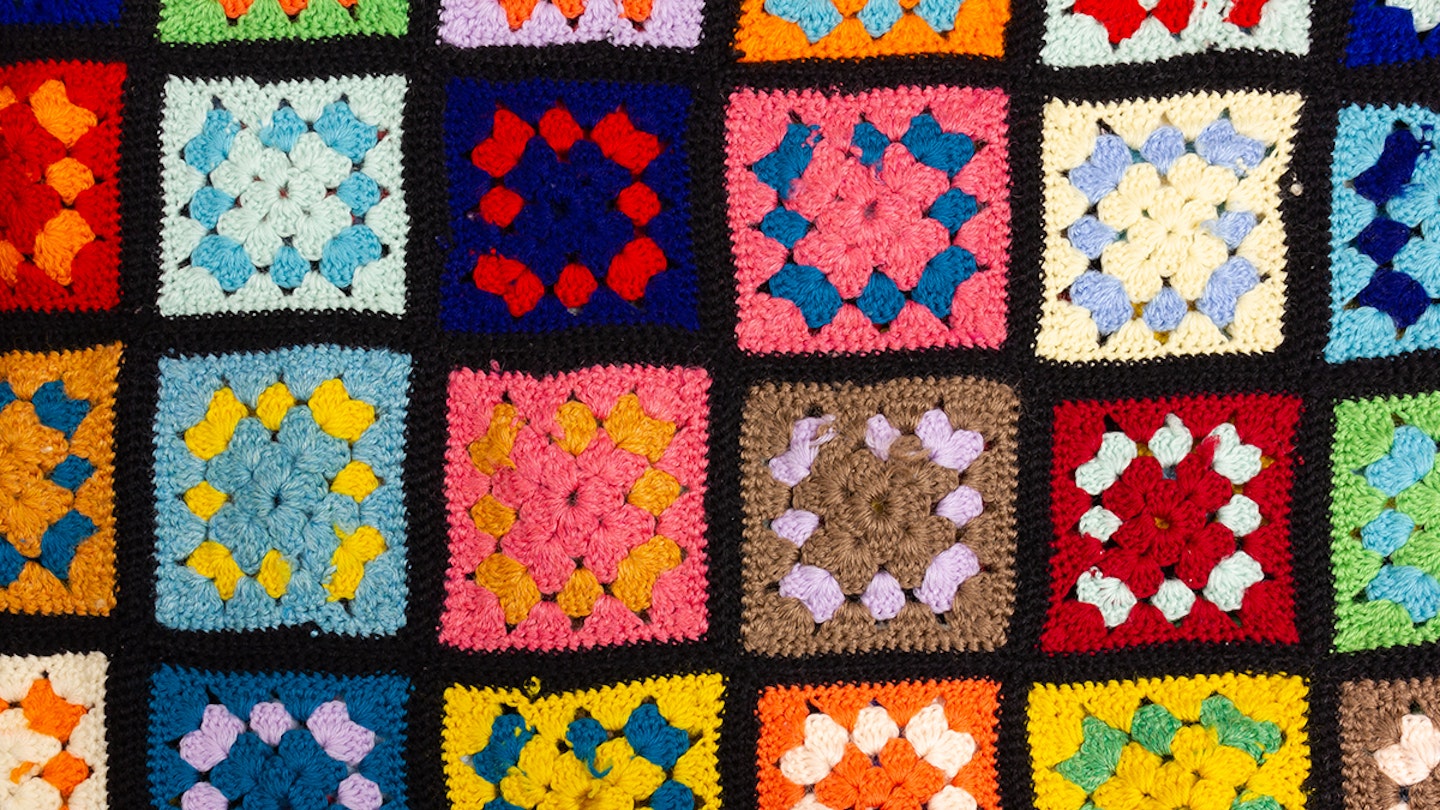
The granny square is often one of the first patterns a beginner learns to make when starting to crochet.
The basic granny square is a classic crochet design for many reasons. It’s an easy-to-learn pattern that’s straightforward and repetitive. Granny squares are simple to make, and quick, too!
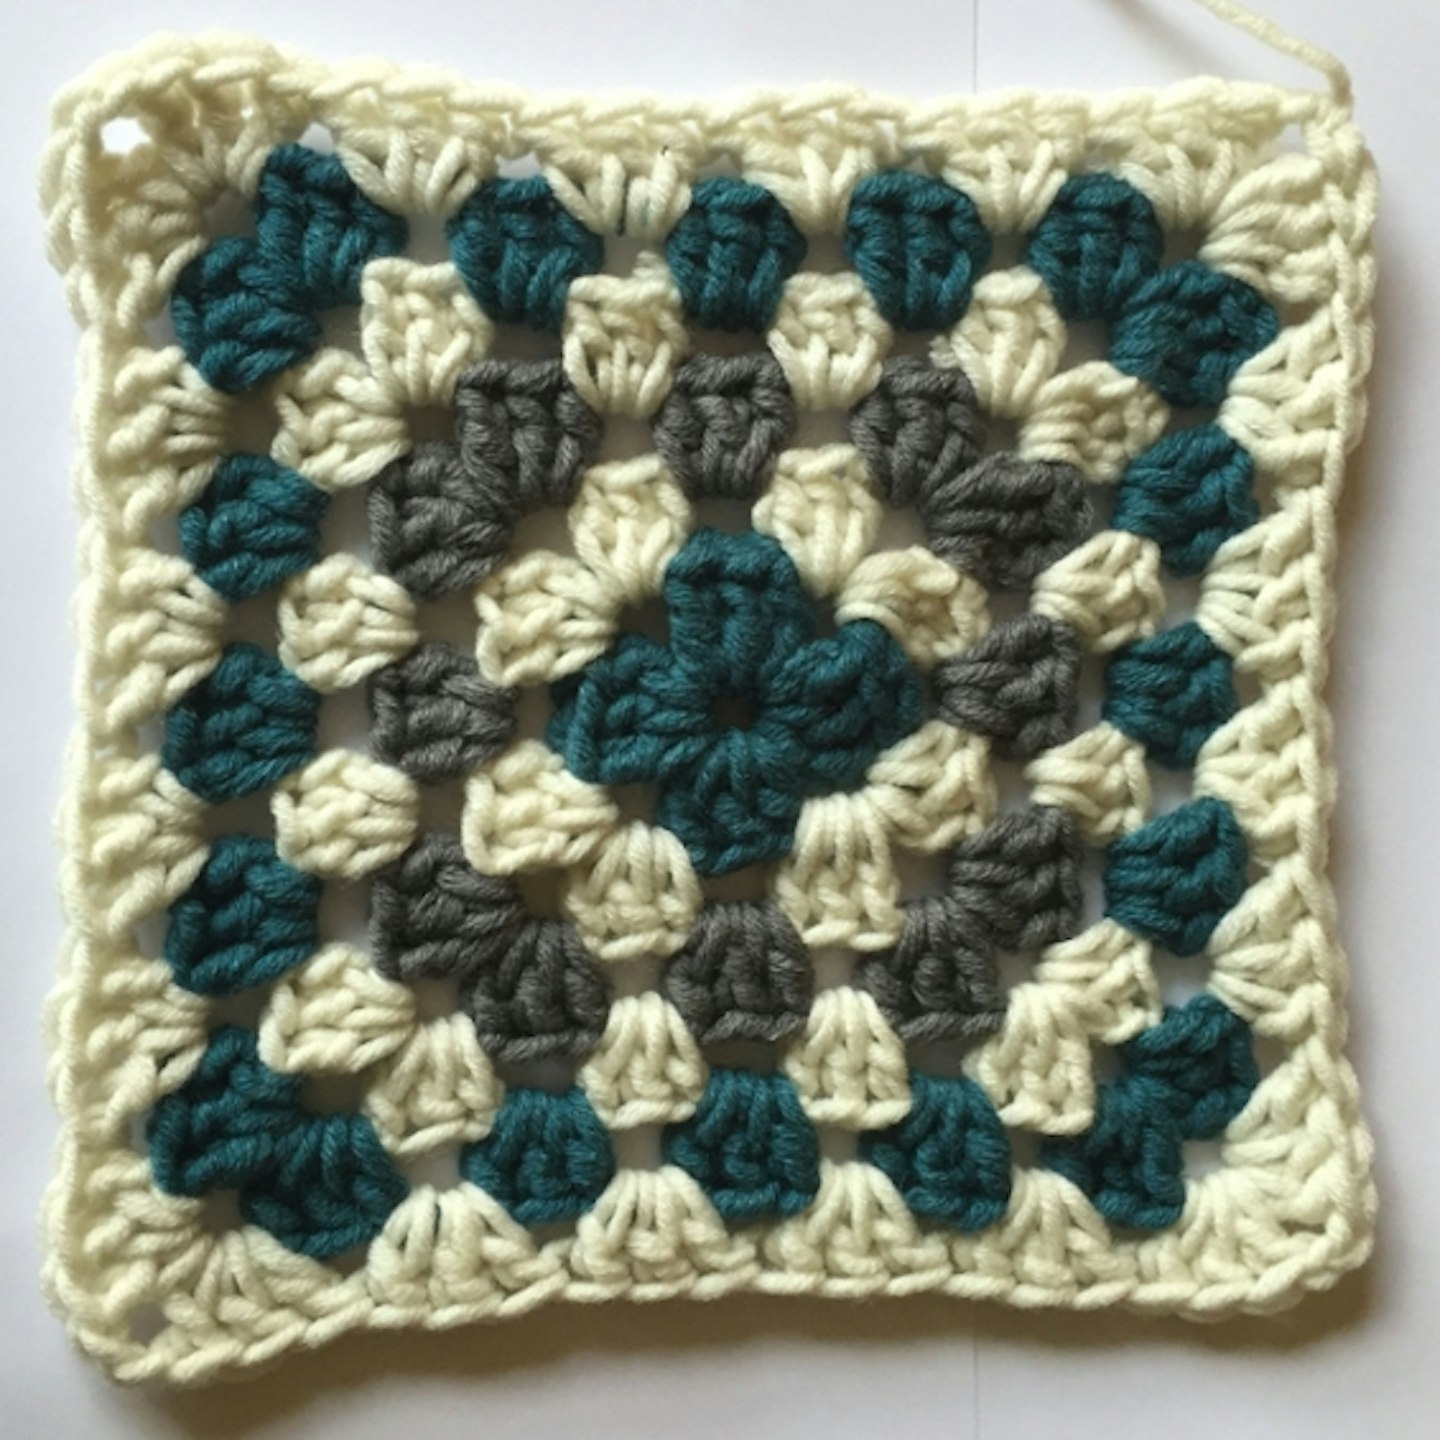
Granny squares can be worked using one solid colour, or a different colour for each round — which is a great way to use up smaller scraps of yarn. It’s easy to transform the look of a granny square by playing with colour.
Step-by-step how to make a granny square
The design below uses three different yarn colours, but you can also just use the one colour if you'd prefer.
When joining in new yarn, join on last pull through of last stitch in previous colour.
The method below consists of only two stitches, the Chain stitch and the Treble Crochet, but you can add a Double Crochet to edge it if you wish.
Abbreviations - Stitches (UK):
ch : Chain Stitch – Yarn around hook (from the back) draw through loop on hook.
st – stitch
sp – space
sl st : Slip Stitch – Put hook through work and pull yarn through work and through loop on hook.
dc : Double Crochet – Put hook through work and draw yarn back through (two loops on hook) yarn around hook, draw through two loops on hook..
tr : Treble Crochet – Yarn around hook (from the back) put hook through work and draw yarn back through (three loops on hook) yarn around hook, draw through two loops on hook, yarn around hook, draw through two loops on hook.
Rem : remaining
You will need:
• Yarn
• Crochet hook (this method uses a 9mm hook)
• Scissors
Method
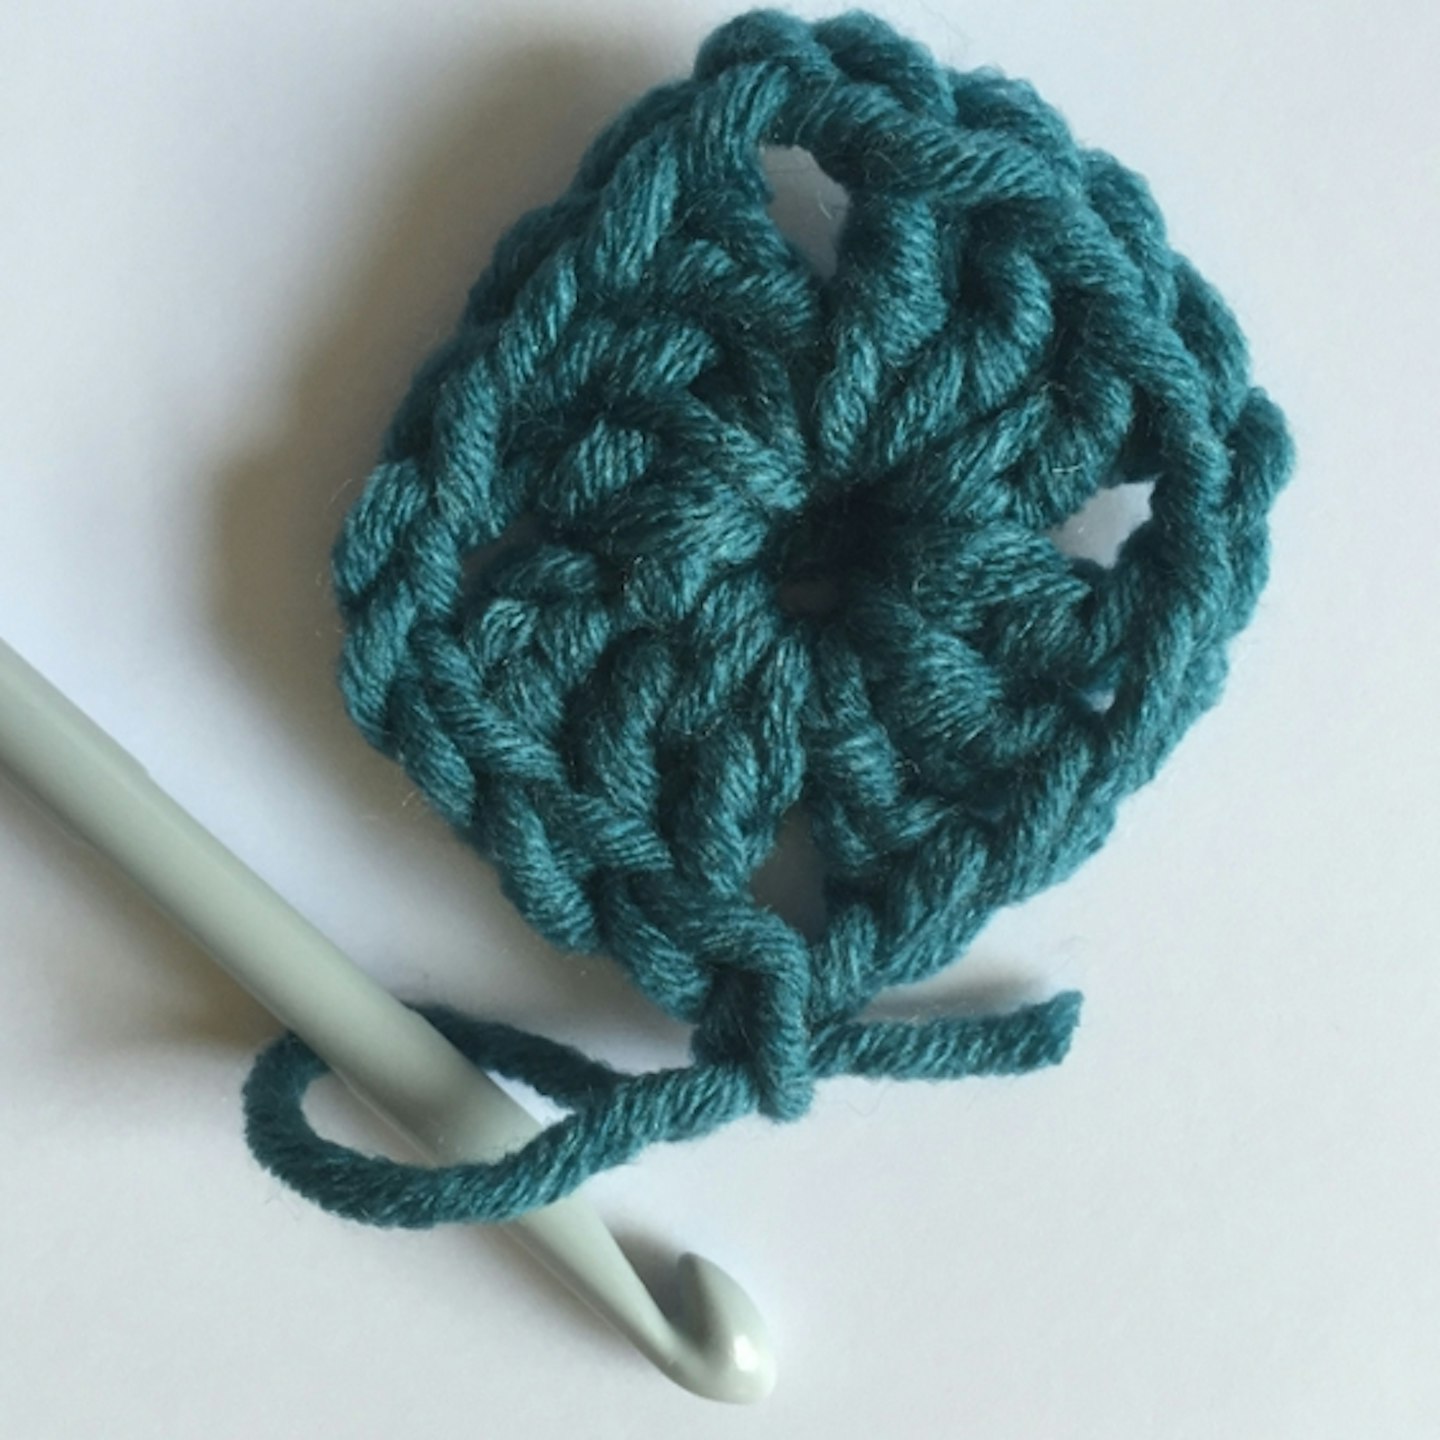
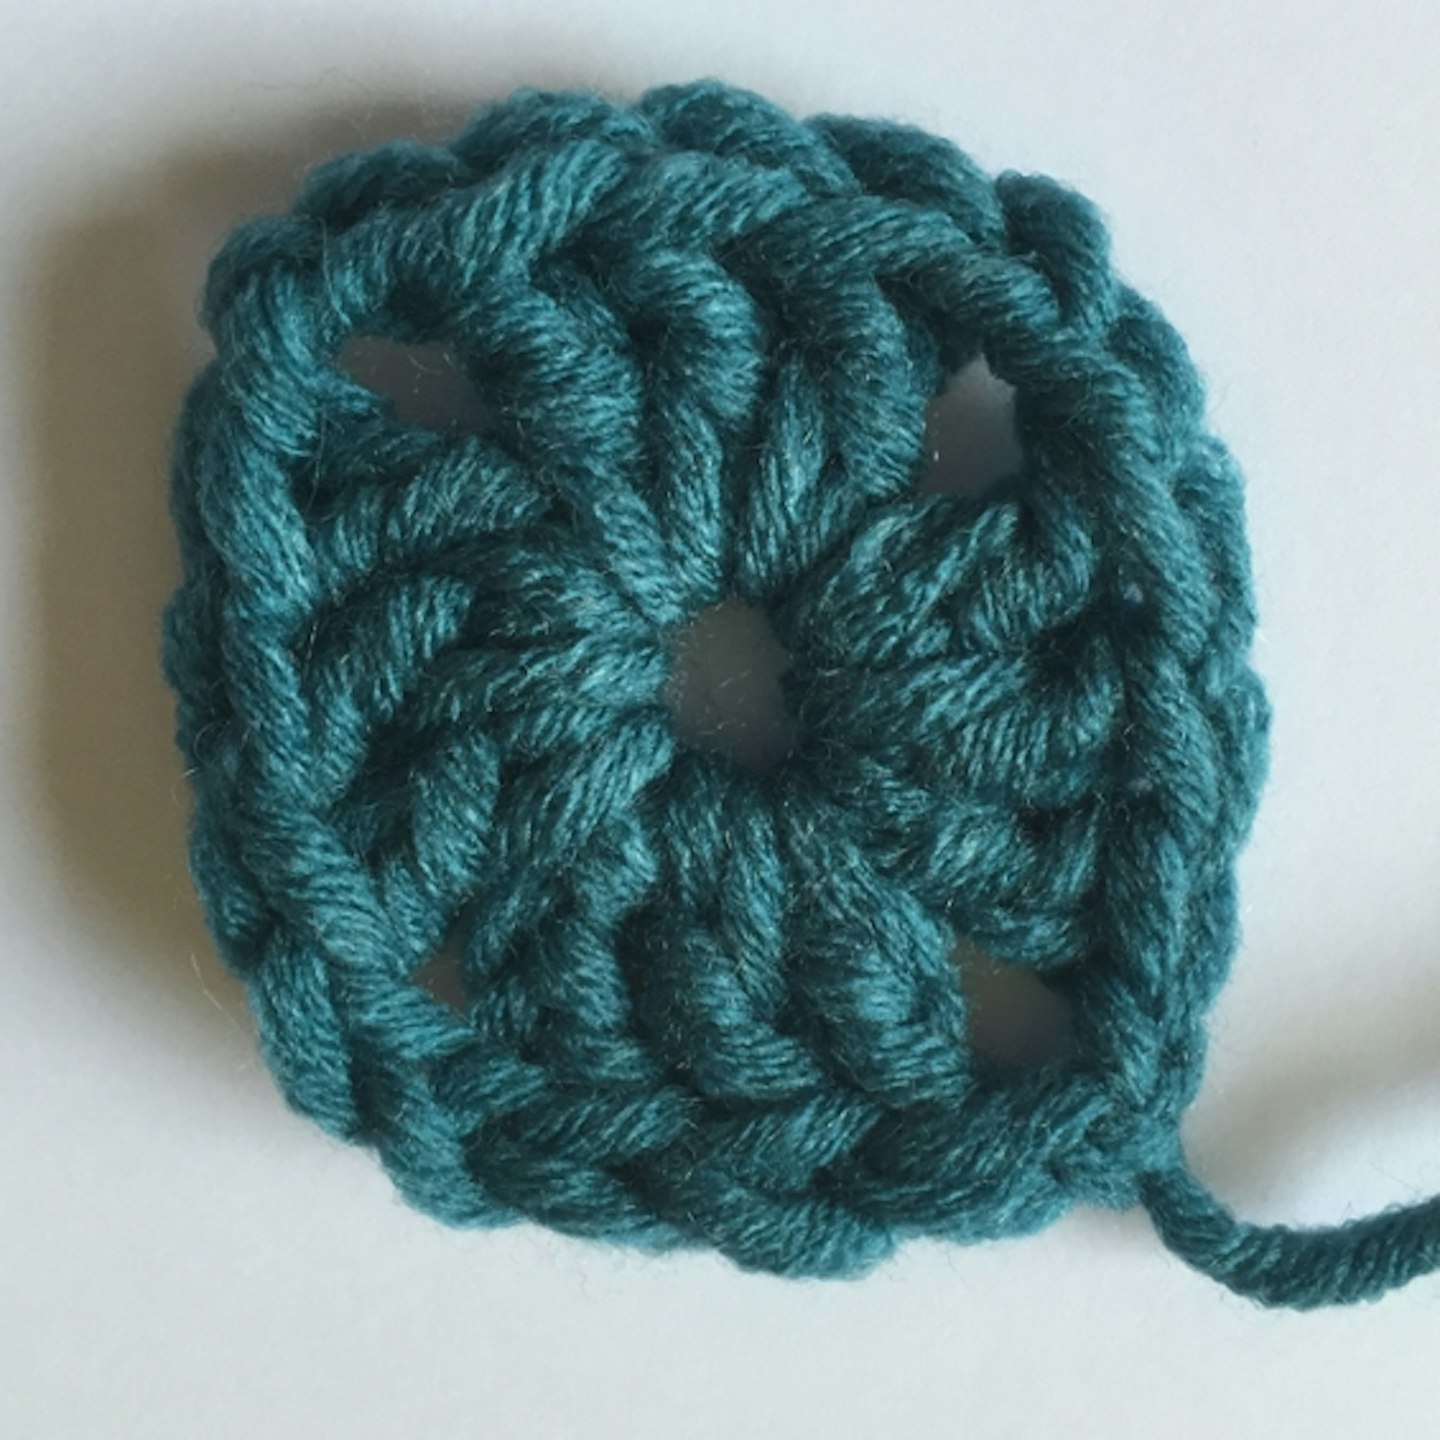
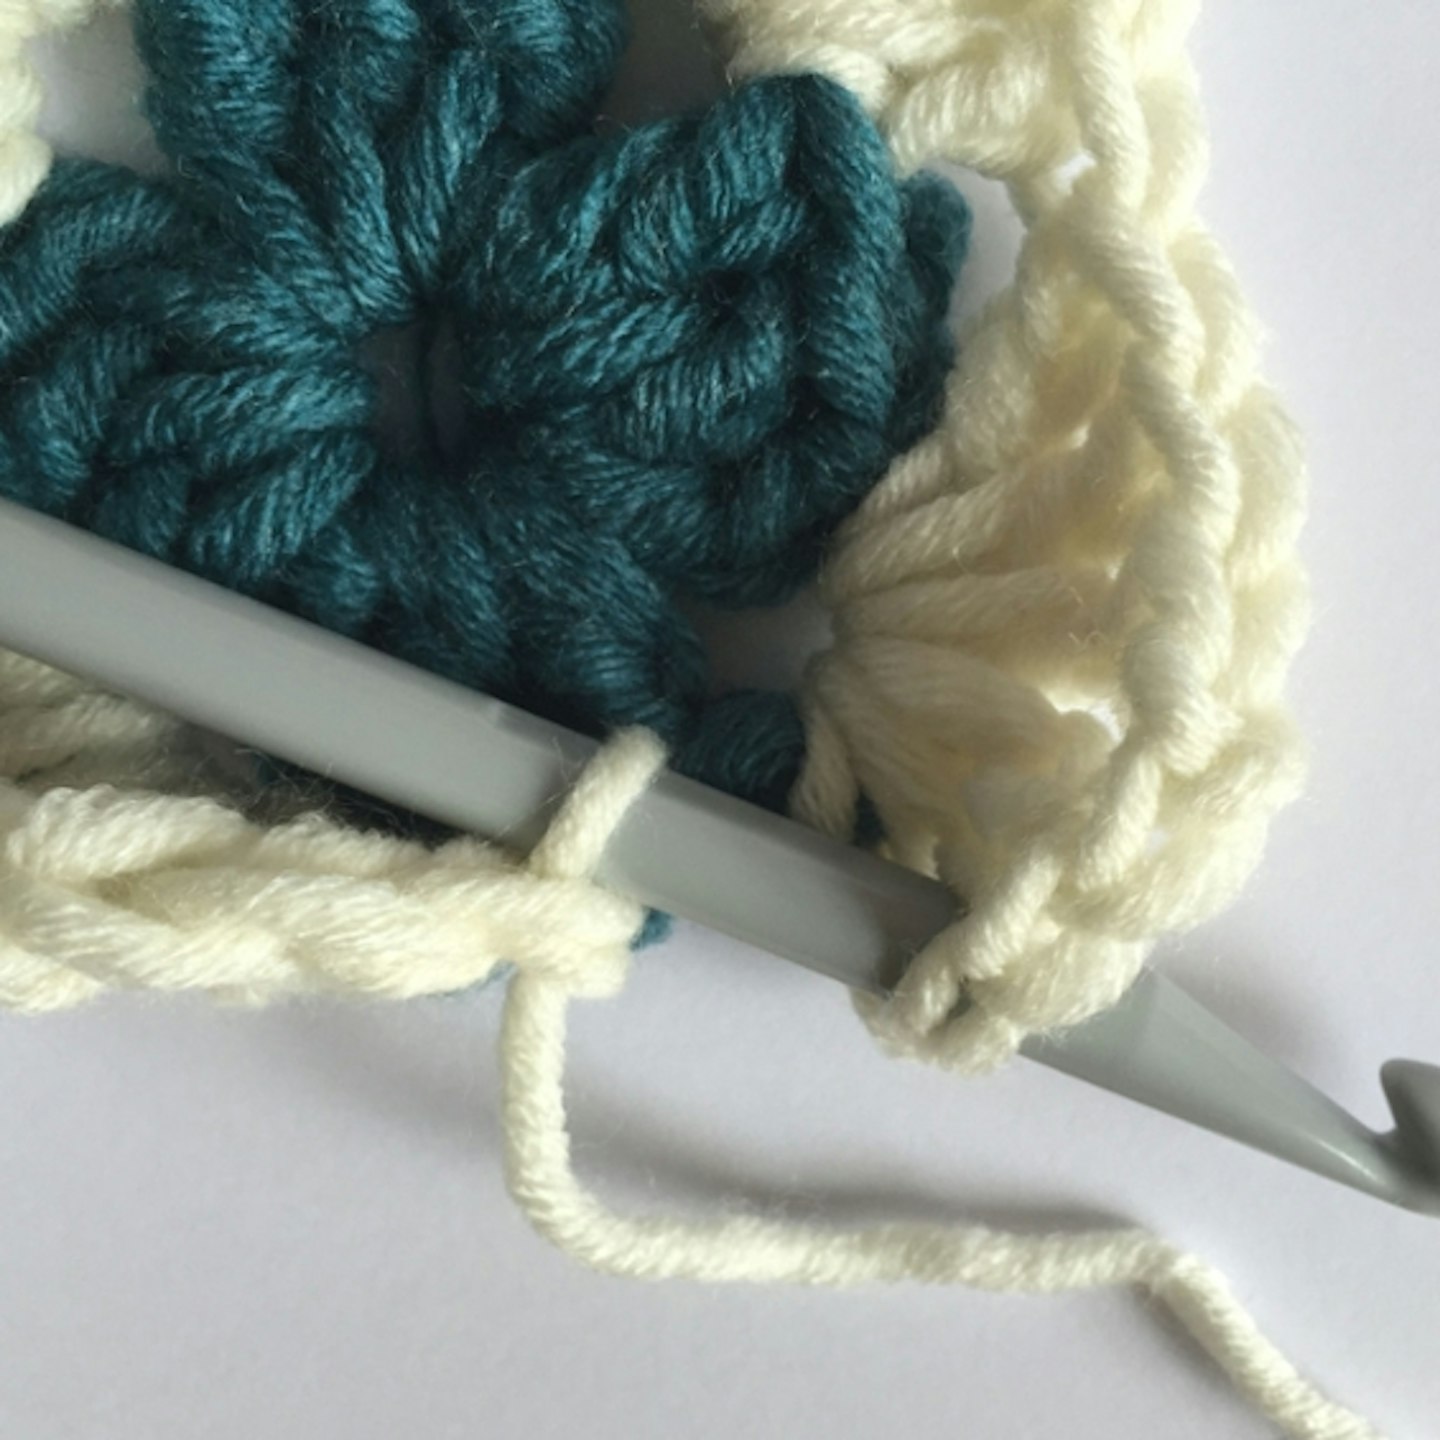
- Using your yarn and a 9mm hook, make an adjustable loop or a foundation ring by working four chain stitches (ch), then slip stitch (sl st) to the first chain stitch to join to form the ring.
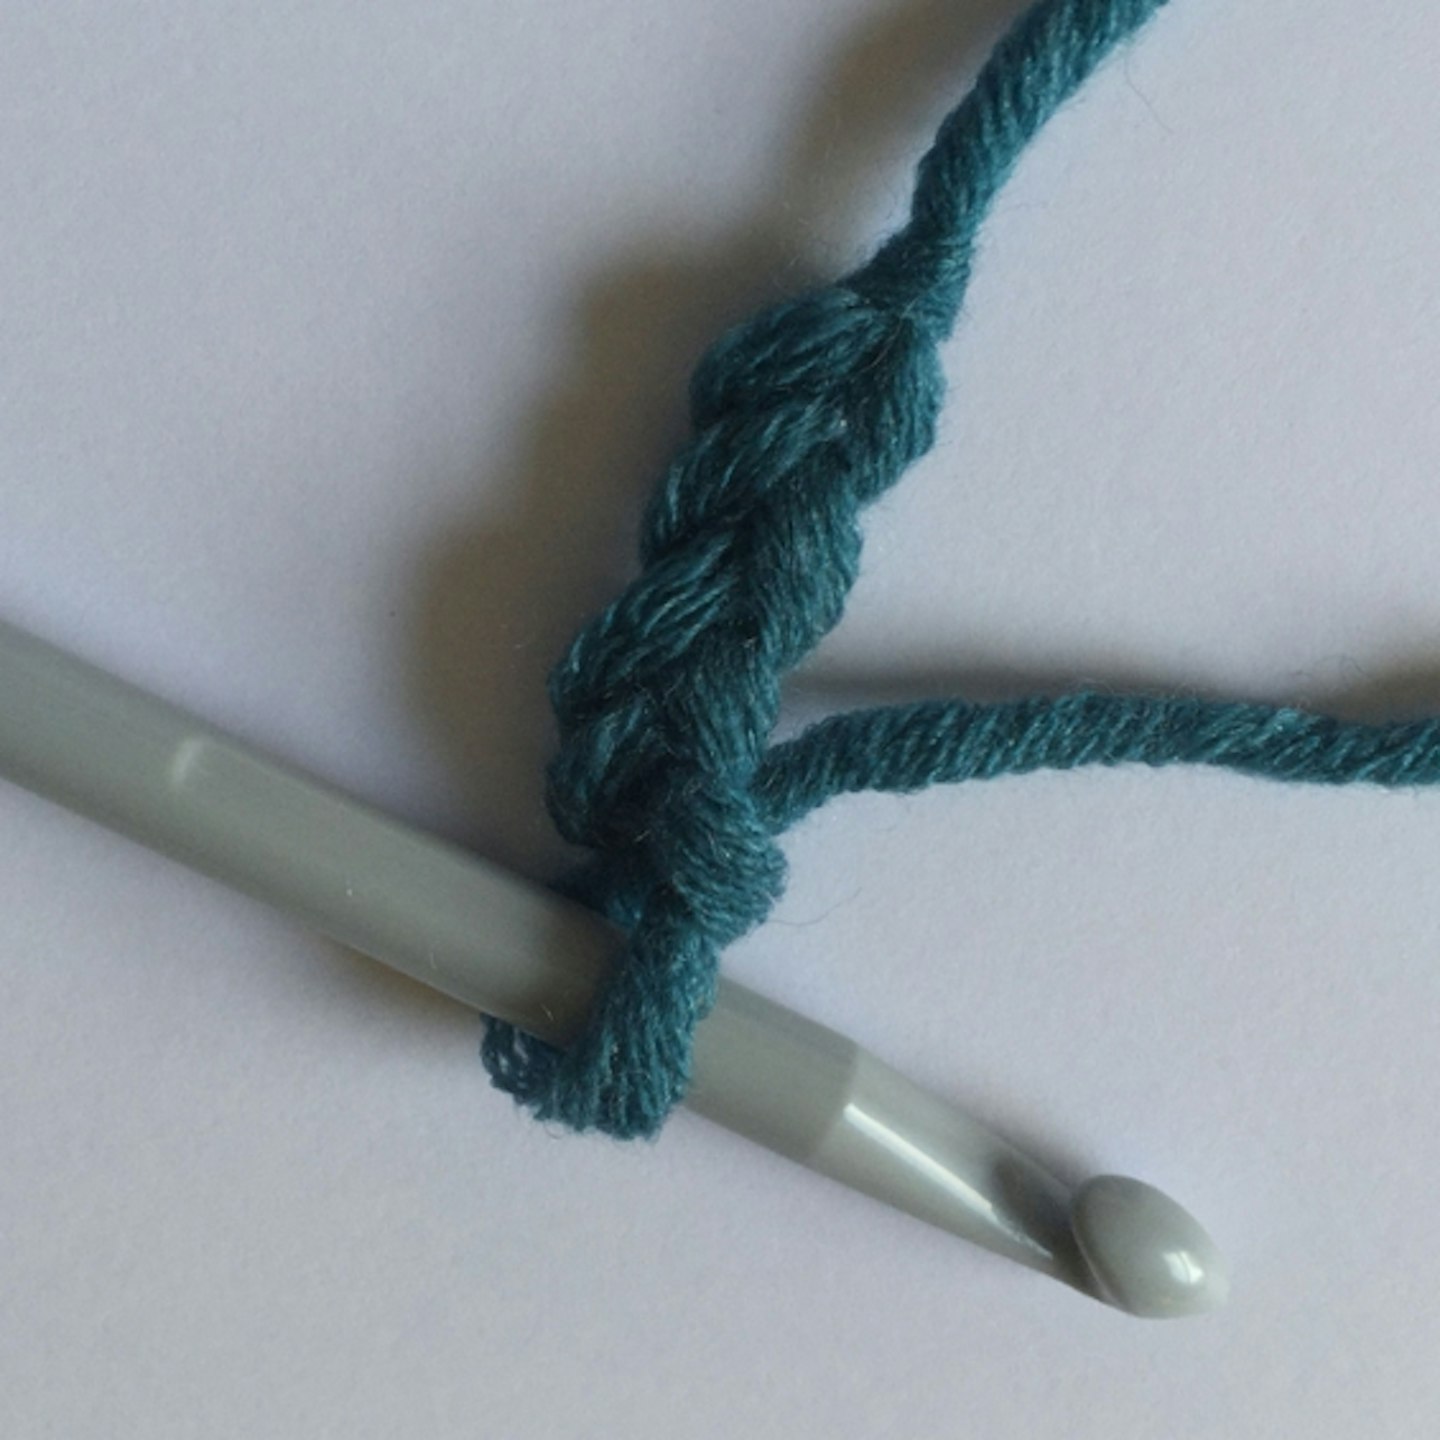
- Chain stitch three (this counts as your first treble crochet – hereafter known as tr) Take note of the space in the middle of the circle, you will be working into this for the whole of the next part.
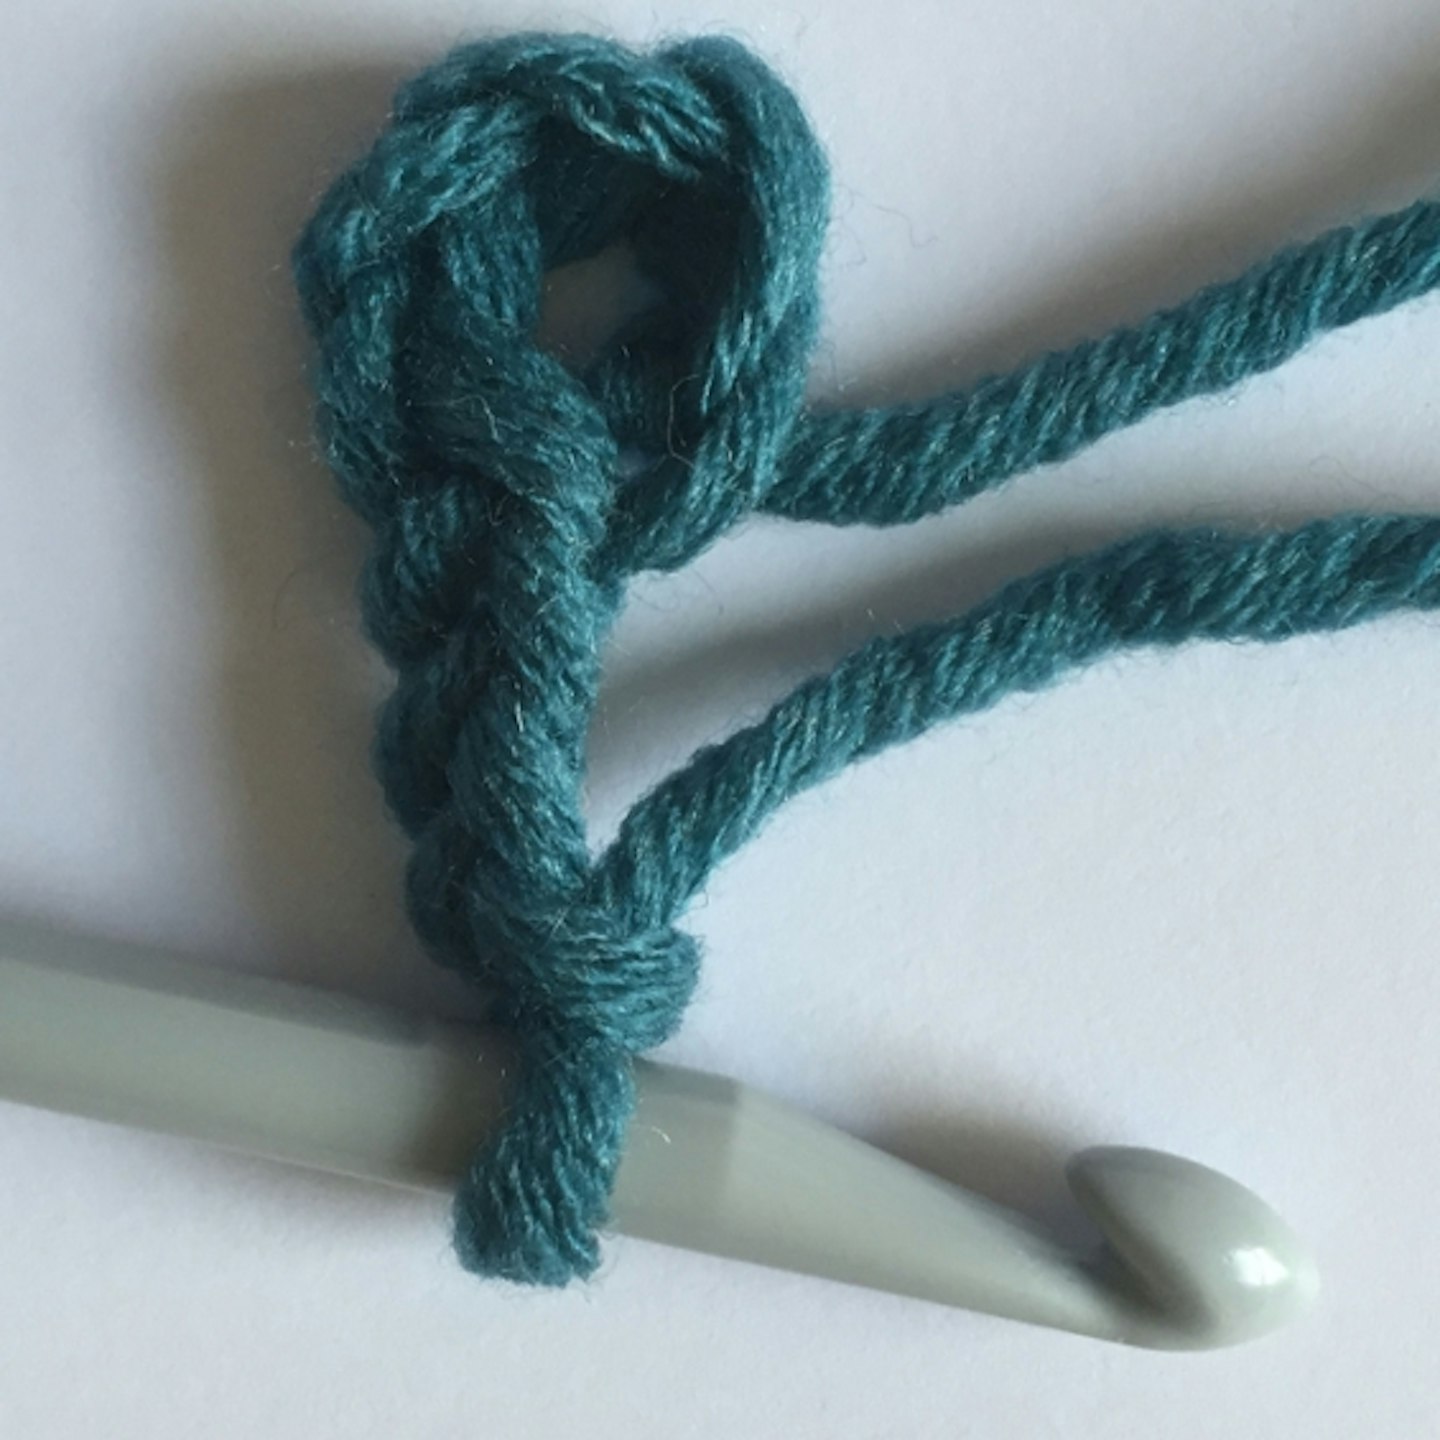
- Into the ring work a 2tr. You now have a cluster of 3tr’s.
- ch2, then work 3tr's into that same space.
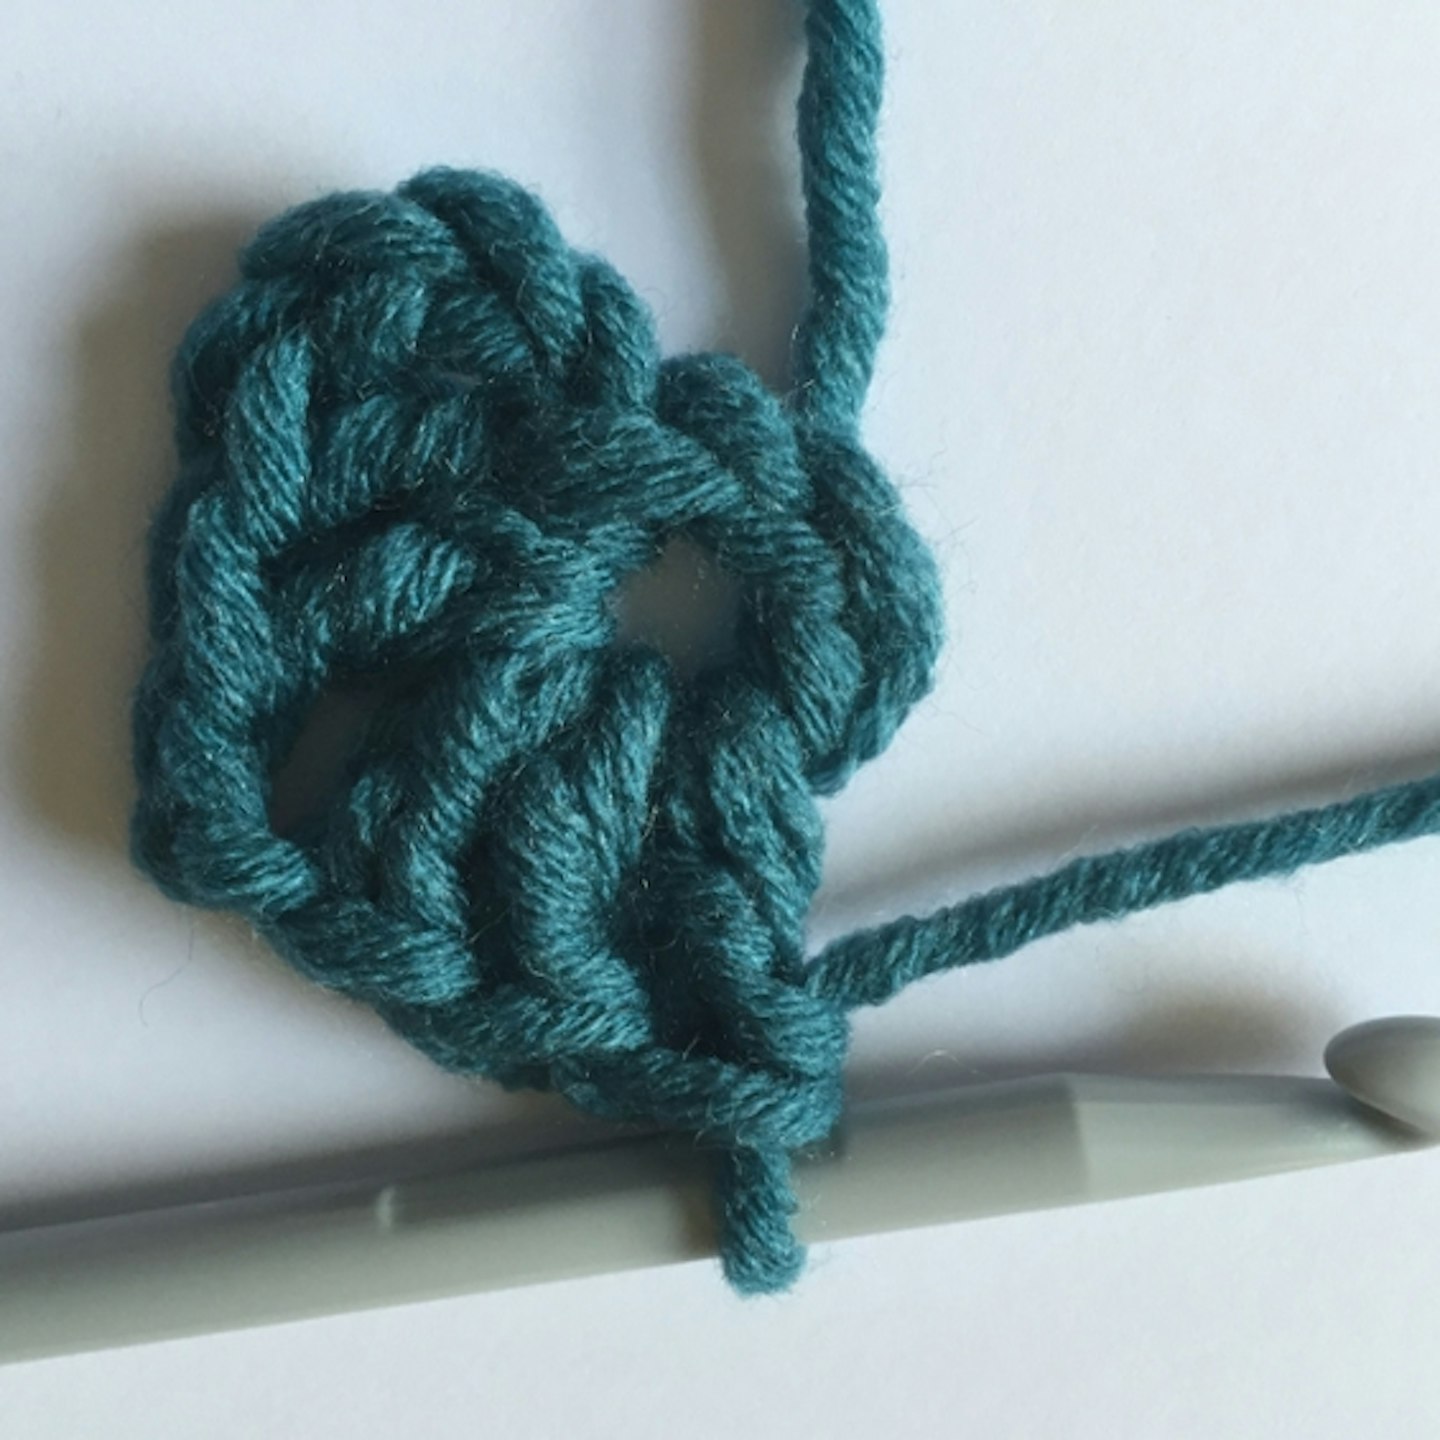
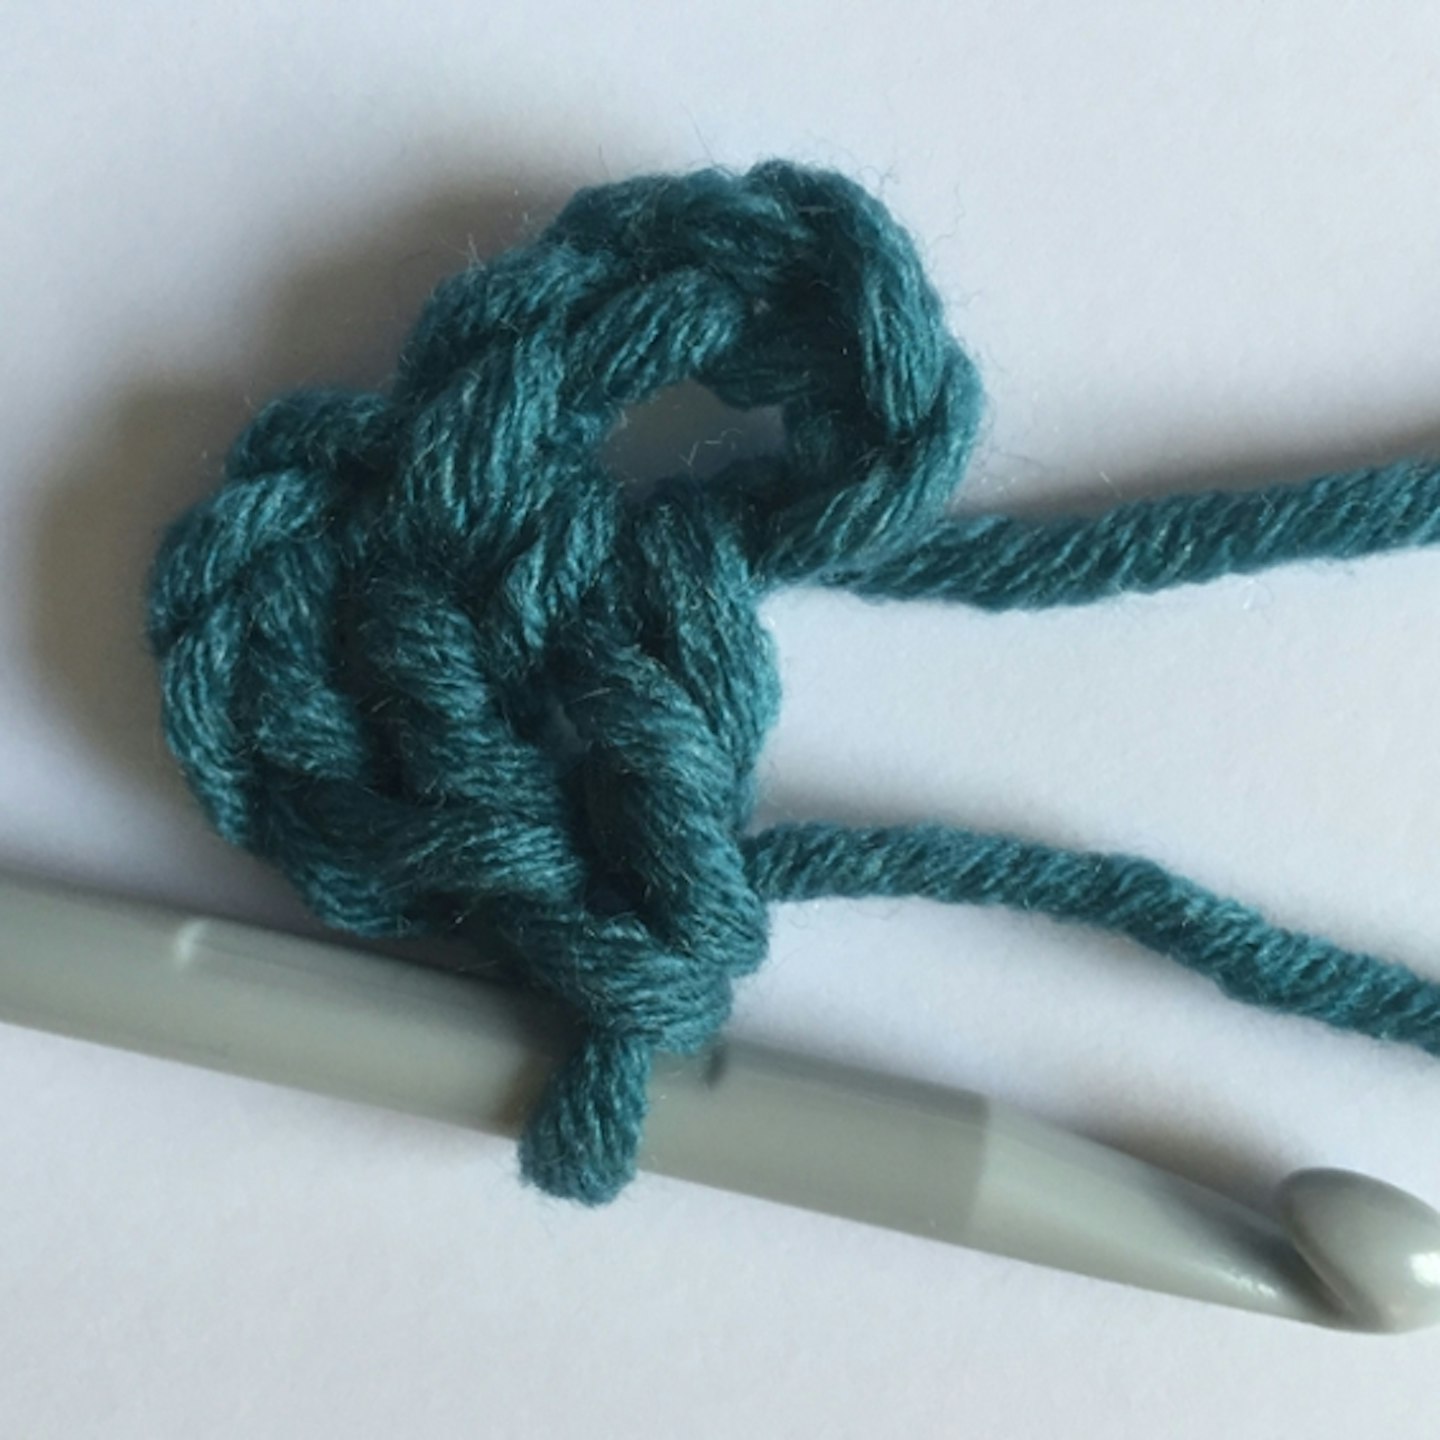
- ch2, then work 3trs into that same space.
- ch2, then work 3trs into that same space.
- ch2, then sl st into the top of the 3ch from the start of the round.
- Make a single ch, cut the yarn and pull the loop up and out to form a knot.
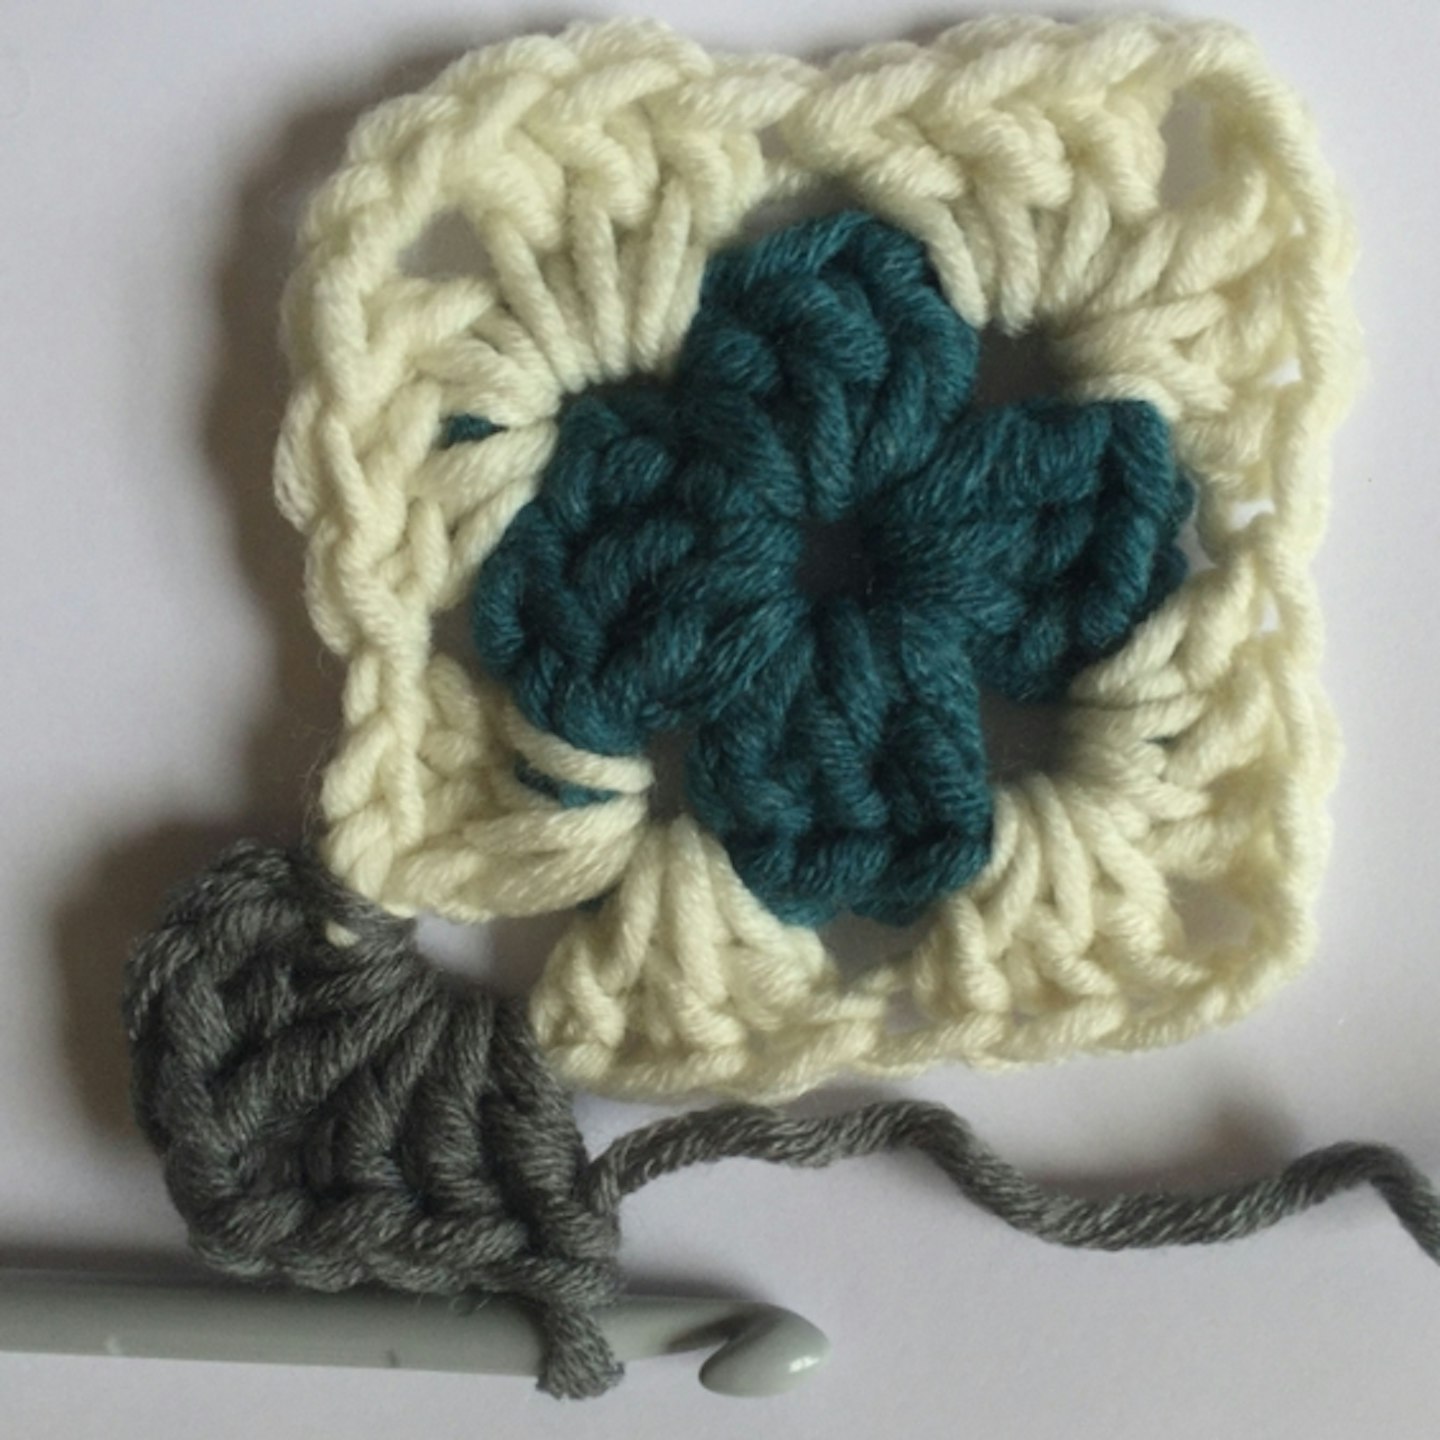
- That is the first round done, now onto the next.
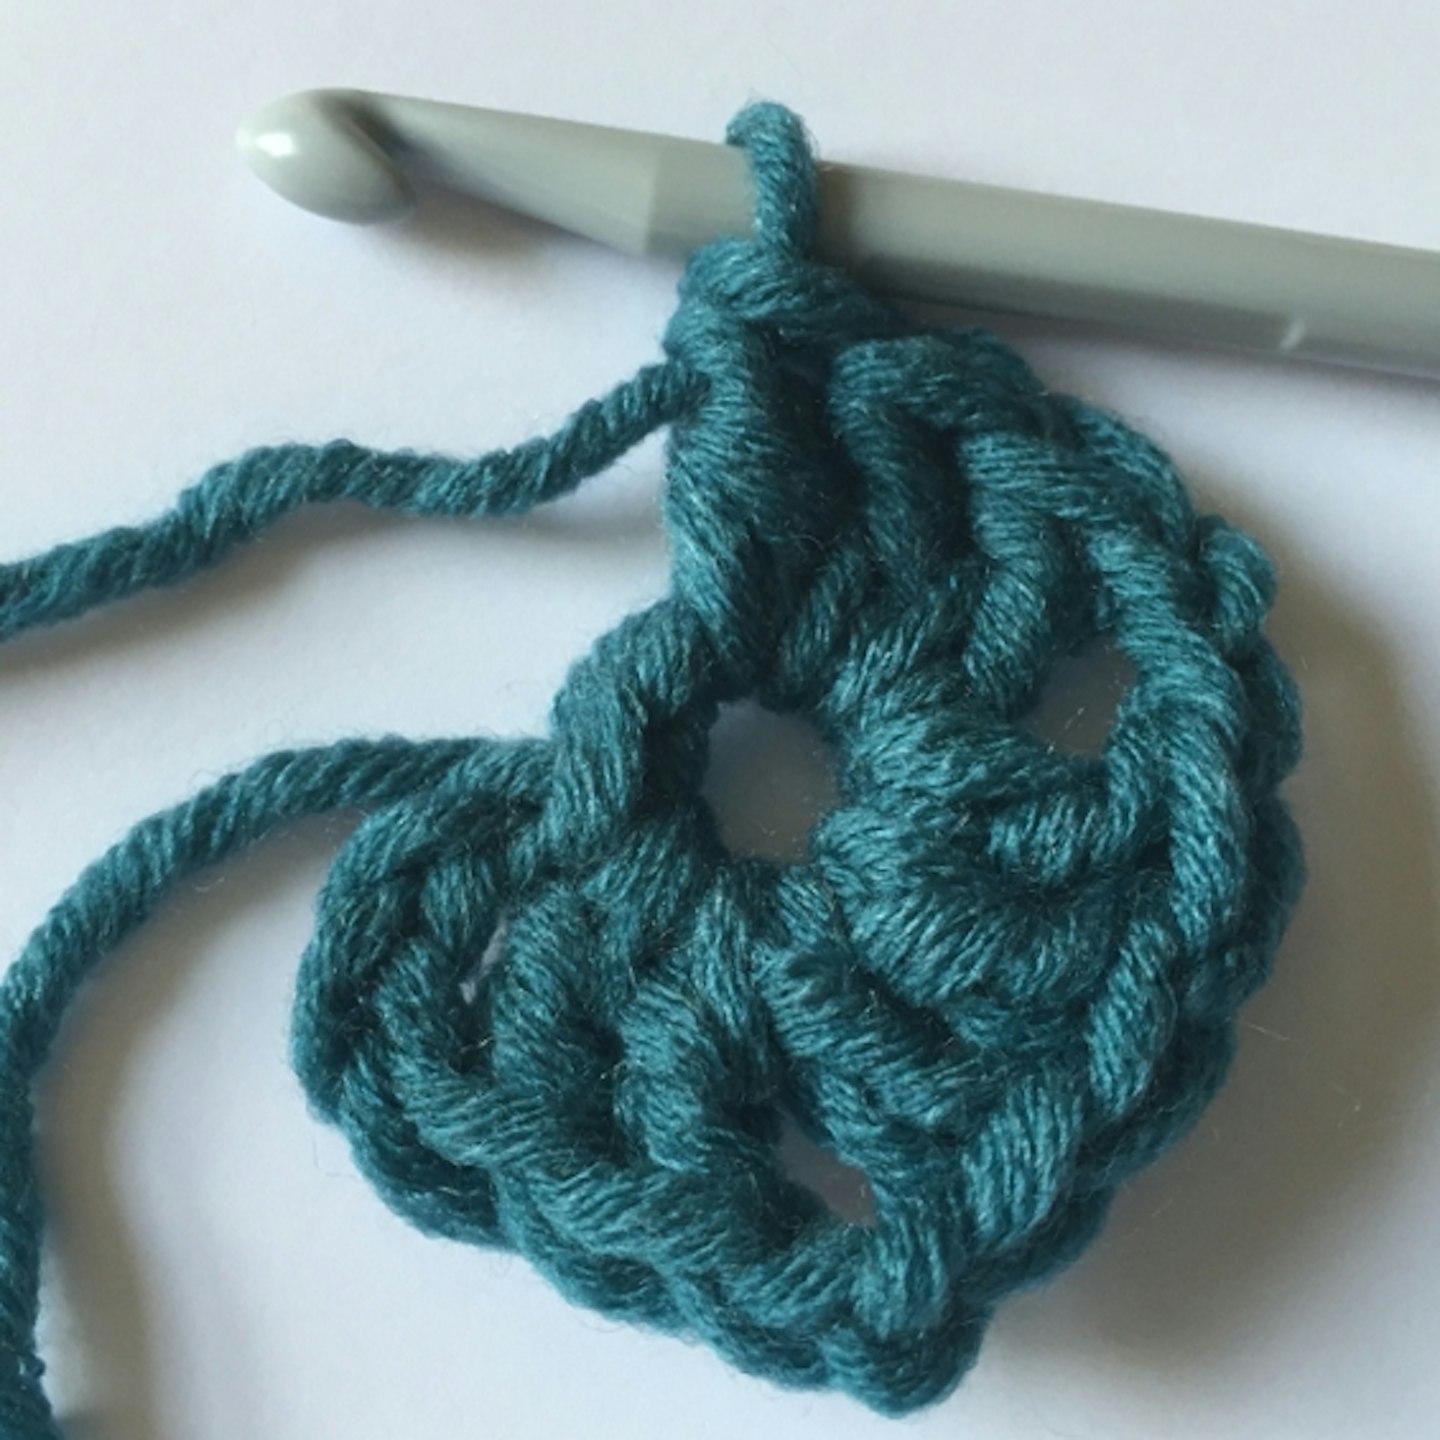
- This is the point you can use a new colour of yarn if you wish (see above for how to connect a new colour), put your hook through one of the large corner holes and draw your yarn back (no knots).
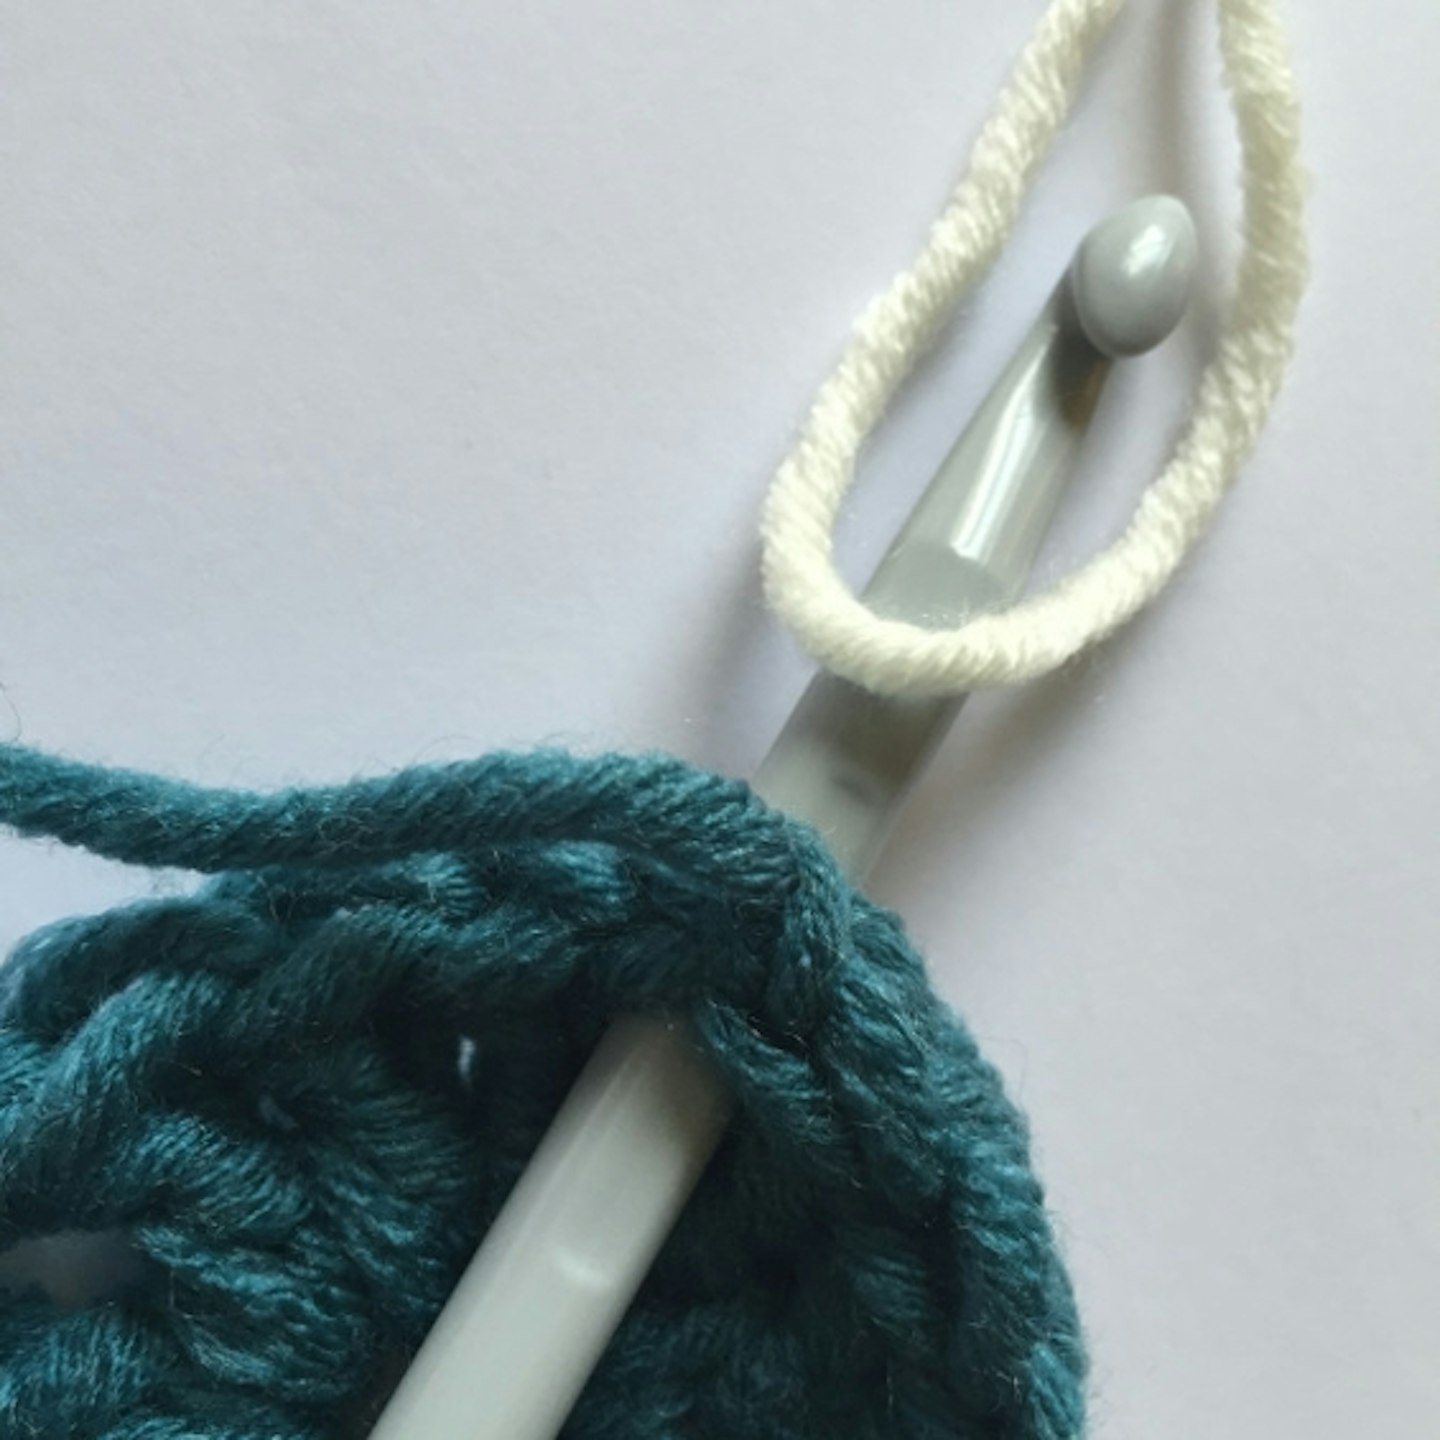
- Using both ends of the yarn, make a ch stitch (this anchors your yarn in place). Ch2.

- Into the same space work the following: 2tr, ch2, 3tr. Work into the next corner space and work: 3tr, ch2, 3tr repeated for the remaining corners.
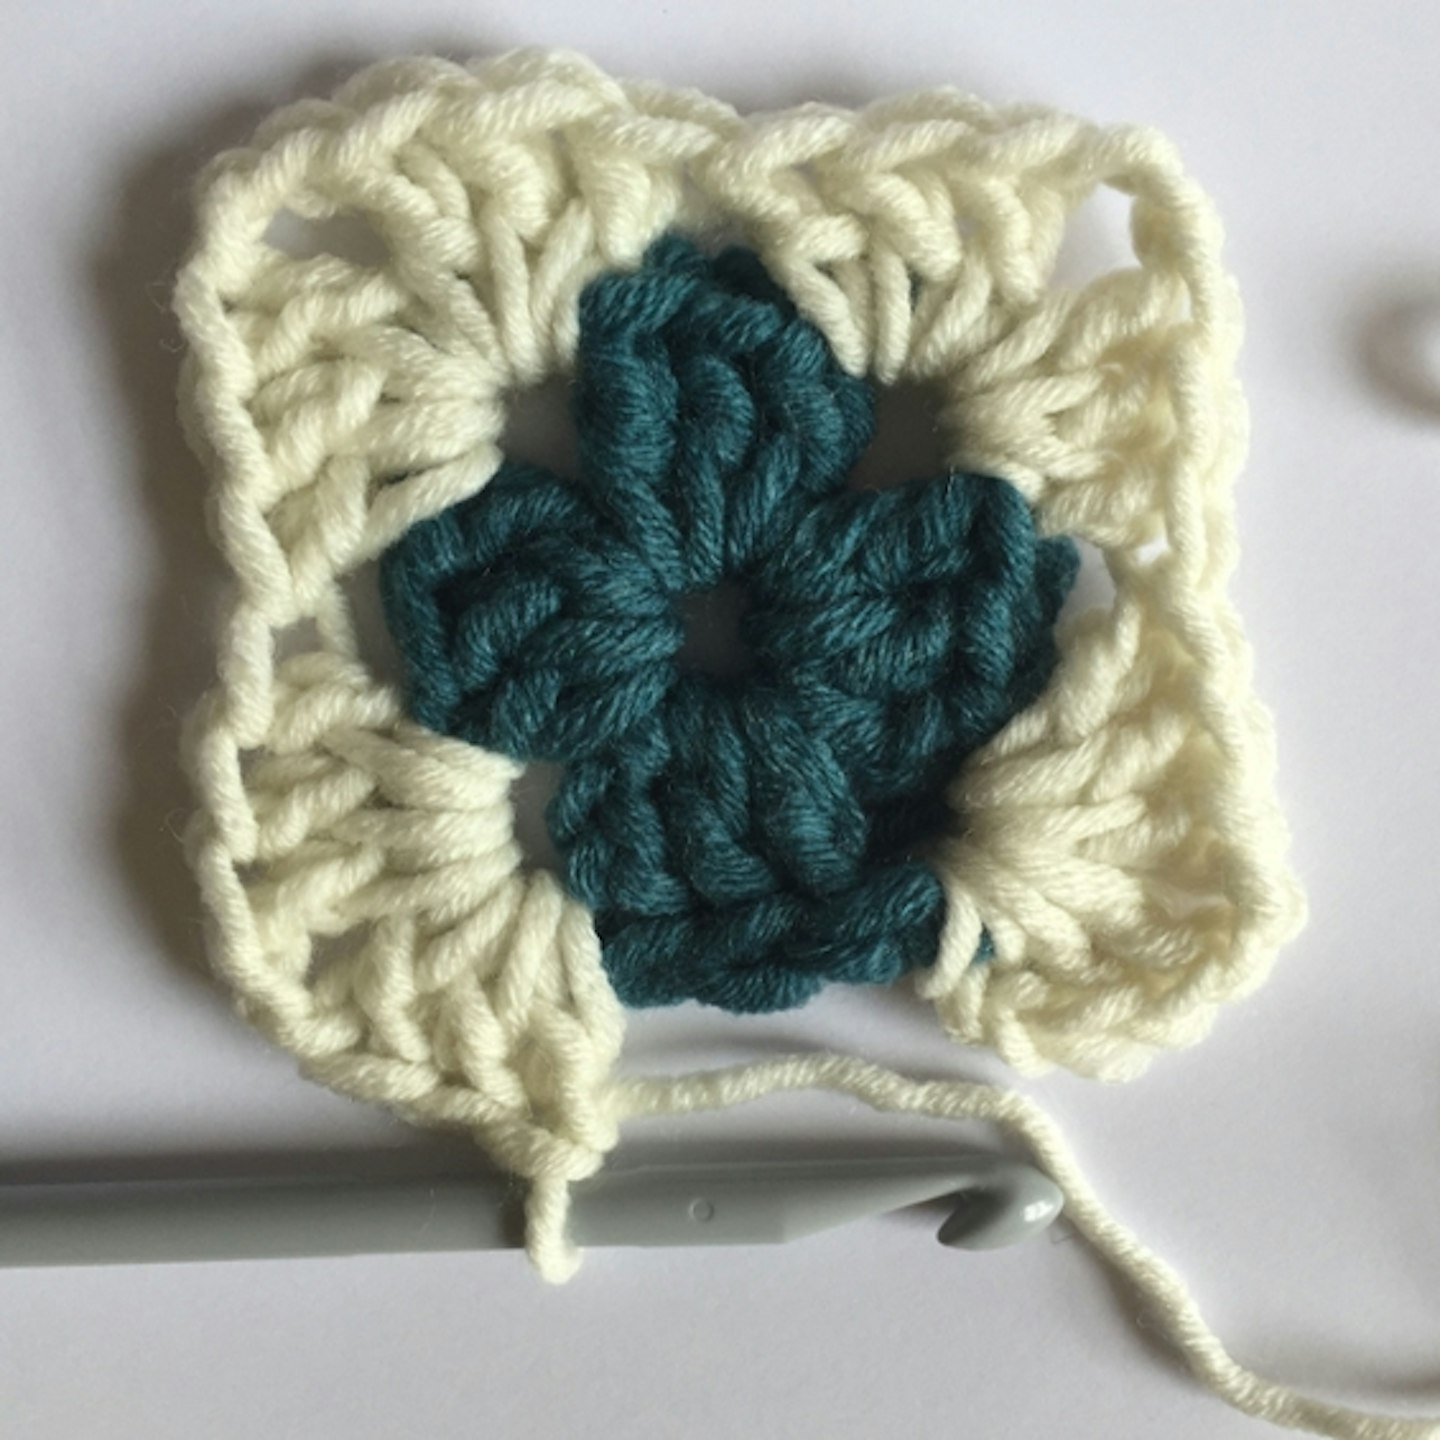
- sl st into the top of the 3ch from the start of the row
- Make a single ch stitch, cut the yarn and pull the loop up and out to form a knot.
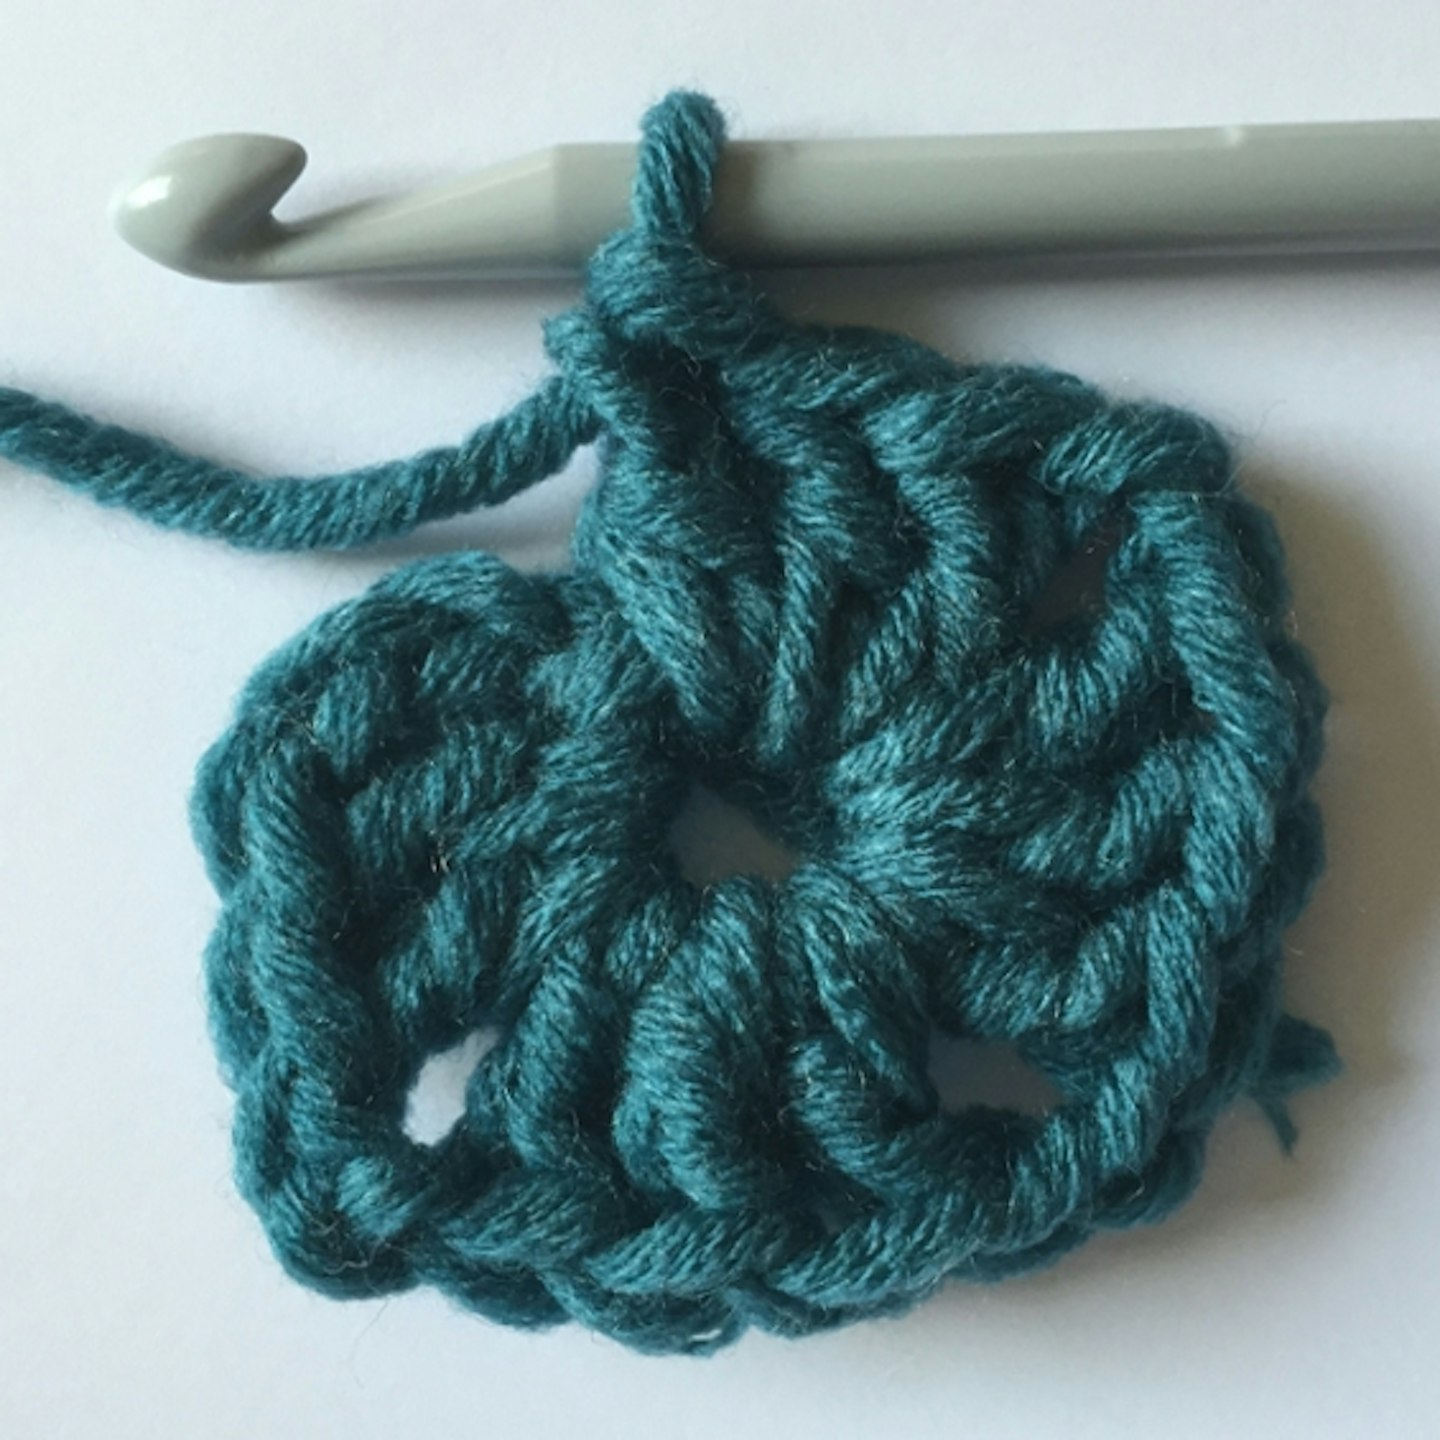
- (Again here, you can add a new colour of yarn). Using the same joining method as in Round 2, join your yarn into any corner space and ch3 work 2tr, ch2, 3tr.into the same space
- Work into the next space in-between the tr’s of the previous row and work 3tr into it.
Now work into the next corner space and work 3tr, ch2, 3tr into that space.
Continue around working 3tr into the straight bits and 3tr, ch2, 3tr into each corner. sl st to join as before.

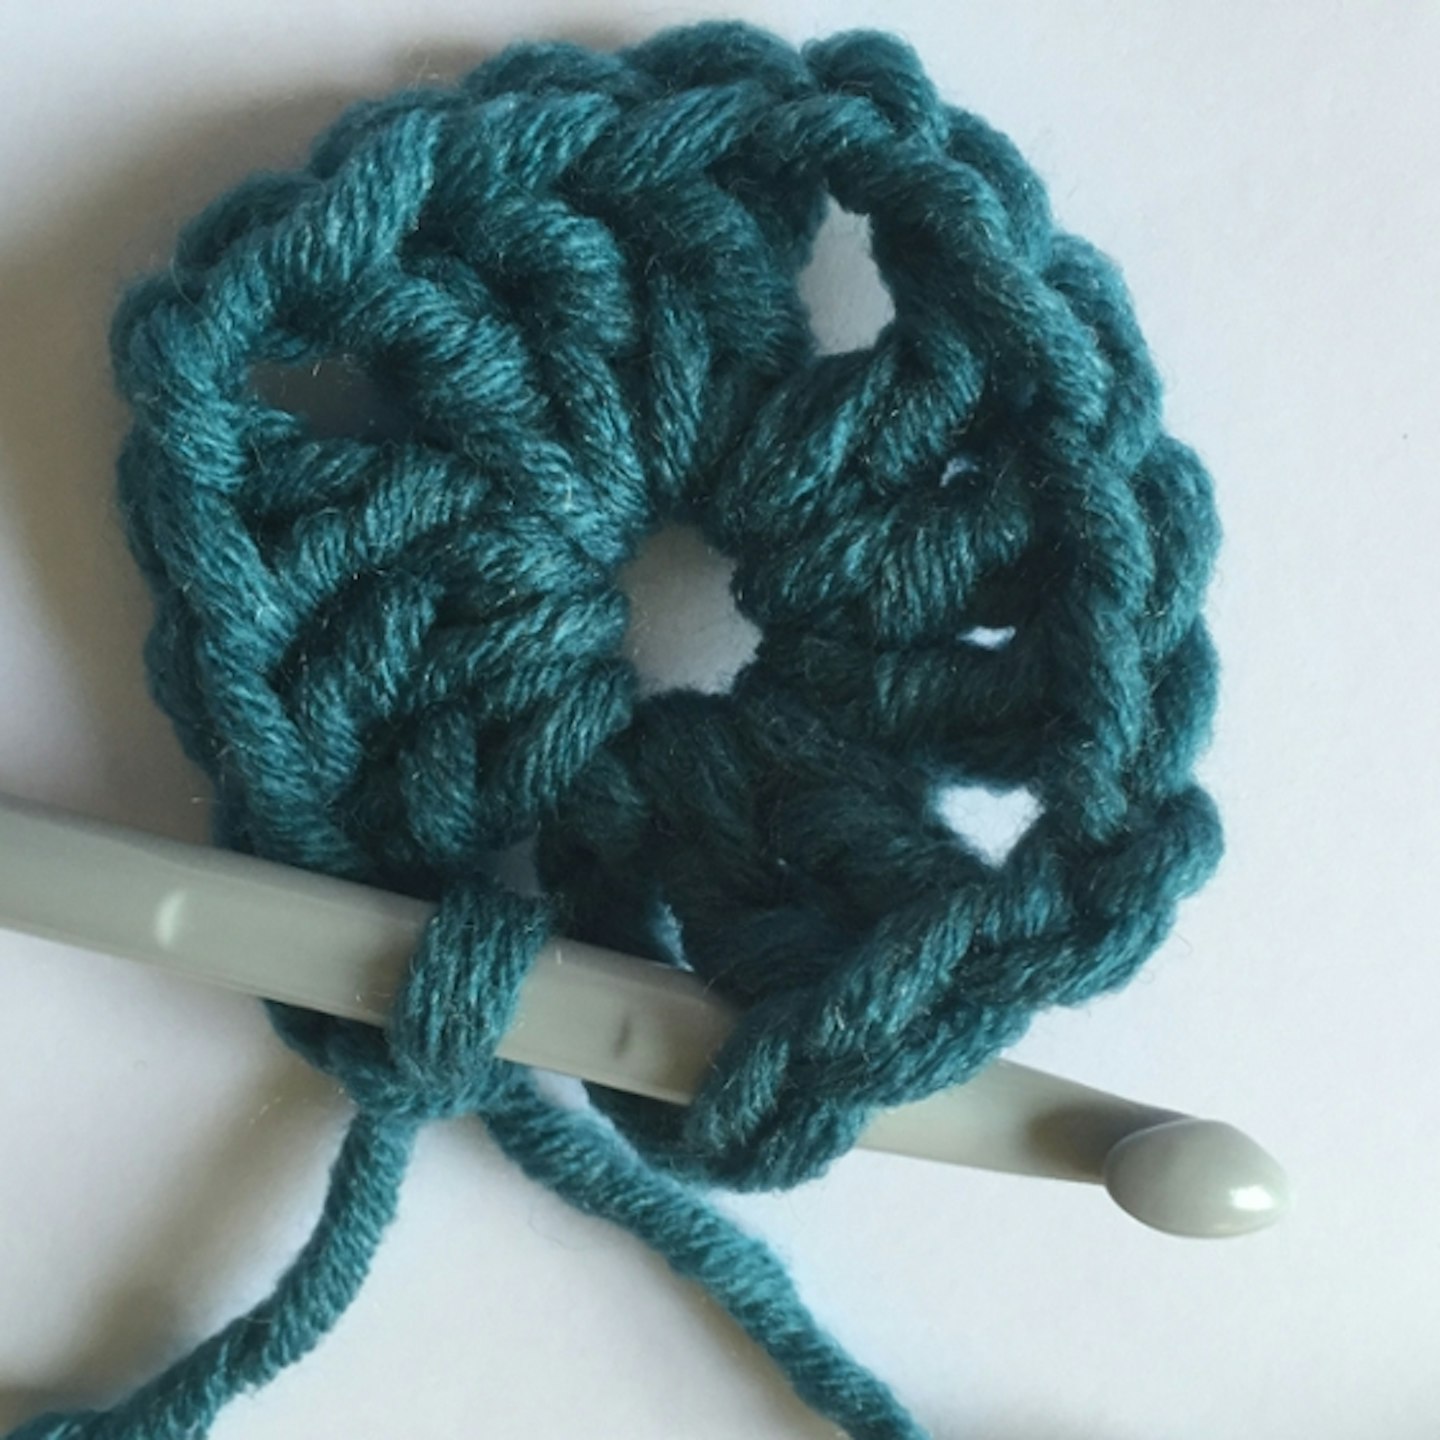
- Work another round as you have just done, this time there will be two clusters of 3trs in-between each corner.
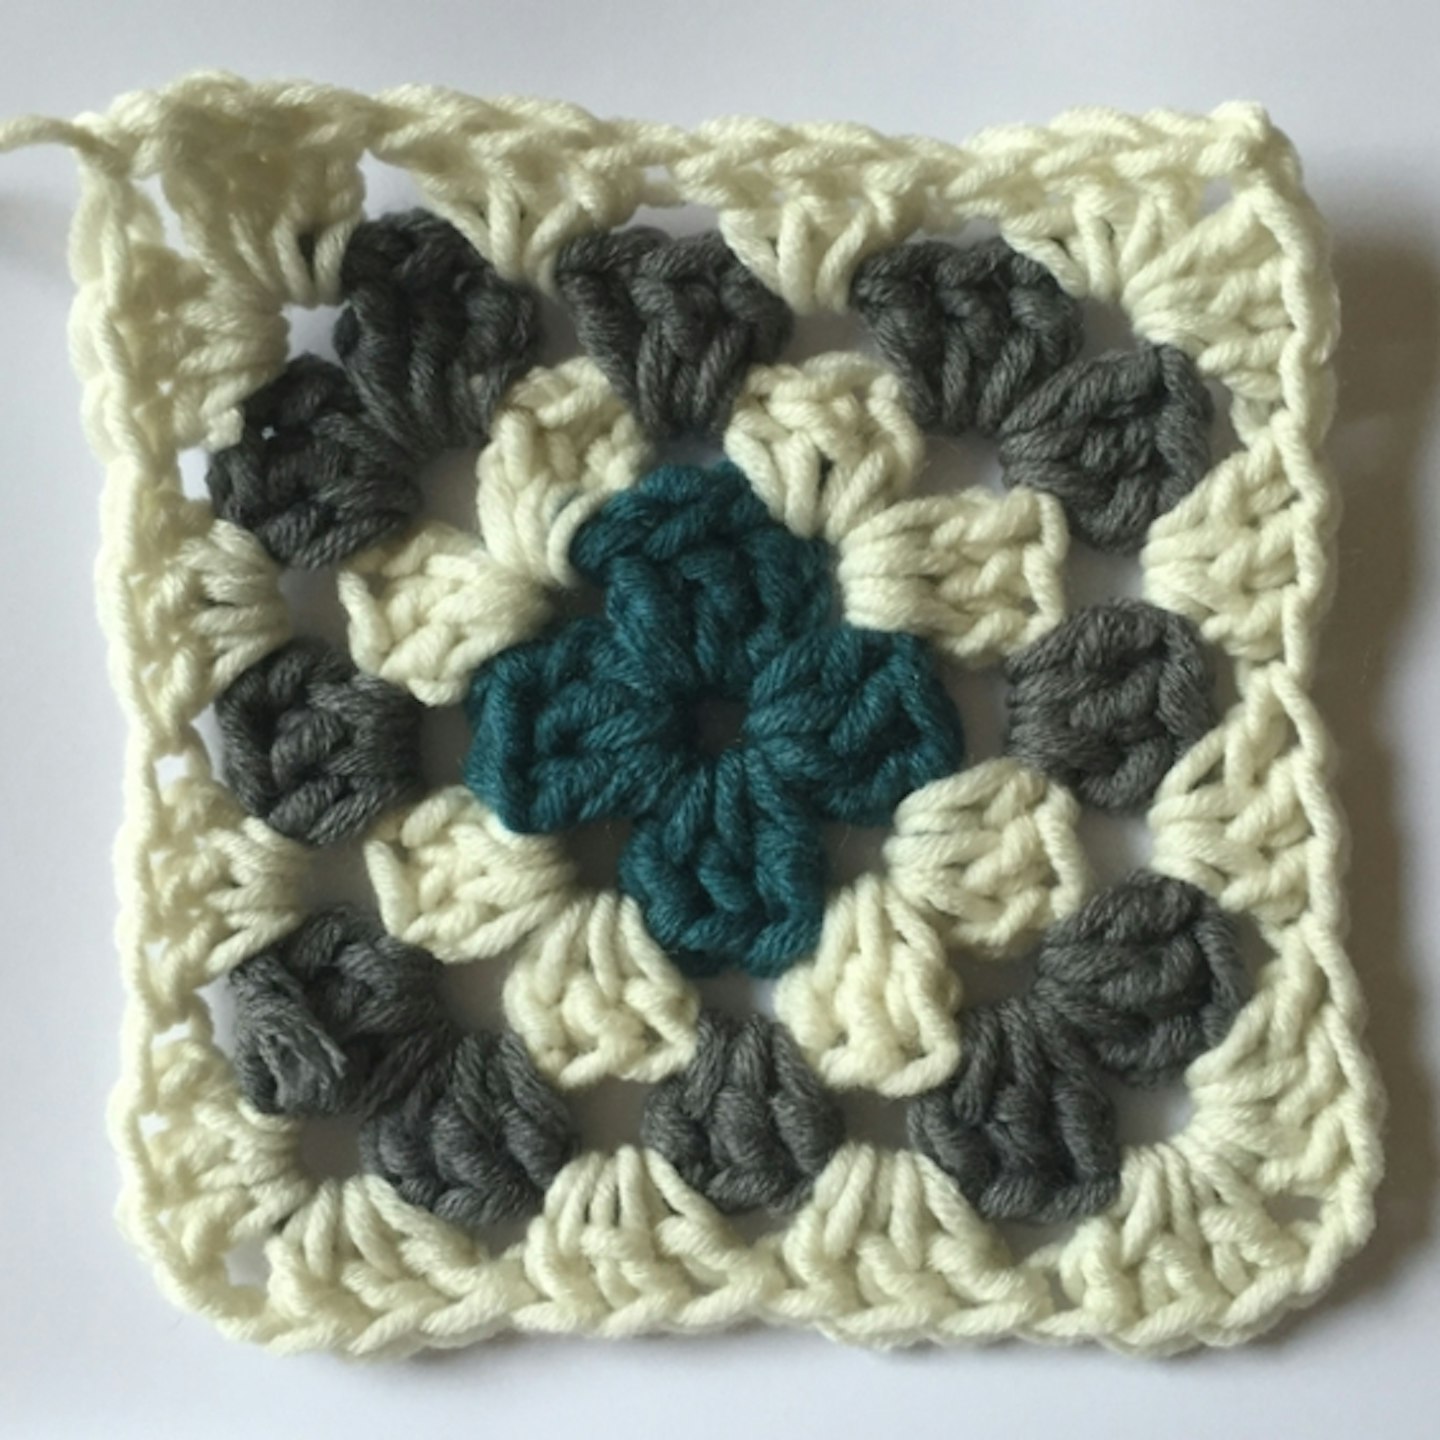
- Work another round as you have just done, this time there will be three clusters of 3trs in-between each corner.
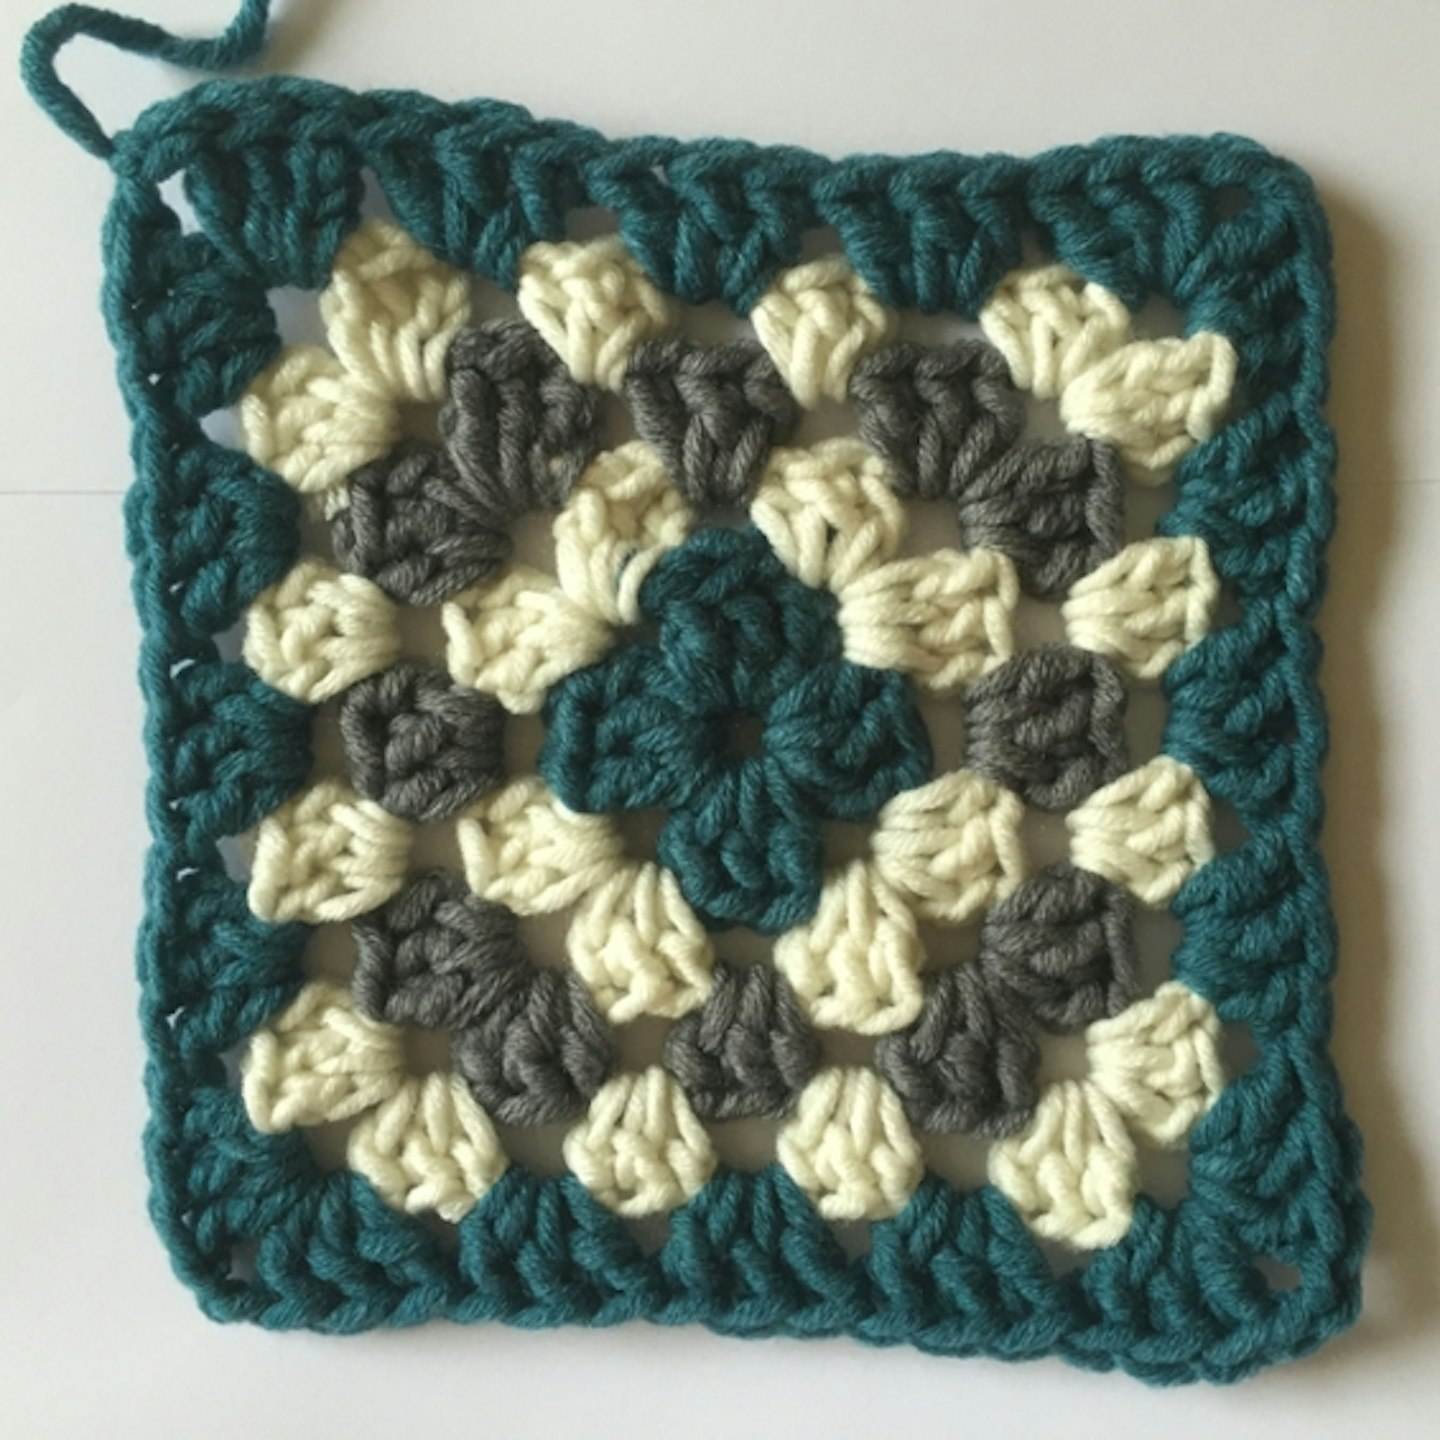
- Using yarn C, work another round as you have just done, this time there will be four clusters of 3trs in-between each corner. This is your completed granny square!
Once you've created your granny squares, you can use them to make loads of different craft projects such as crochet blankets, scarves, bags, tops, cardigans and a variety of other easy crochet patterns.
Have a play with the colours and designs and get creative!
Watch the video below for an alternative Hobbycraft pattern:
How to join granny squares
- Place two squares back to back.
- Put your hook through the back loop of each stitch and sl st your yarn through, don’t pull it too tight.
- Move to the next set of stitches and do the same. Work all the way across.
Using this method you should have a nice neat finish when you turn your work over.
Read more popular articles
How to cast-on in knitting: a simple technique for beginners