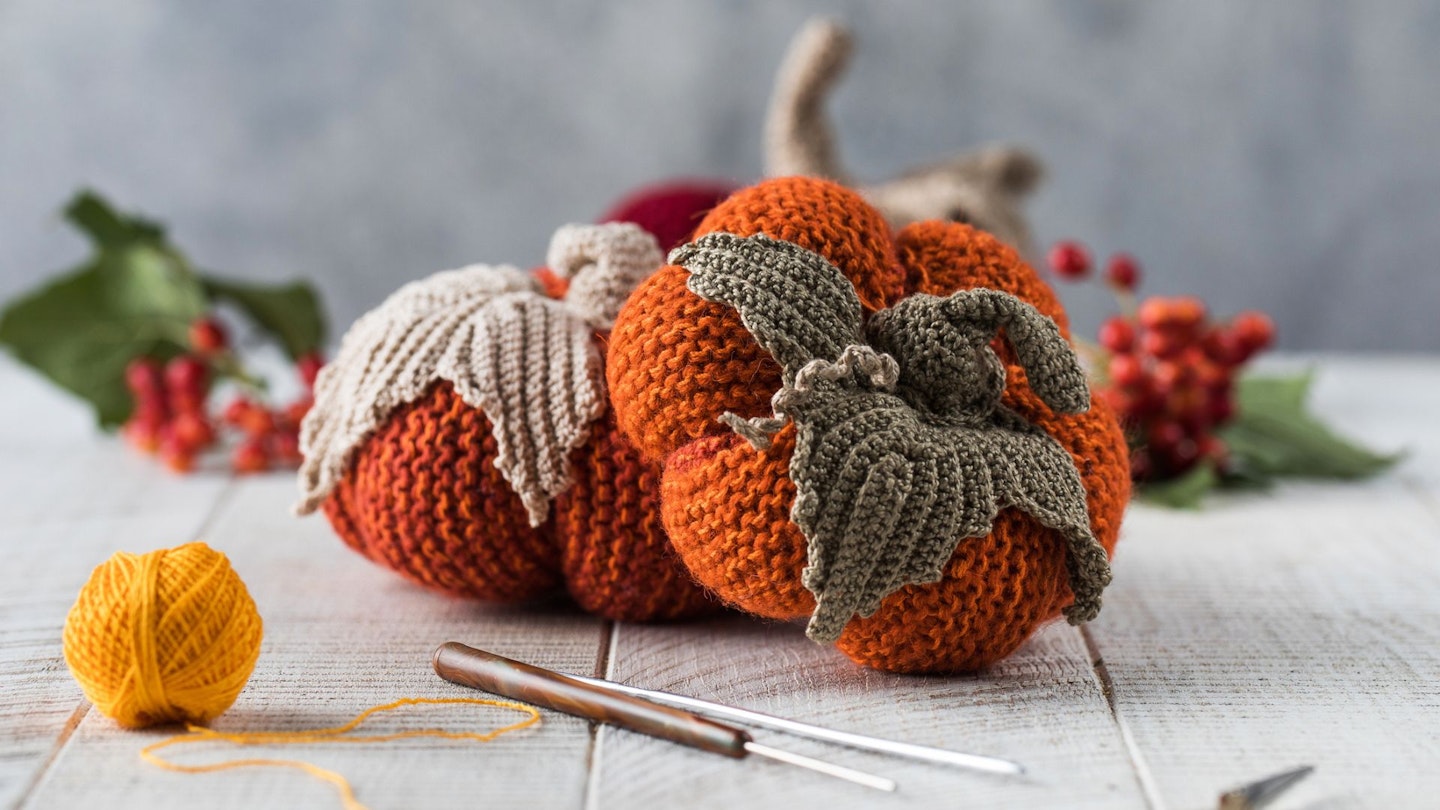
Whether you're looking to create some autumnal decorations that can be brought out every year or you want to try a new craft, making crochet pumpkins is a lot of fun and very rewarding. Once you have the granny square mastered, you'll be able to crochet any shape if you put your mind to it.
There are plenty of designs to have a go at, including plain, bobble and crochet pumpkins. It's all down to your skill level, design preferences and how much time you're able to spend to make them. Before you whip out your craft box, here's everything you need to know.
How to make a crochet pumpkin
Abbreviations
Before you begin, it's important to note that many words have been abbreviated to make the instructions more concise. Here are the key abbreviations for you to refer back to:
Ch- chain
Dc- double crochet
Htr- half treble crochet
St(s)- stitch(es)
Tr- treble crochet
MB- make bobble by working tr4tog in same stitch
Sl st- slip stitch
Rs- right side
Ws- wrong side
Note: Tension not critical for this project but may effect yarn quantities needed.
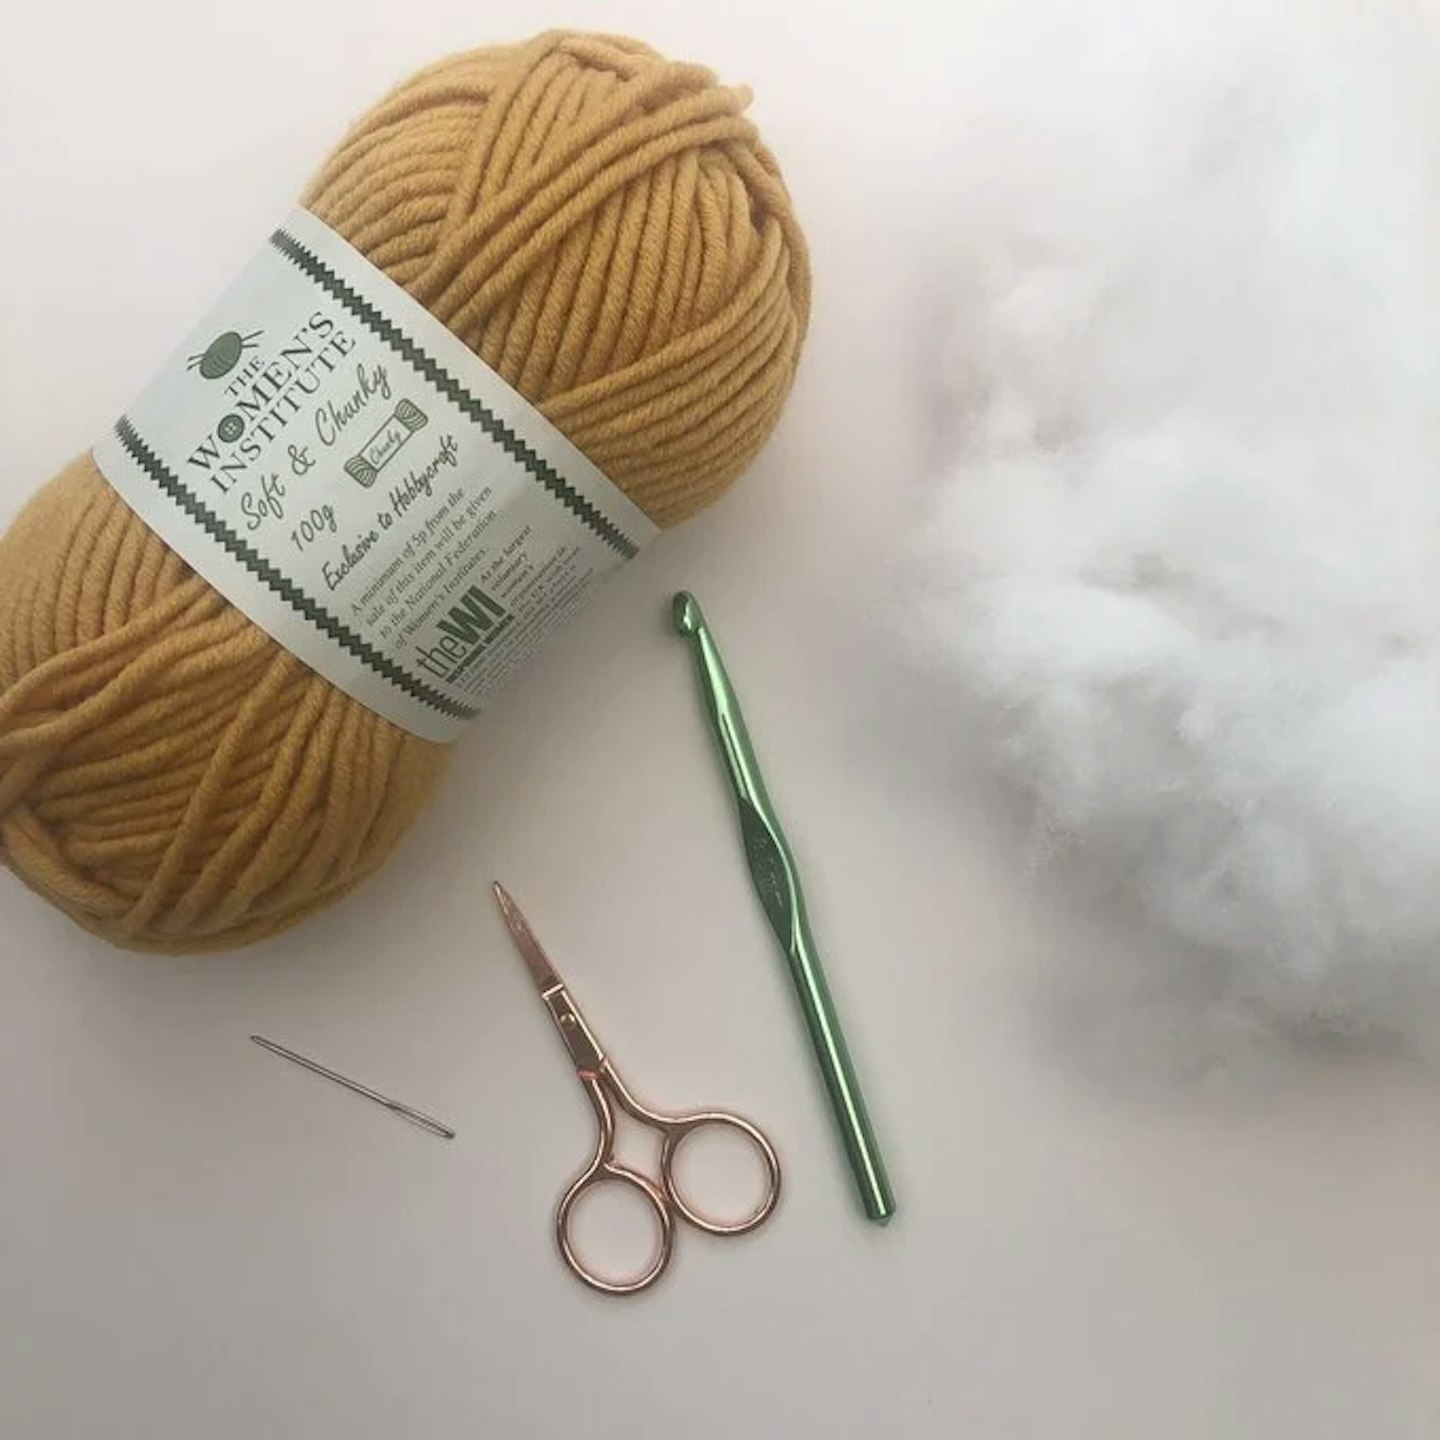
Equipment:
Crochet hook
Tapestry needles
Yarn (in different colours)
Polyester toy filling (can be recycled)
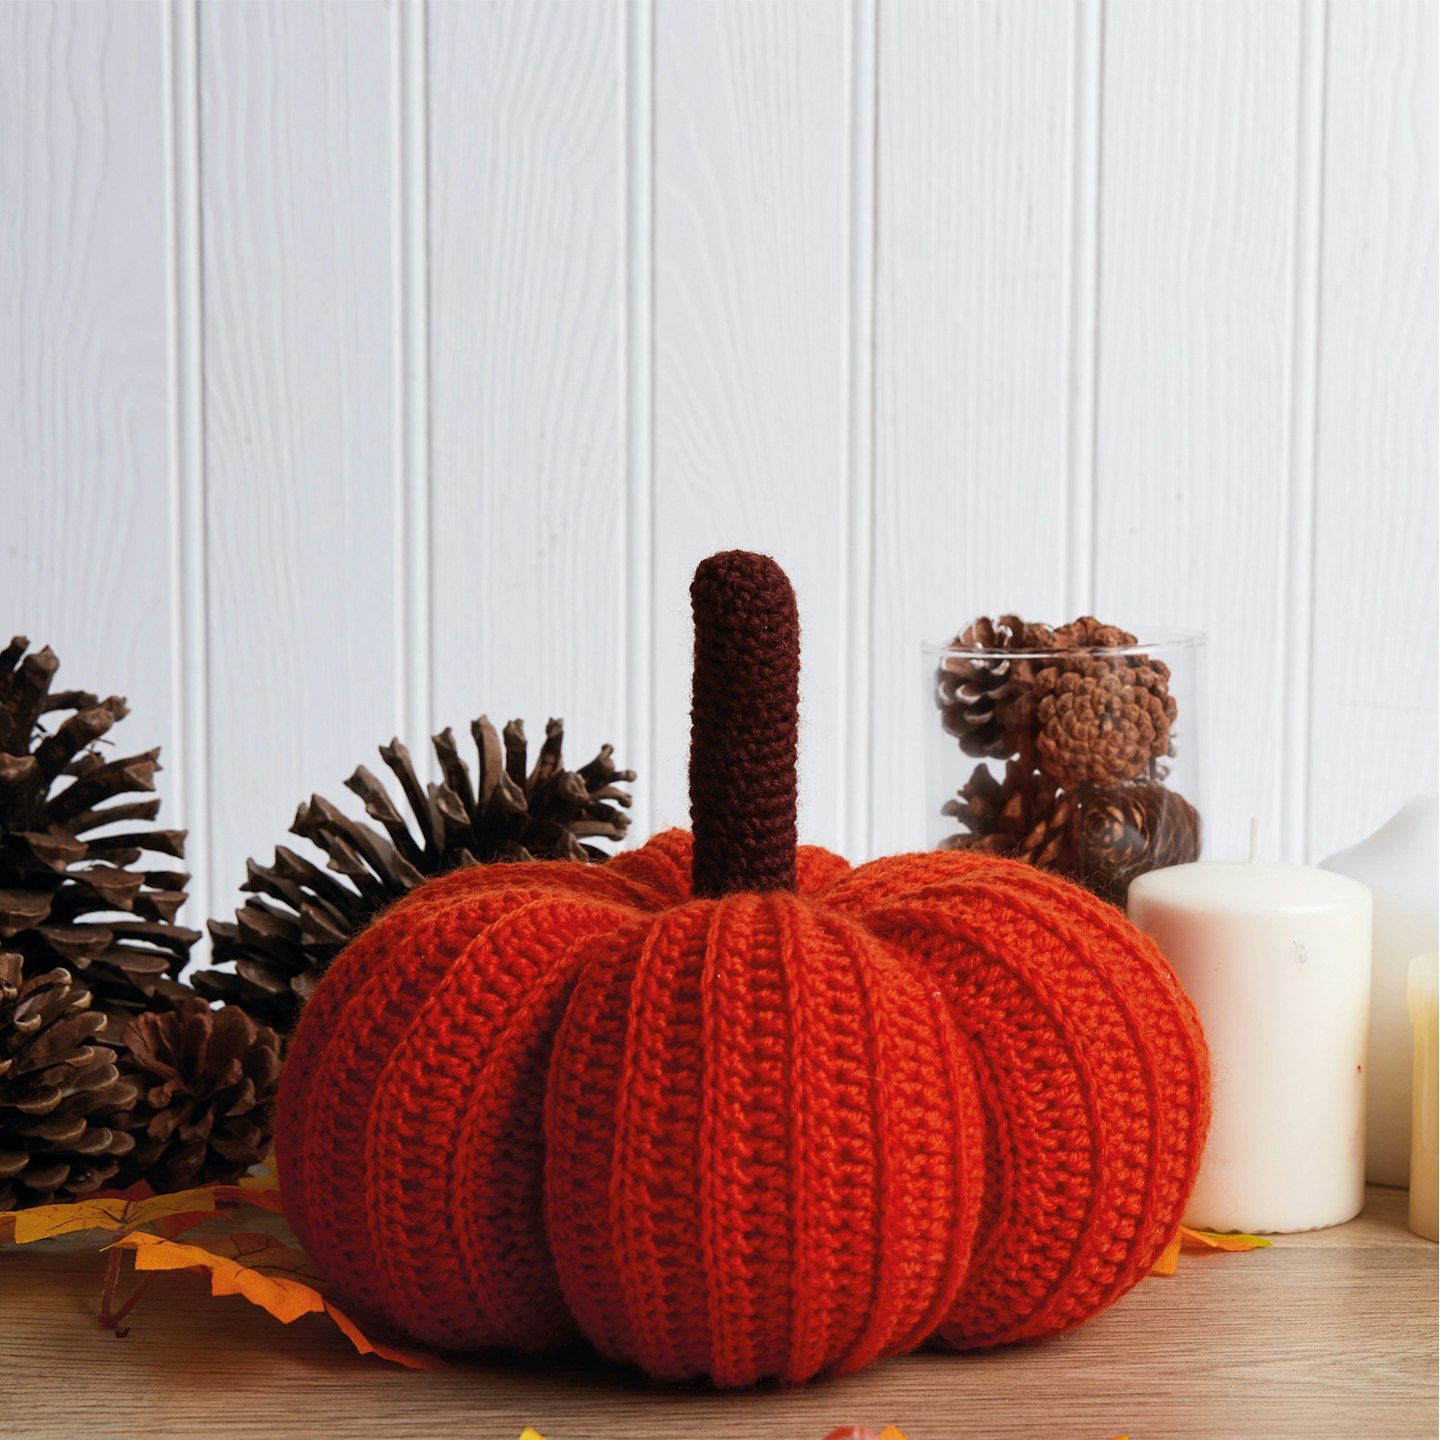
Plain crochet pumpkins
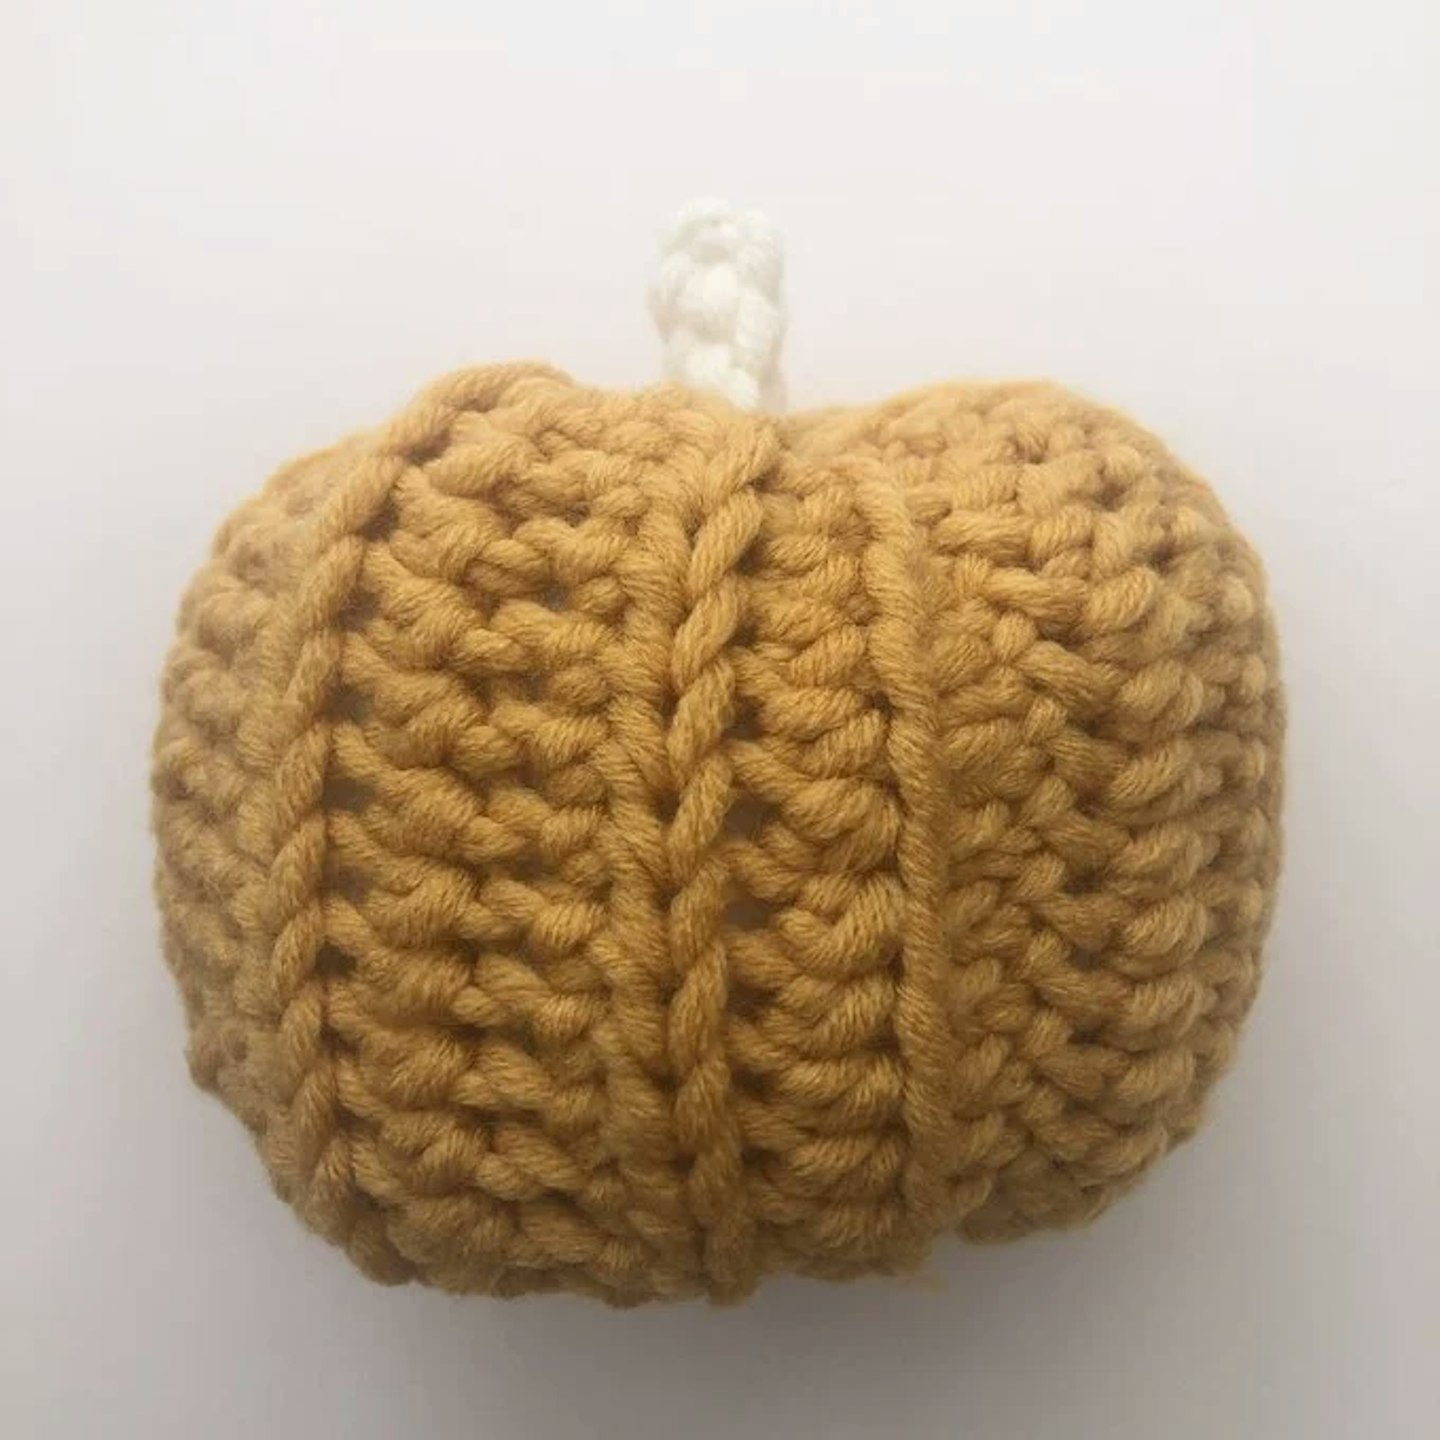
Before you have a go at adding different patterns, let's try with solid colours. For this pumpkin you will be using the half treble stitch and each stitch is worked in the back loops to create ribbing. Bear in mind that chain 1 doesn't count as a stitch throughout. When making the beginning slip knot and fastening off for sewing, you need to leave a long tail end of 30cm.
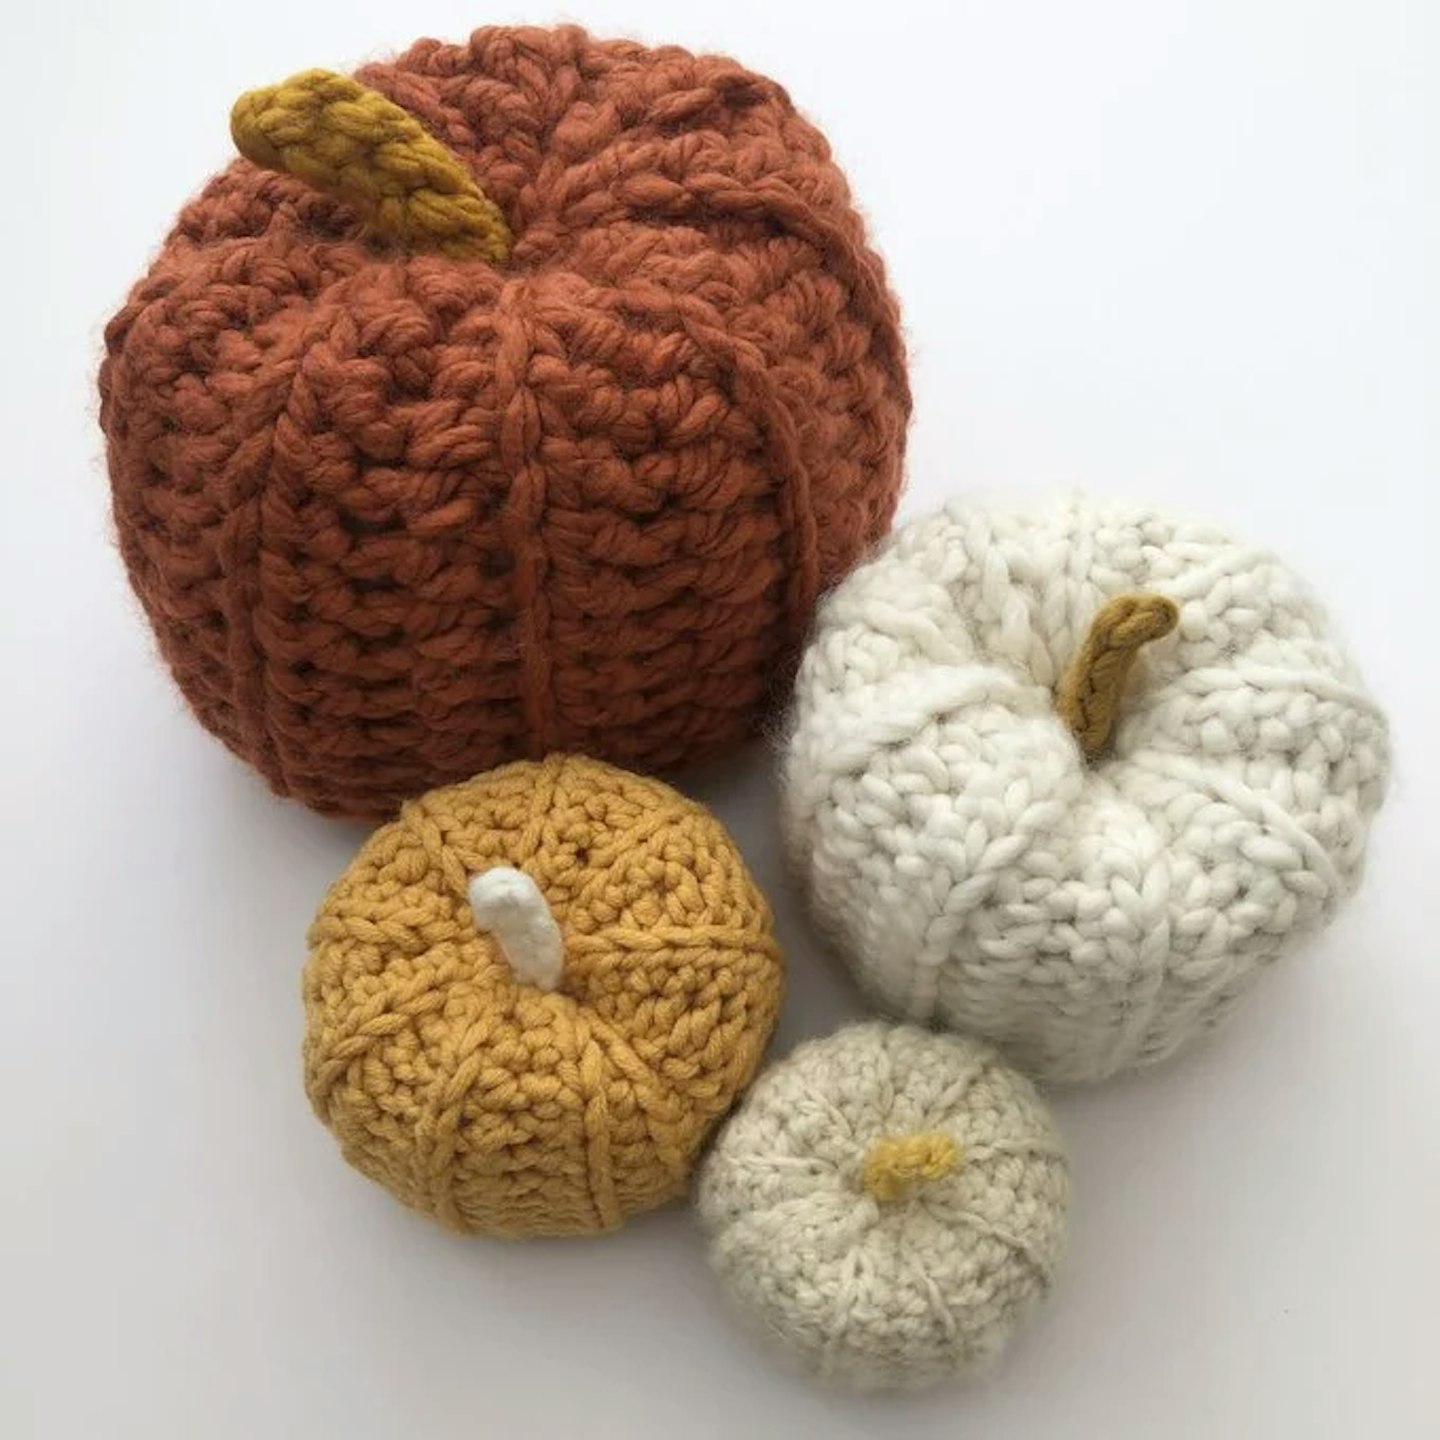
Make 1 of each using: first colour yarn with a 12mm hook, second colour yarn with a 10mm hook, third colour yarnon a with 8mm hook and fourth colour yarn with 5mm hook.
Row 1: Ch 21, htr in 2nd ch from hook, htr to end, turn. 20 sts.
Row 2: Ch1, htr in each st working in back loops only, turn.
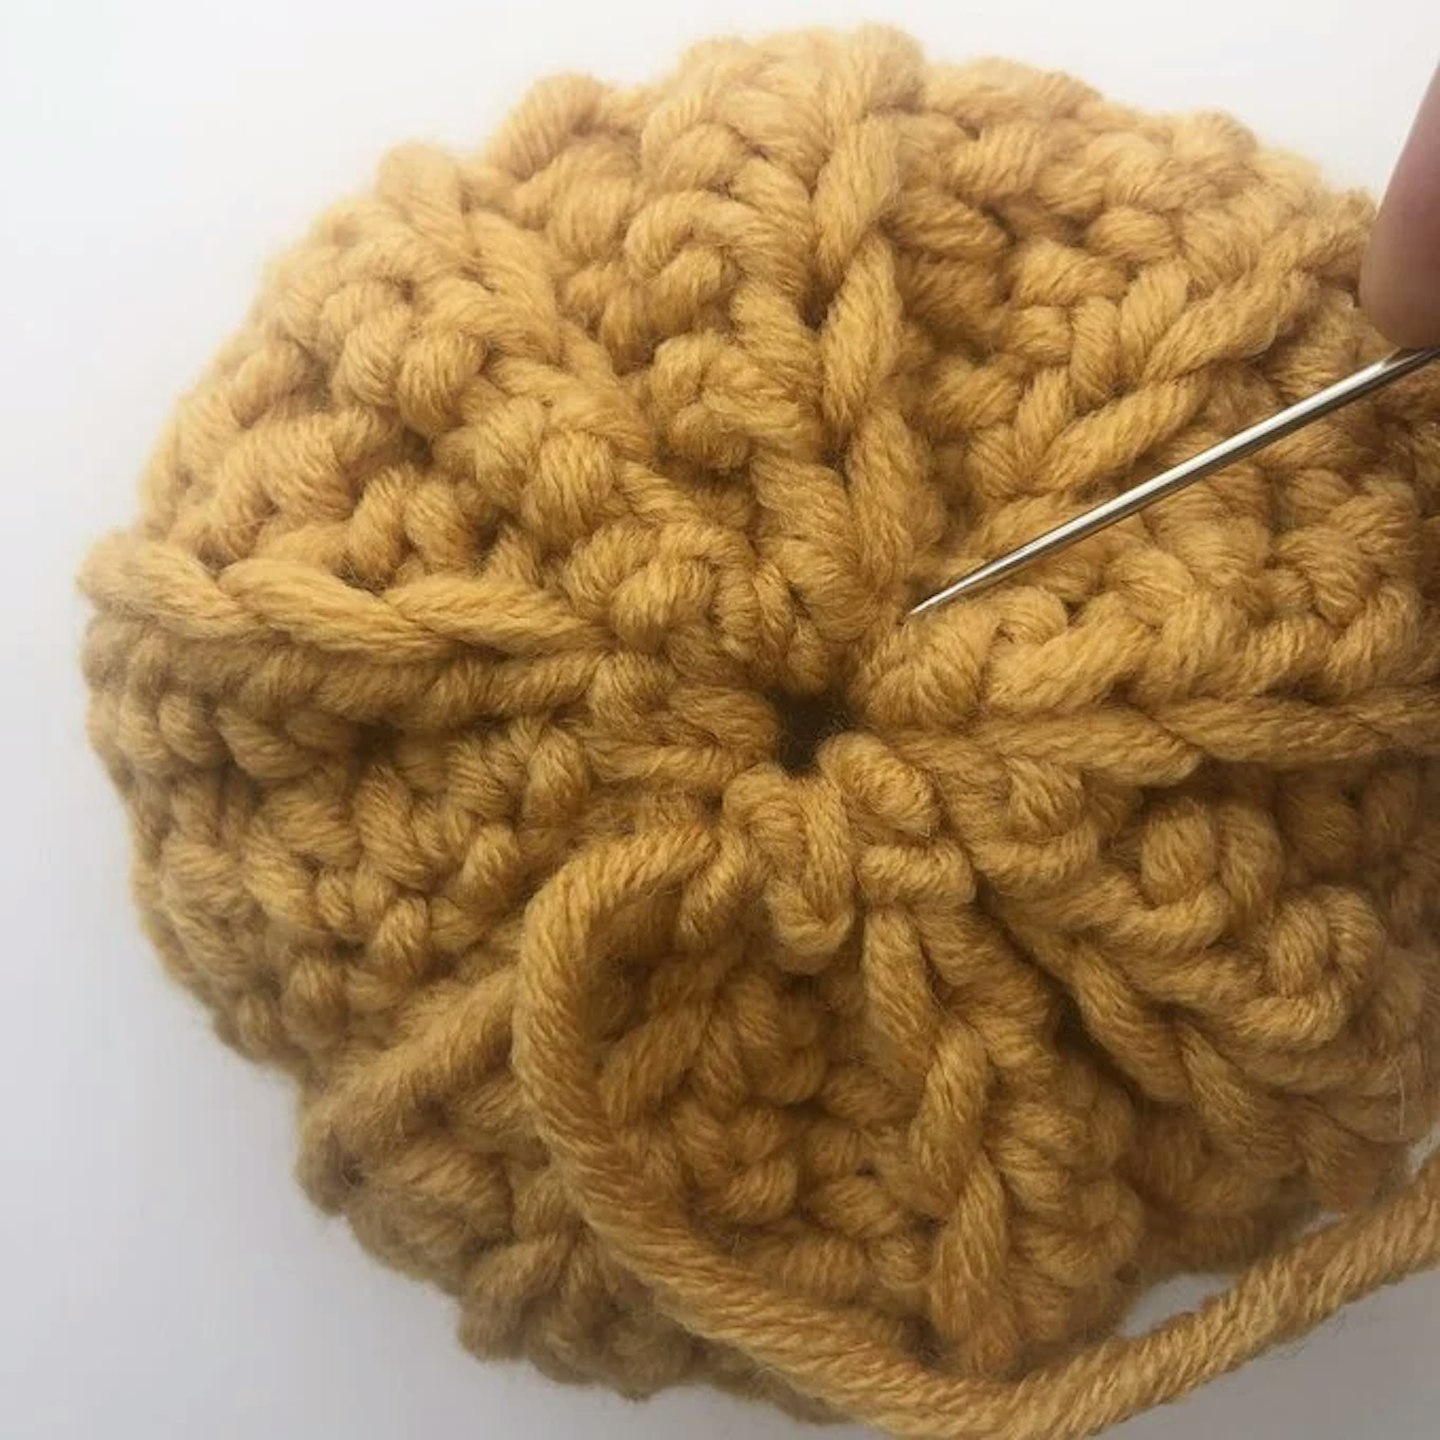
Row 3-17: As Row 2, do not fasten off after row 17. Fold in half with WS facing. Line up stitches of Row 17 with the unworked loops of the foundation chain. Slip stitch in each stitch to join working in front loops only. Fasten off leaving long tail for sewing.
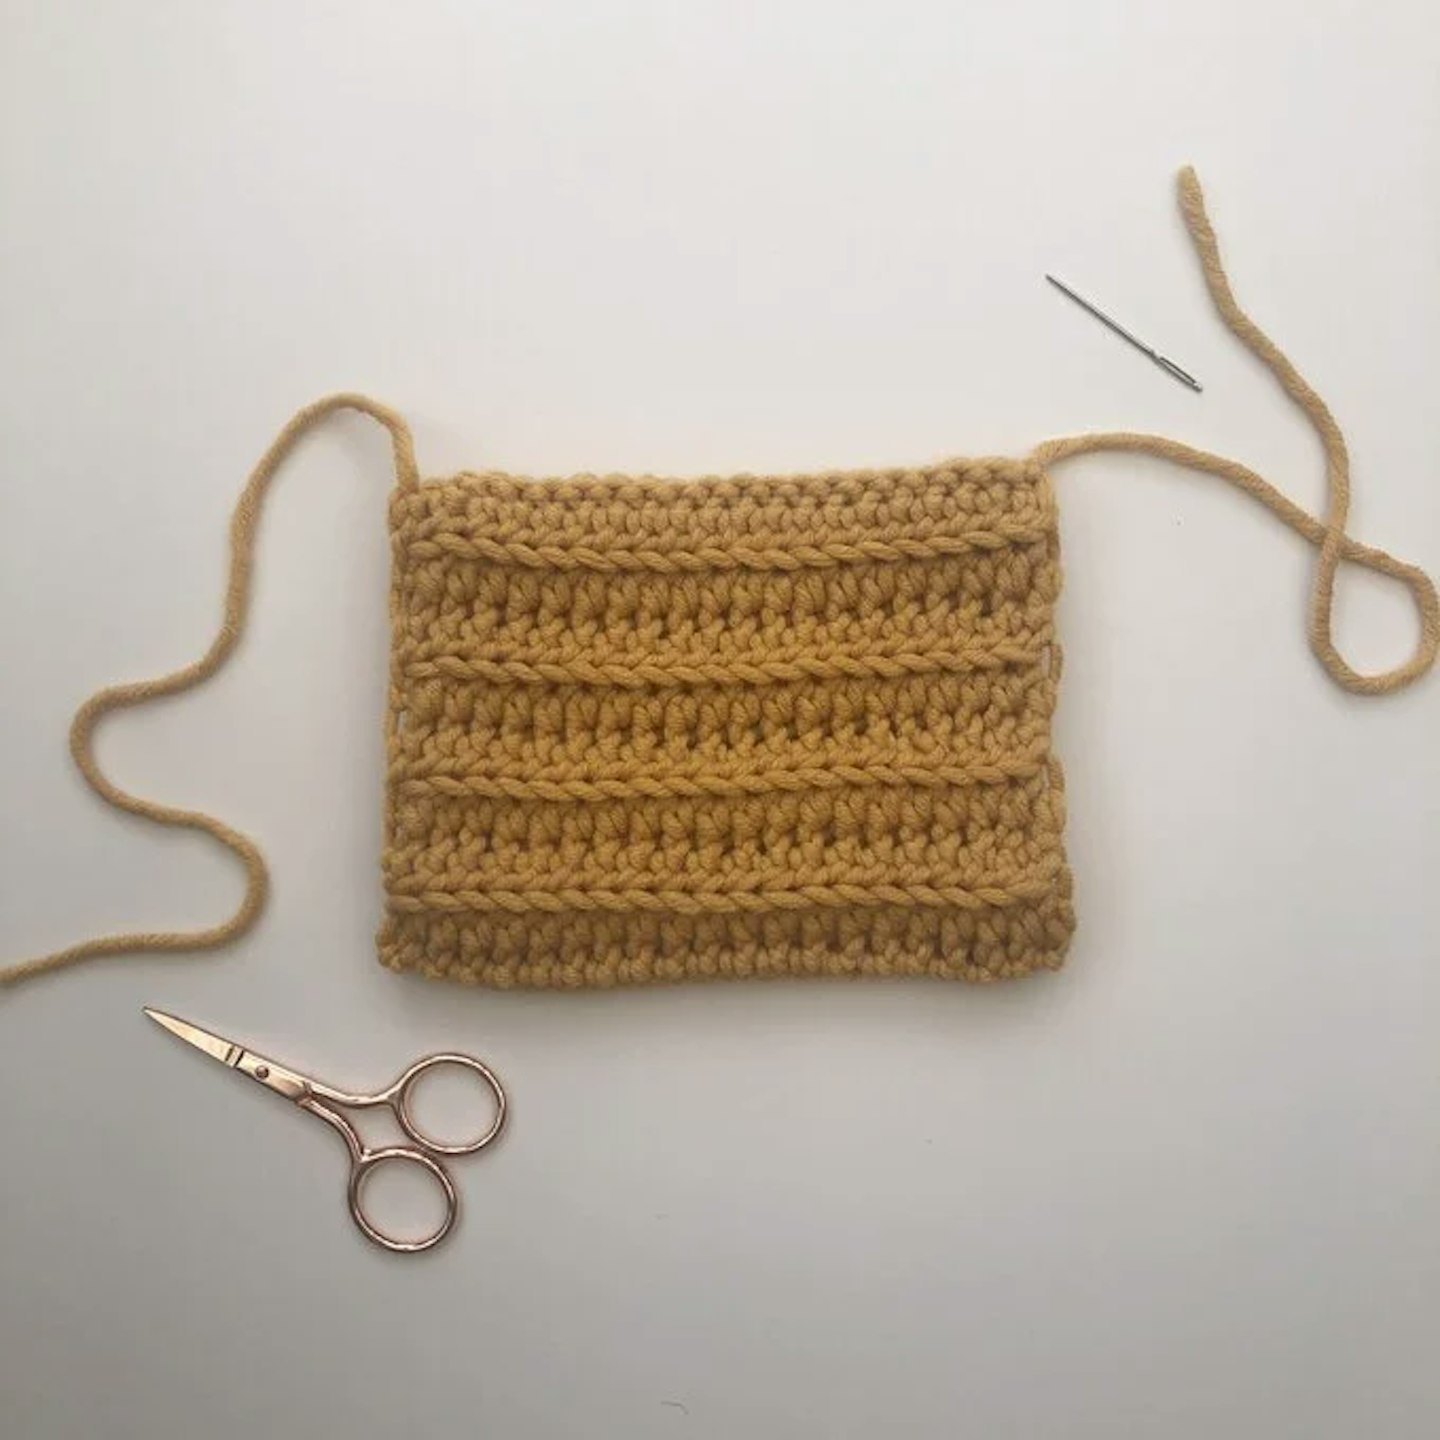
Sew a running stitch around row edges and pull tight to close, sew to secure and stuff. Repeat for other end, and close then sew through the centre of the pumpkin from top to bottom, make a few stitches and pull tight to make a dipped shape.
Make a stalk using contrasting colour in the same yarn: Ch6, sl st in 2nd ch from hook, sl st to end, fasten off leaving a long tail for sewing. Sew through centre of each pumpkin to attach the stalk and weave in ends.
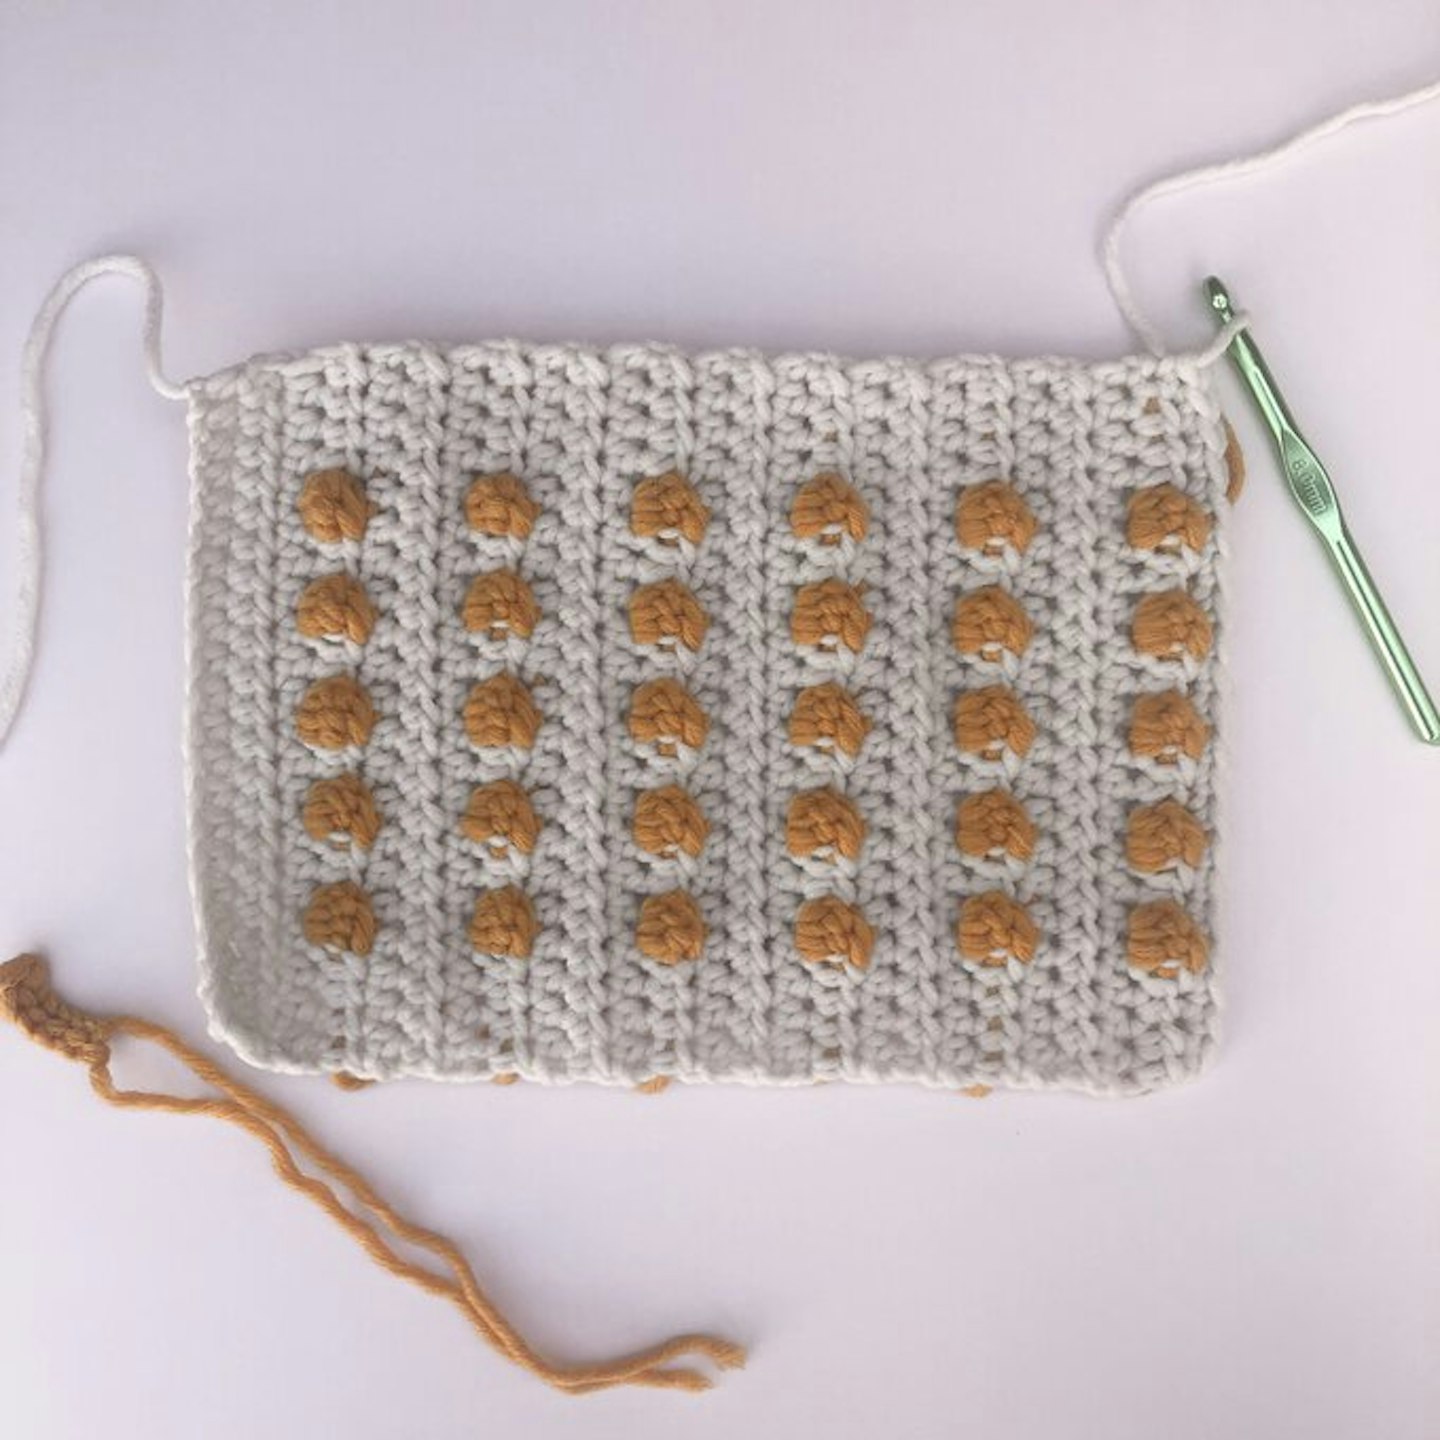
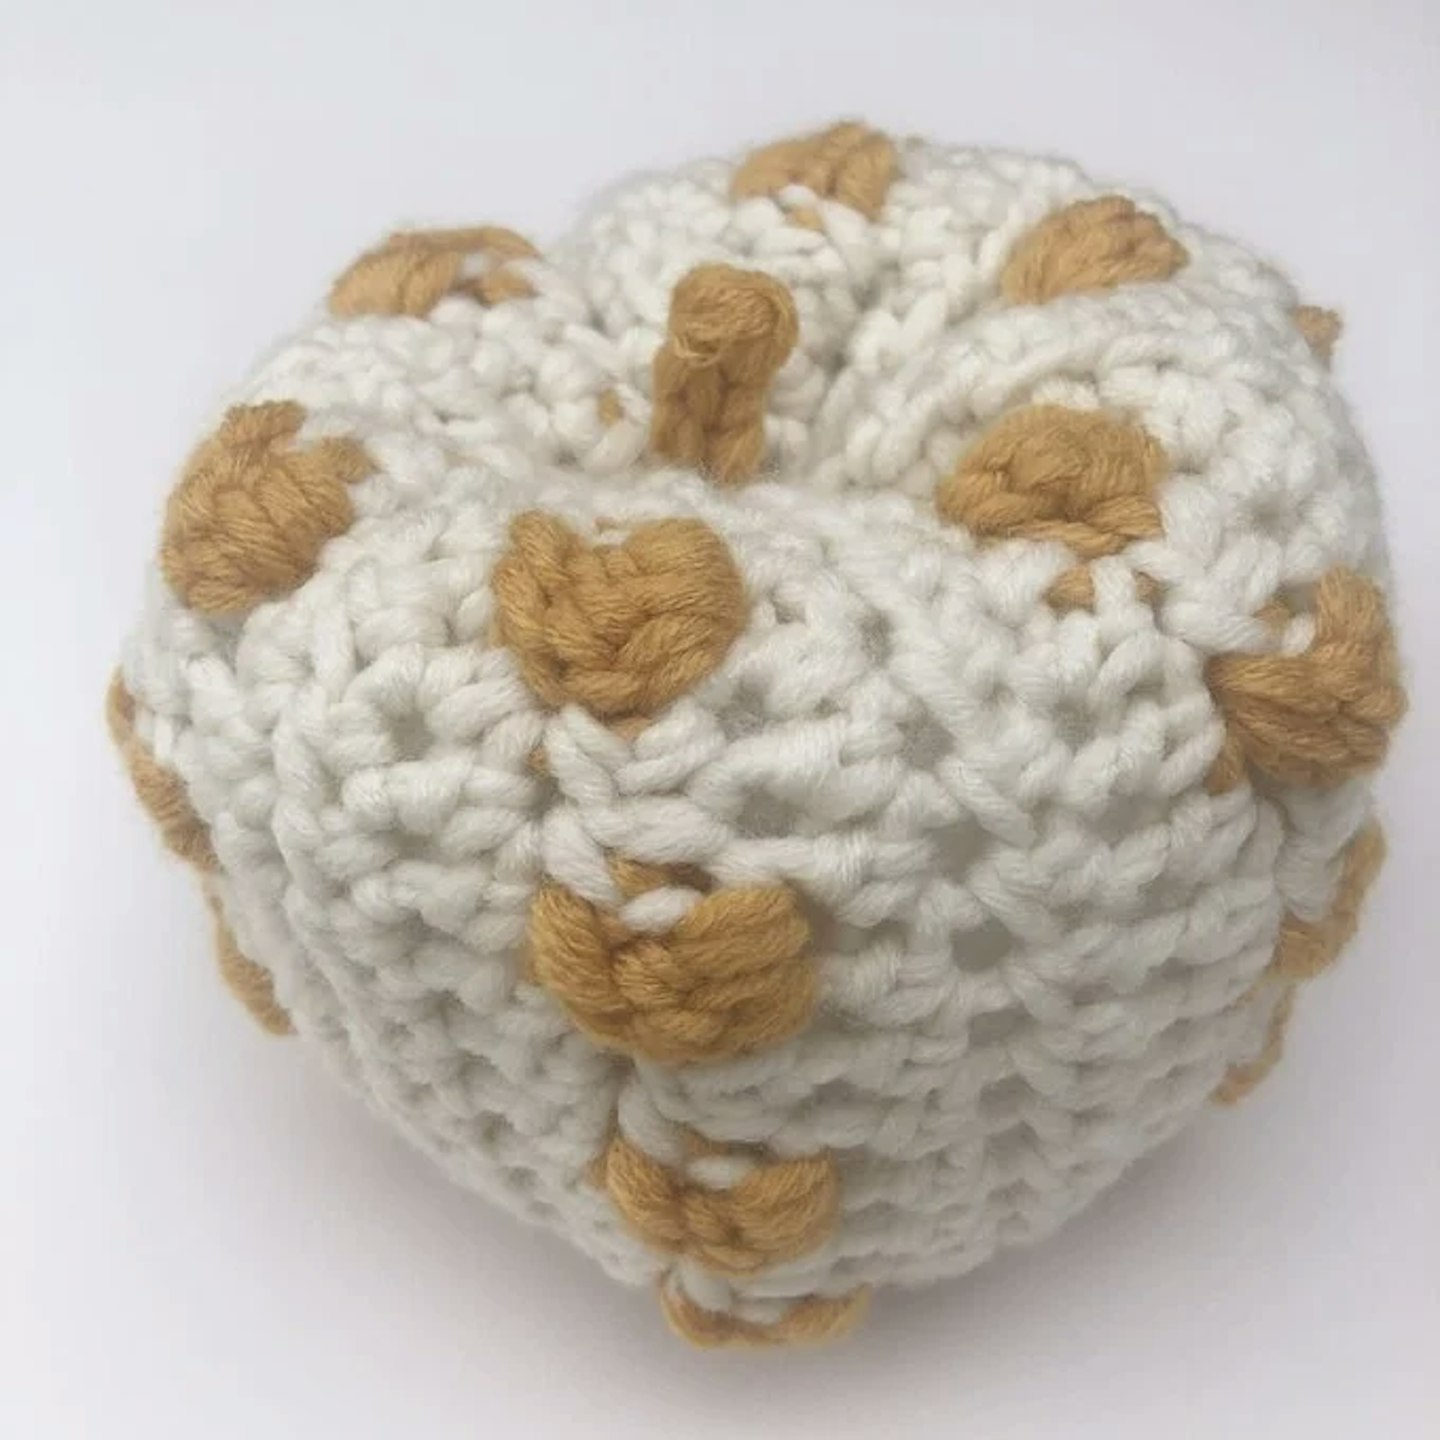
Bobble crochet pumpkins
Now you've tried and tested the plain pumpkin, it's time to let your creative juices flow with a bobble design! You will work in 2 colours using the tapestry crochet technique and will work over the contrasting yarn for each bobble row.
To change colour, complete the last yarn over and pull through with the next colour. Non-working yarn is carried over within the stitches. Chain 1 does not count as a stitch throughout.
The bobbles are made by working 4 treble crochet together in same stitch, changing to next colour when completing each bobble. Bobbles worked on WS rows. Don't forget to leave a long tail end (approx. 30cms long) when making the beginning slip knot and fastening off for sewing.
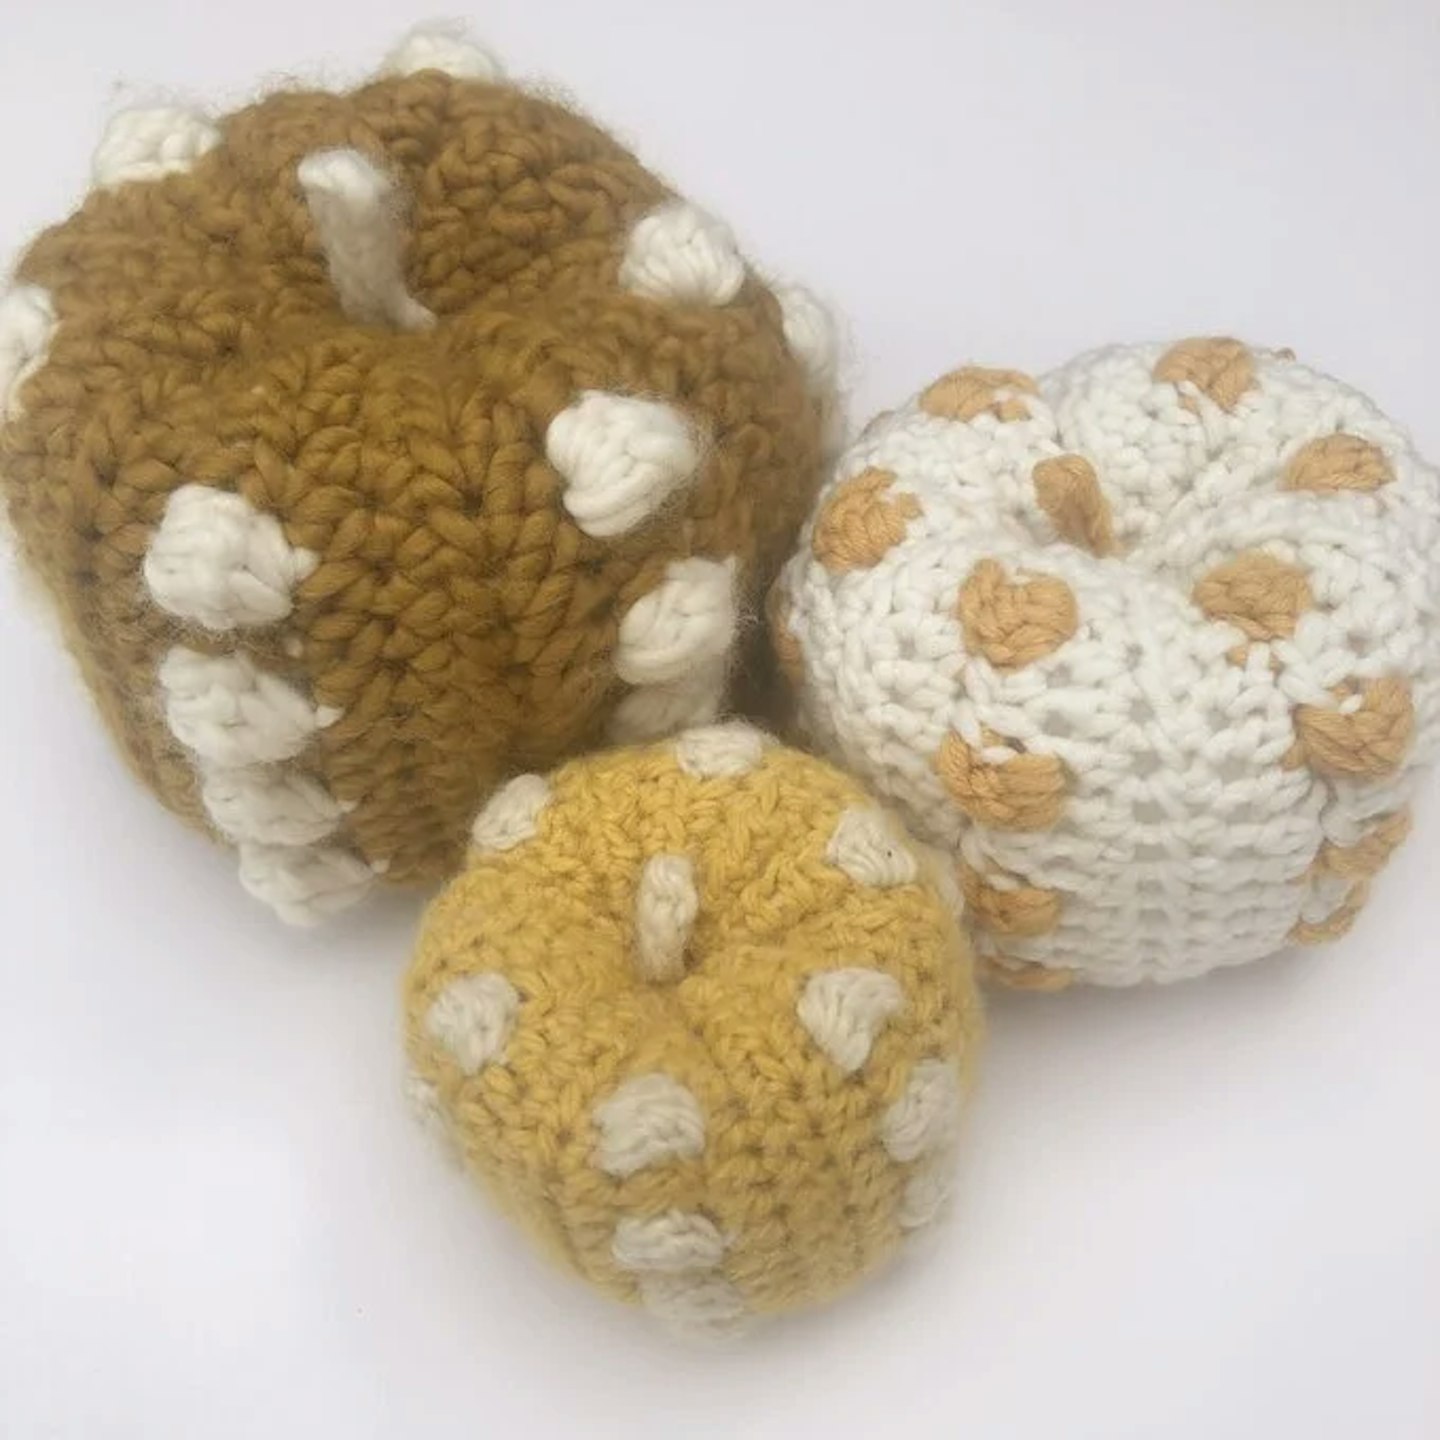
Make 1 of each using: yarn A and yarn B with 10mm hook, yarn A and yarn B with 8mm hook and finally yarn A and yarn B with 5mm hook.
Row 1: Ch22, htr in 2nd ch from hook, htr to end, turn. 21 sts.
Row 2: Ch1, htr to end, turn.
Row 3: As Row 2.
Row 4: (working over yarn B) Ch1, 4htr, *MB in yarn B, 2htr in yarn A; rep from * to last 2 sts, 2htr in yarn A, turn, fasten off yarn B.
Row 5-7: As Row 2.
Row 8: As Row 4. Rep as Rows 5-8 four times.
Row 25: Ch1, dc in each st to end Fold in half with WS facing. Line up stitches of Row 25 with the unworked loops of the foundation chain. Slip stitch in each stitch to join. Fasten off leaving long tail for sewing. Turn RS out then finish as plain pumpkin.
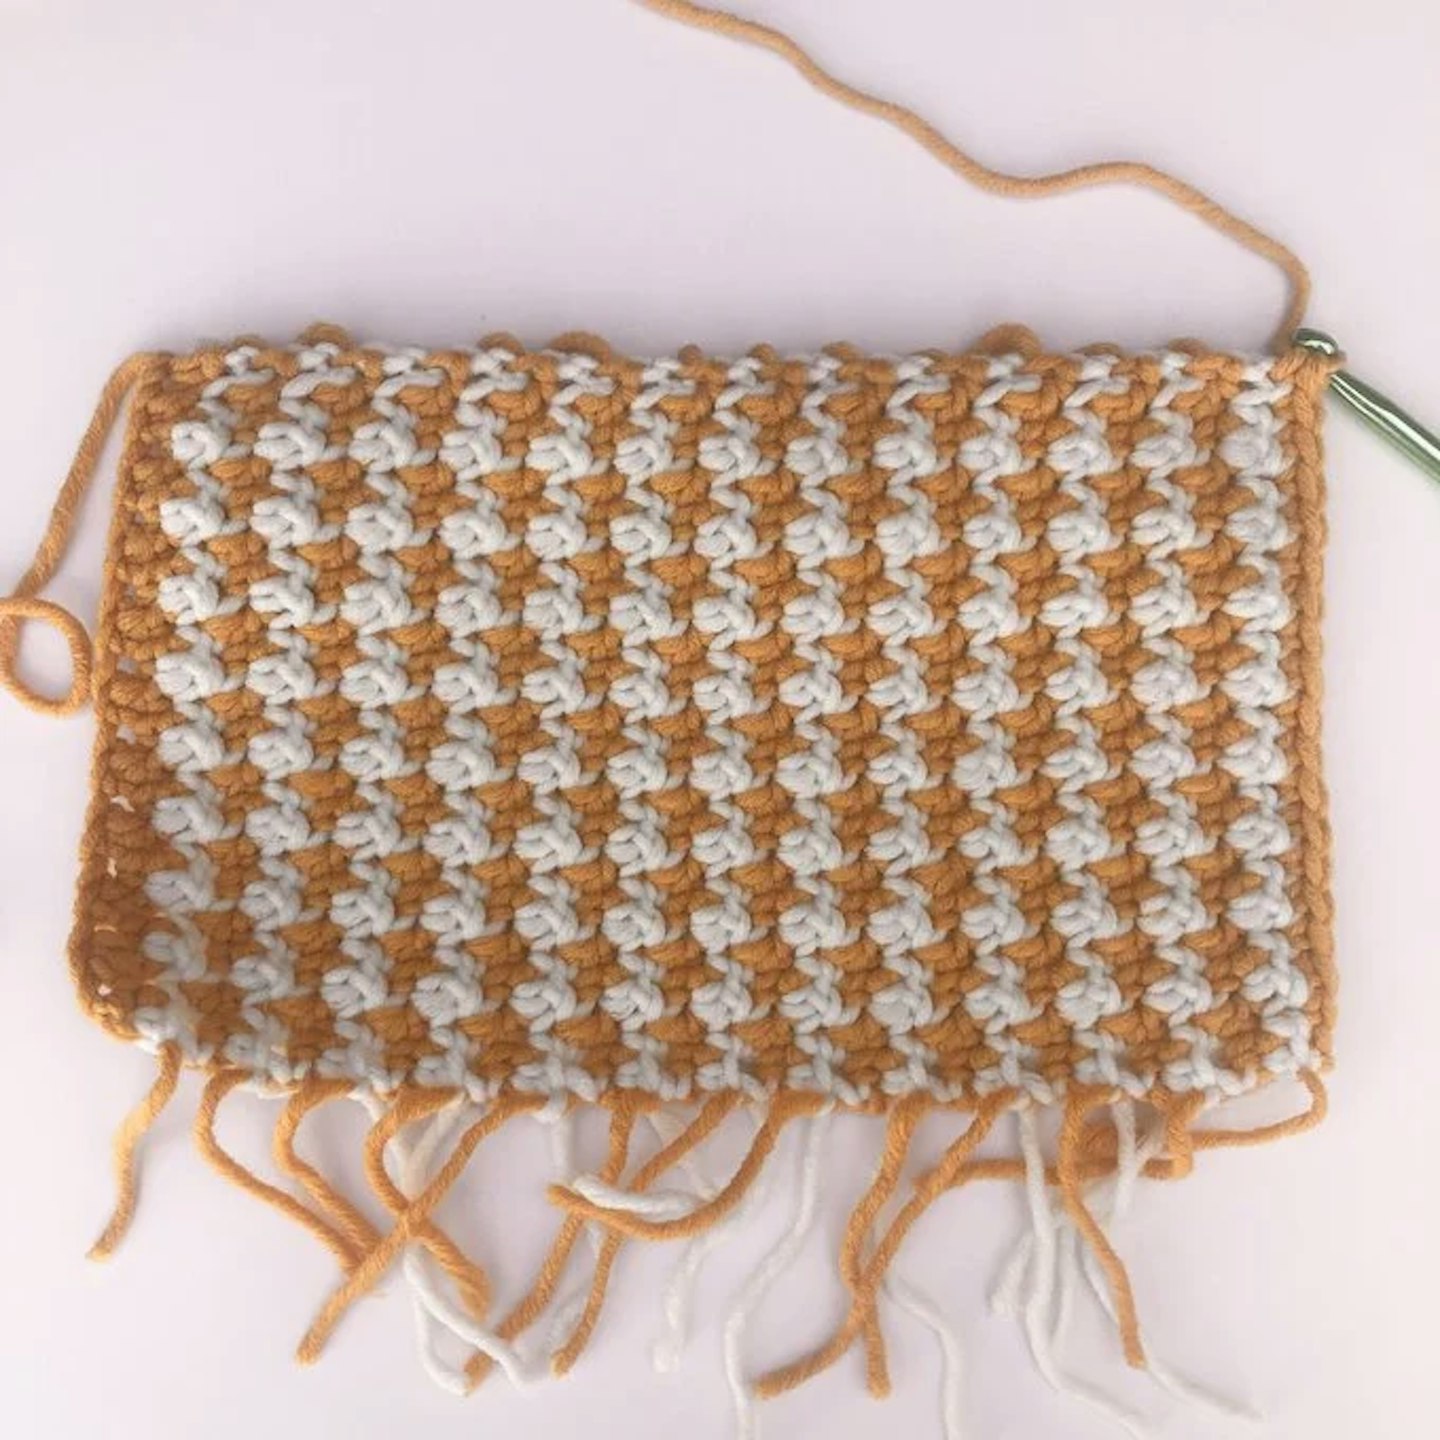
Houndstooth pumpkin
Made using alternating stitches and changing colours for each row to create a houndstooth effect pattern. Change colour by completing the last stitch of each row with the new colour.
Each colour will be used for alternate rows throughout. Starting ch1 does not count as a stitch. Ch3 counts as the first treble of row 2. Leave a long tail end (approx. 30cms long) when making the beginning slip knot and fastening off for sewing.
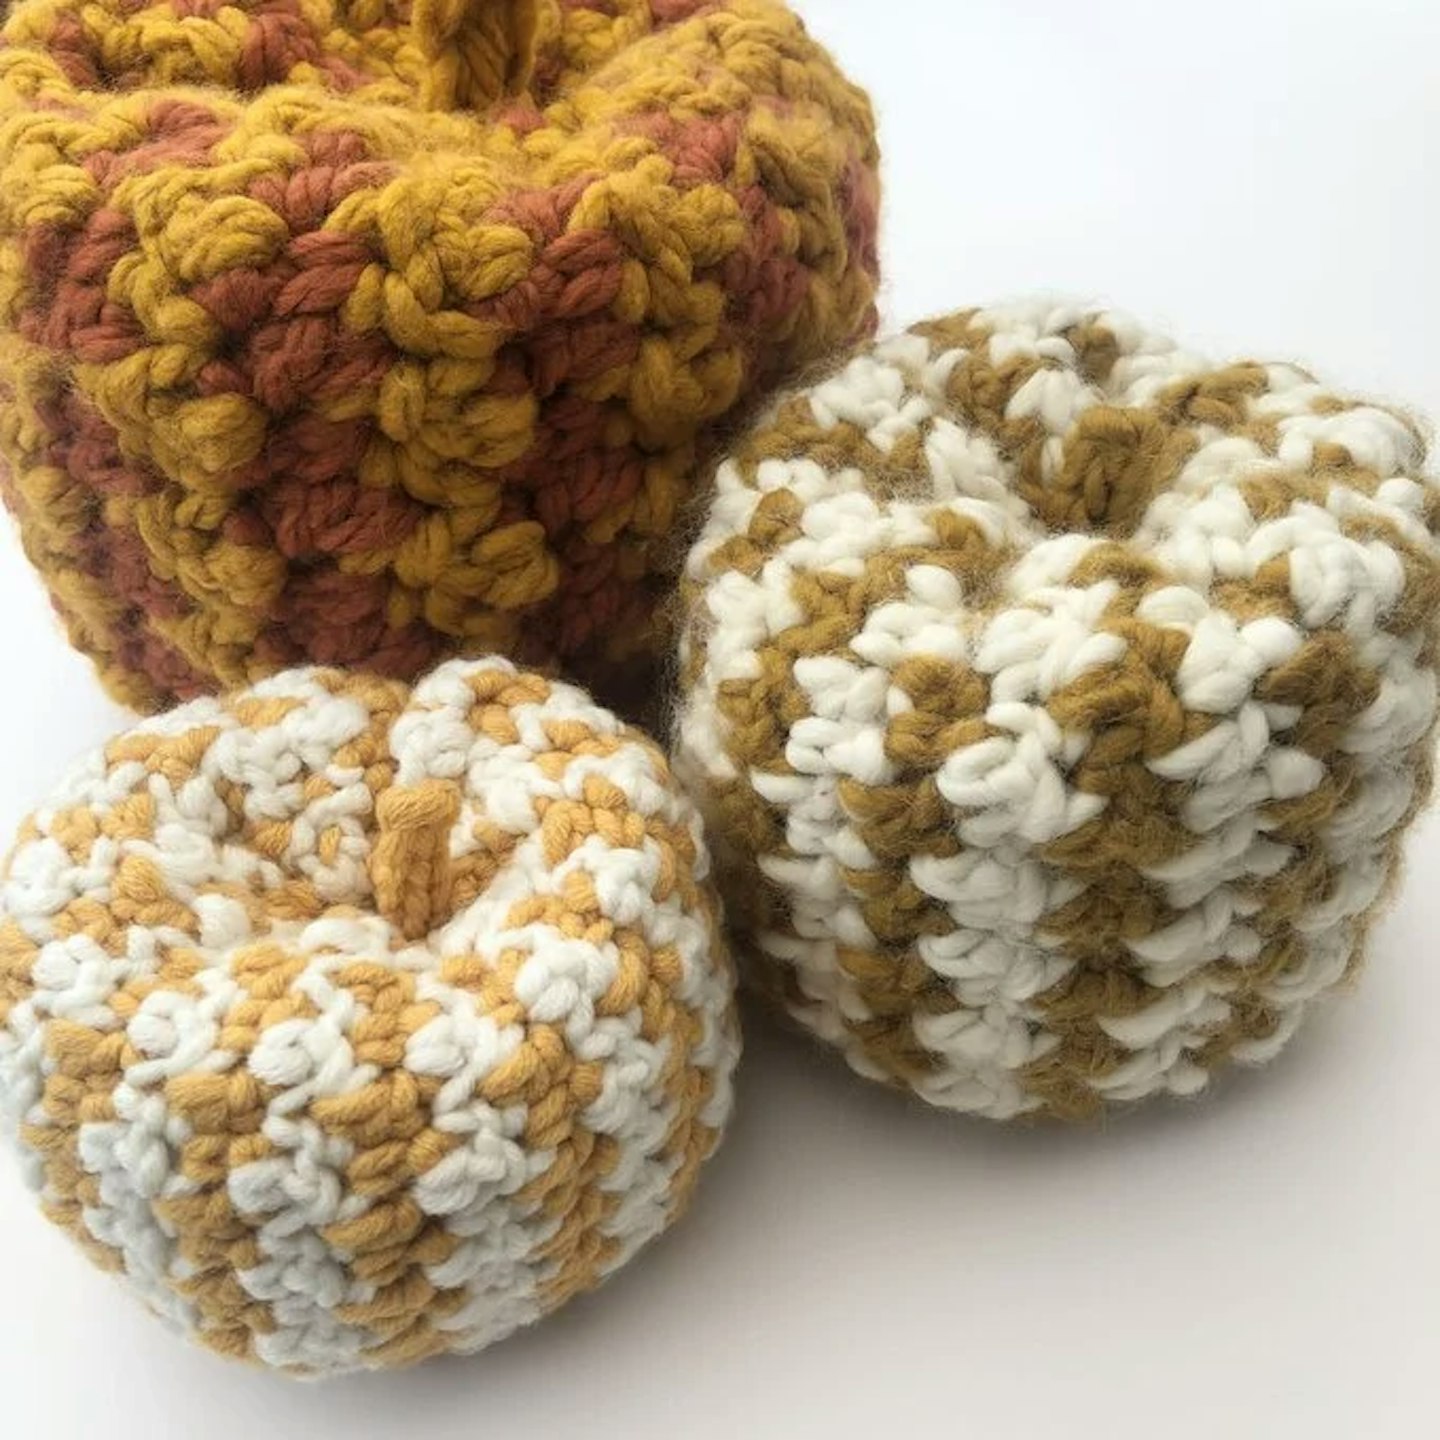
Make 1 of each using: Yarn A and Yarn B, Yarn A and Yarn B, yarn A and Yarn B with 8mm hook, yarn A and Yarn B with 5mm hook.
Using Yarn A, Row 1: Ch20, dc in 2nd ch from hook, [1tr, 1dc] to end, change to yarn B. 19 sts
Row 2: Ch3 (counts as 1st tr) [1dc, 1tr] to end, change to yarn A.
Row 3: Ch1, dc in same st, [1tr, 1dc] to end, change to yarn B. Rep Rows 2-3 eleven times.
Row 26: As Row 2.
Row 27: Ch1, dc in each st to end. Fasten off leaving long tail for sewing. Fold in half with WS facing. Line up stitches of Row 27 with the unworked loops of the foundation chain.
Slip stitch in each stitch to join. Fasten off leaving long tail for sewing. Turn RS out then finish as plain pumpkin. Optional- weave in ends before finishing or sew around leaving them loose inside the work.
Crocheting equipment you may need
Need to stock up on some equipment before you start crafting? No problem! Here are some of our favourite products which are perfect for making crochet pumpkins, along with other DIY Halloween decorations.
Best for a crochet kit
www.therange.co.uk
Perfect for gifting, this crochet kit contains all of the equipment needed to create your very own pumpkin garland. How cute! It's recommended for ages 8 plus, so it's brilliant for children and adults alike. Once done, simply hang it on a mantel or some twigs to show off your creation.
Pros
- Makes both orange and white pumpkins
- Crochet hook included
Cons
- Not very long
Best crochet gift set
www.therange.co.uk
If you'd prefer to make something a bit bigger and don't want to faff around buying all of the equipment separately, this Simply Make crochet kit from The Range is just what you need. It's designed for both beginners and experienced crafters alike and you can make a couple of smaller ones if you'd prefer.
Pros
- 7 pieces inside
- Suitable for beginners
Cons
- Can't decide what colour yarn to use
Best for yarn
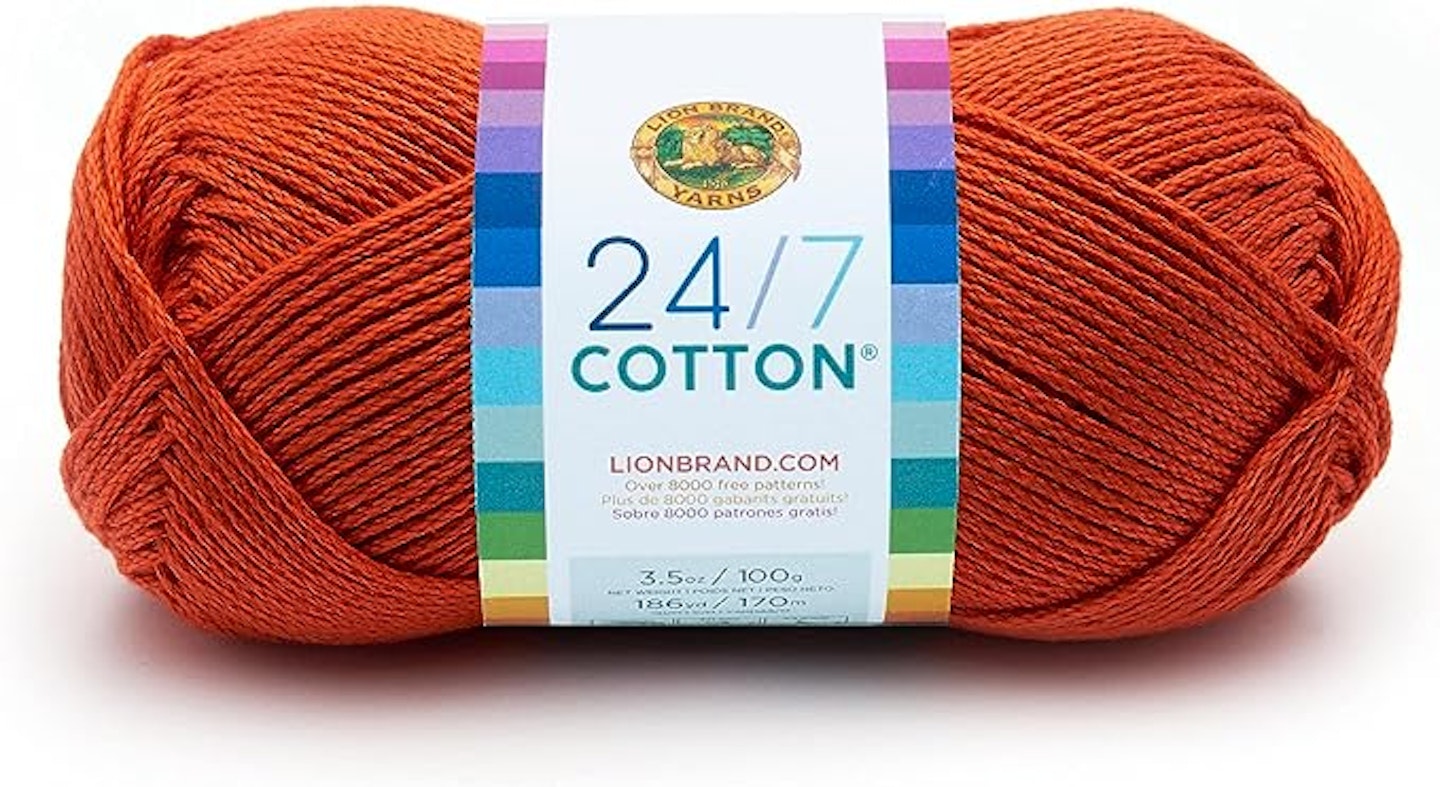
We love this tangerine yarn from Lion Brand as it's so vibrant and it gives you magnificent stitch definition. This is thanks to the mercerization process, which dyes it and gives it that sheen.
One reviewer said: "This is 100% (mercerized) 4/medium worsted cotton. It’s intended to have a different texture and is much more durable than conventional cotton yarn without the loss of a nice feel. The feel and look of a higher quality is obvious once you touch a finished piece. Yes, the yarn feels different than standard yarn. It’s supposed to. It’s processed differently for a reason. This particular yarn is perfect for any project that will be used or handled frequently. It is stronger, doesn’t produce heavy lint, doesn’t get fuzzy or pill up, doesn’t split easily, and is more resistant to mildew. It holds its shape better than regular cotton yarn, and withstands many many washes and tumble dries on a medium heat setting."
Pros
- Machine washable
- Broad selection of colours to choose from
Cons
- Can't use bleach or fabric softener on it
Best for crochet hooks
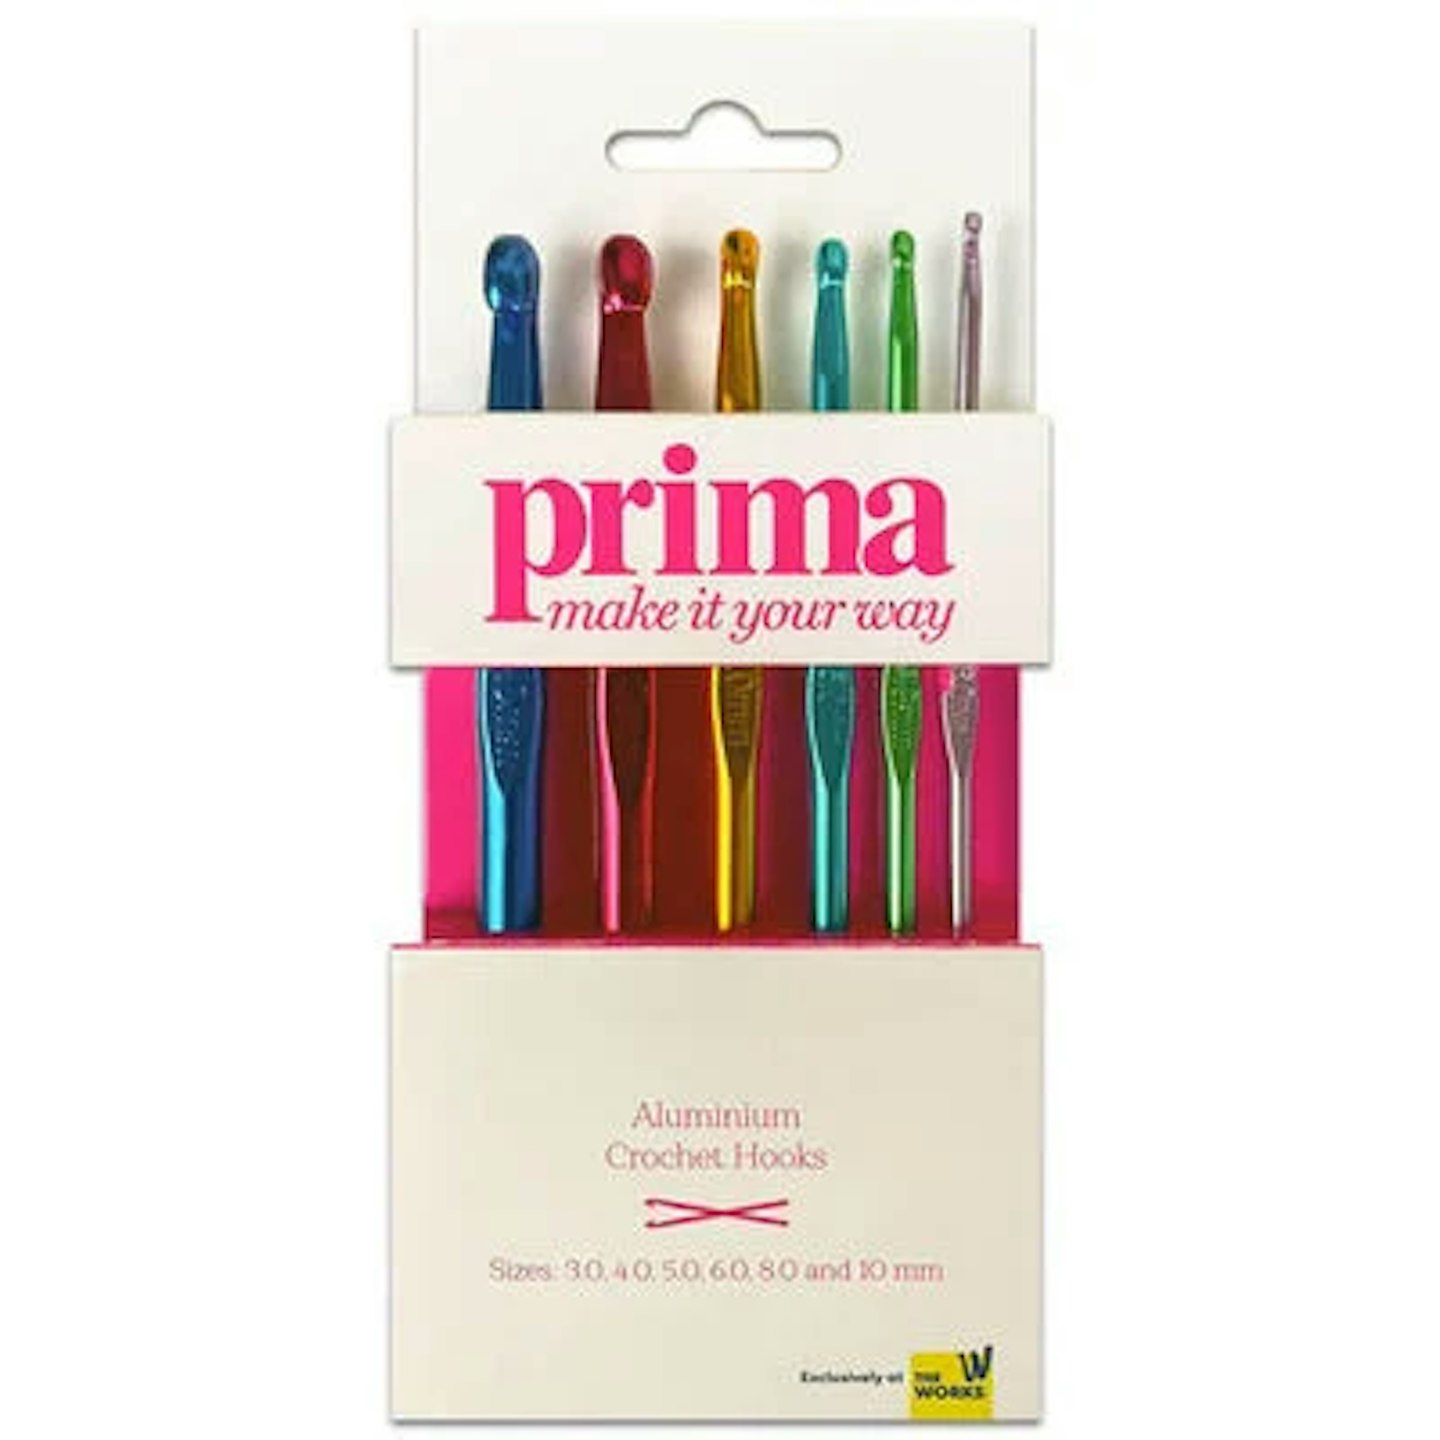
www.theworks.co.uk
Beginner or advanced, every one who's taking up crochet needs some hooks and this multicoloured pack from The Works is perfect, especially for those who are crafting on a budget. They come in different sizes, from 3.0 to 10mm.
One reviewer said: "An excellent buy at a reasonable price. I would recommend them to anyone, whether they have just started crochet or are wanting new needles. They are comfortable and easy to use. They are in mm sizes though; if you were looking for 1/2 sizes. Not these."
Pros
- Range of sizes
- Handily, each one is a different colour
Cons
- Half-sizes not included
Best pumpkin homeware
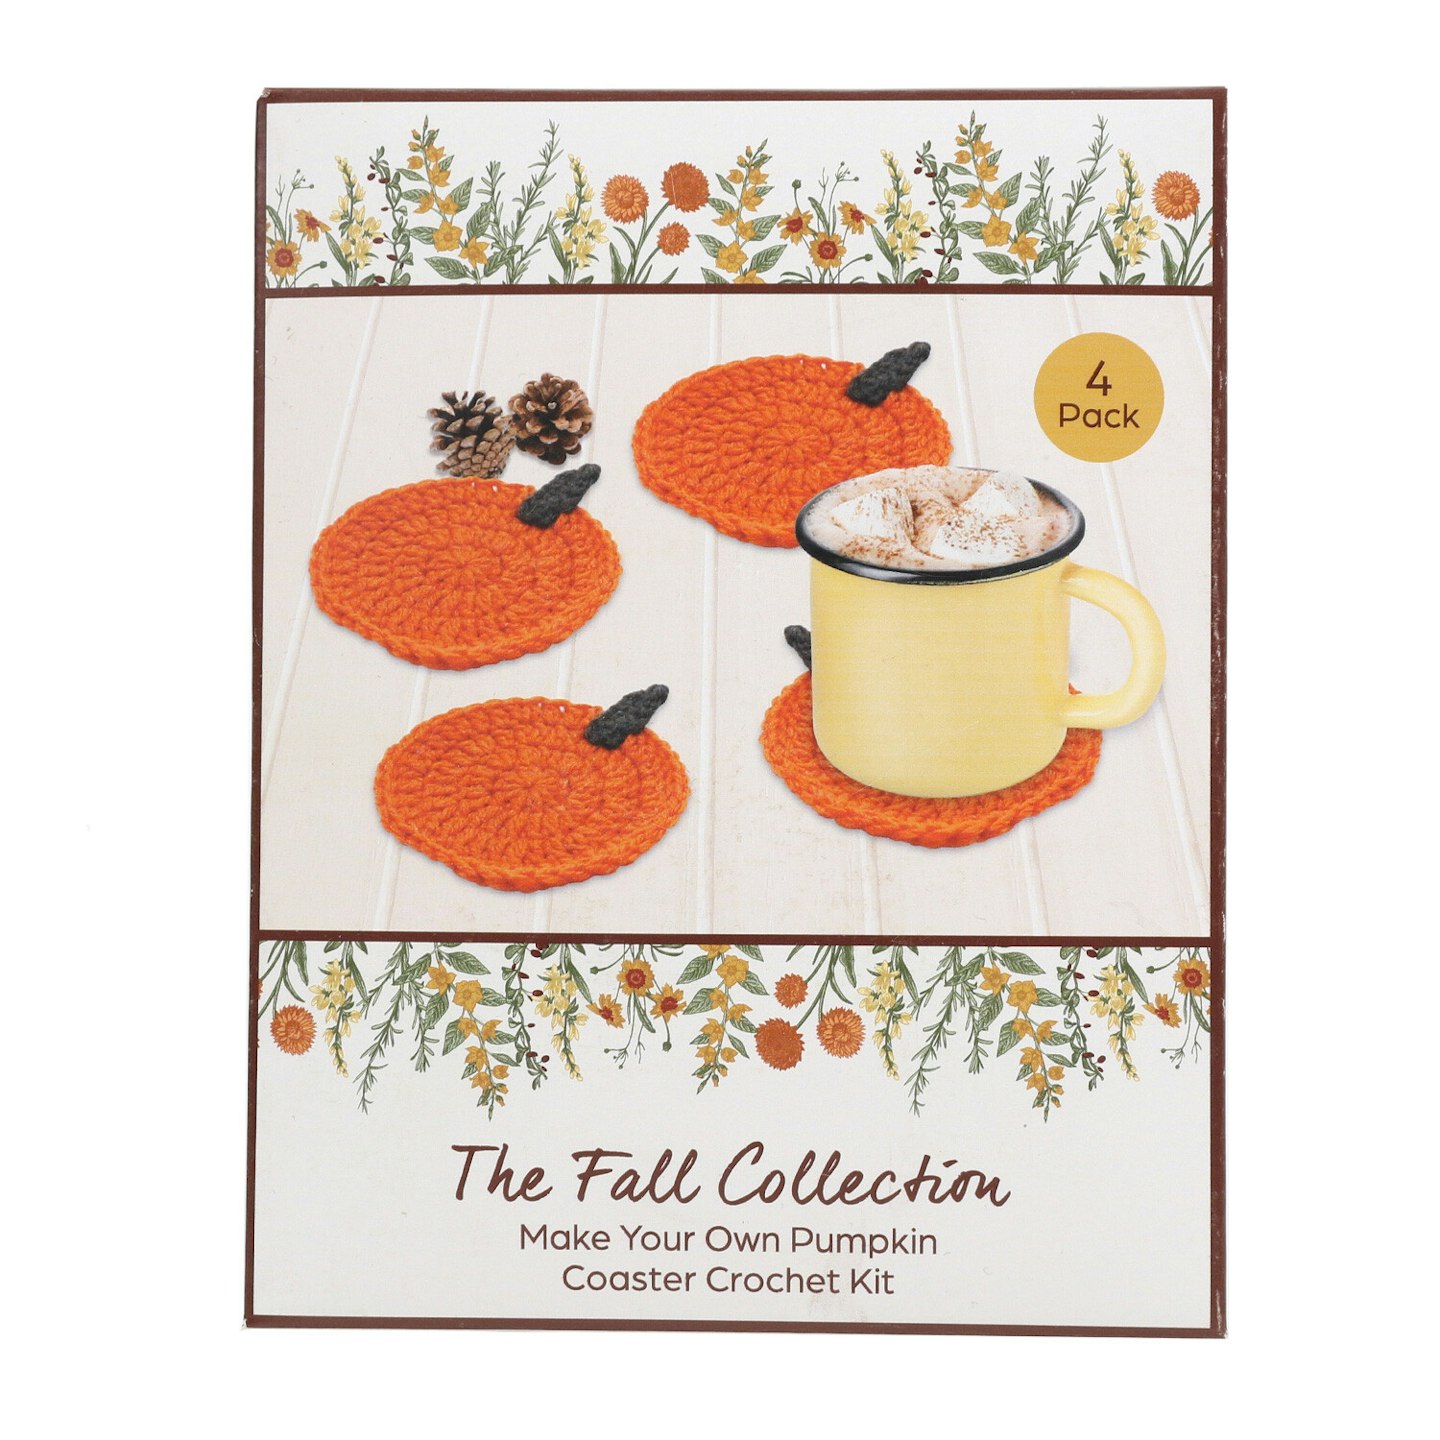
www.therange.co.uk
Practical and cute, any guests you have will love using these pumpkin coasters and they're so simple to make. There are four in a pack and they're just what you need to pop your pumpkin spiced latte or steaming cup of hot chocolate on in the evening.
Pros
- Affordable
- Equipment included
Cons
- Only makes 4
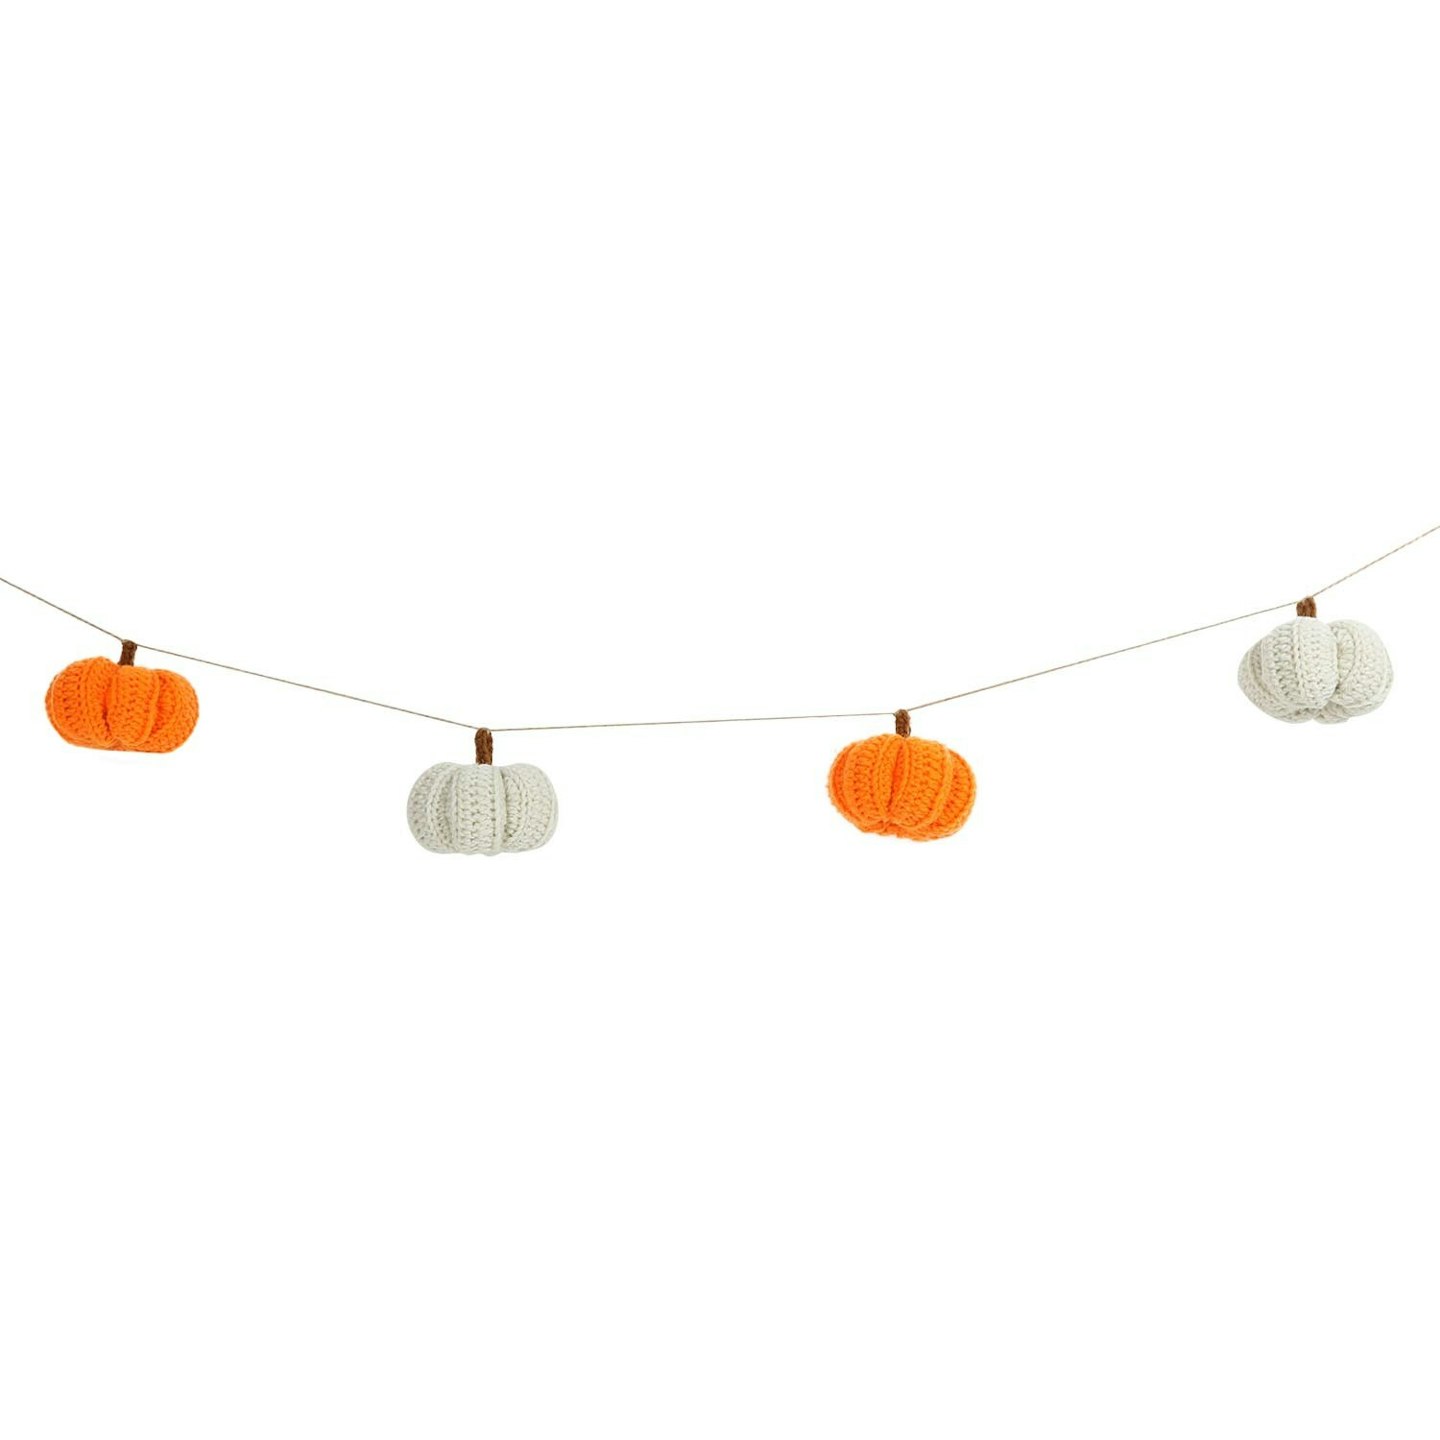
The best crochet pumpkins
Don't fancy making your own crochet pumpkin quite yet? There are plenty of super-cute pre-made options available to buy in all sorts of colours, shapes and sizes.
Best crochet pumpkin
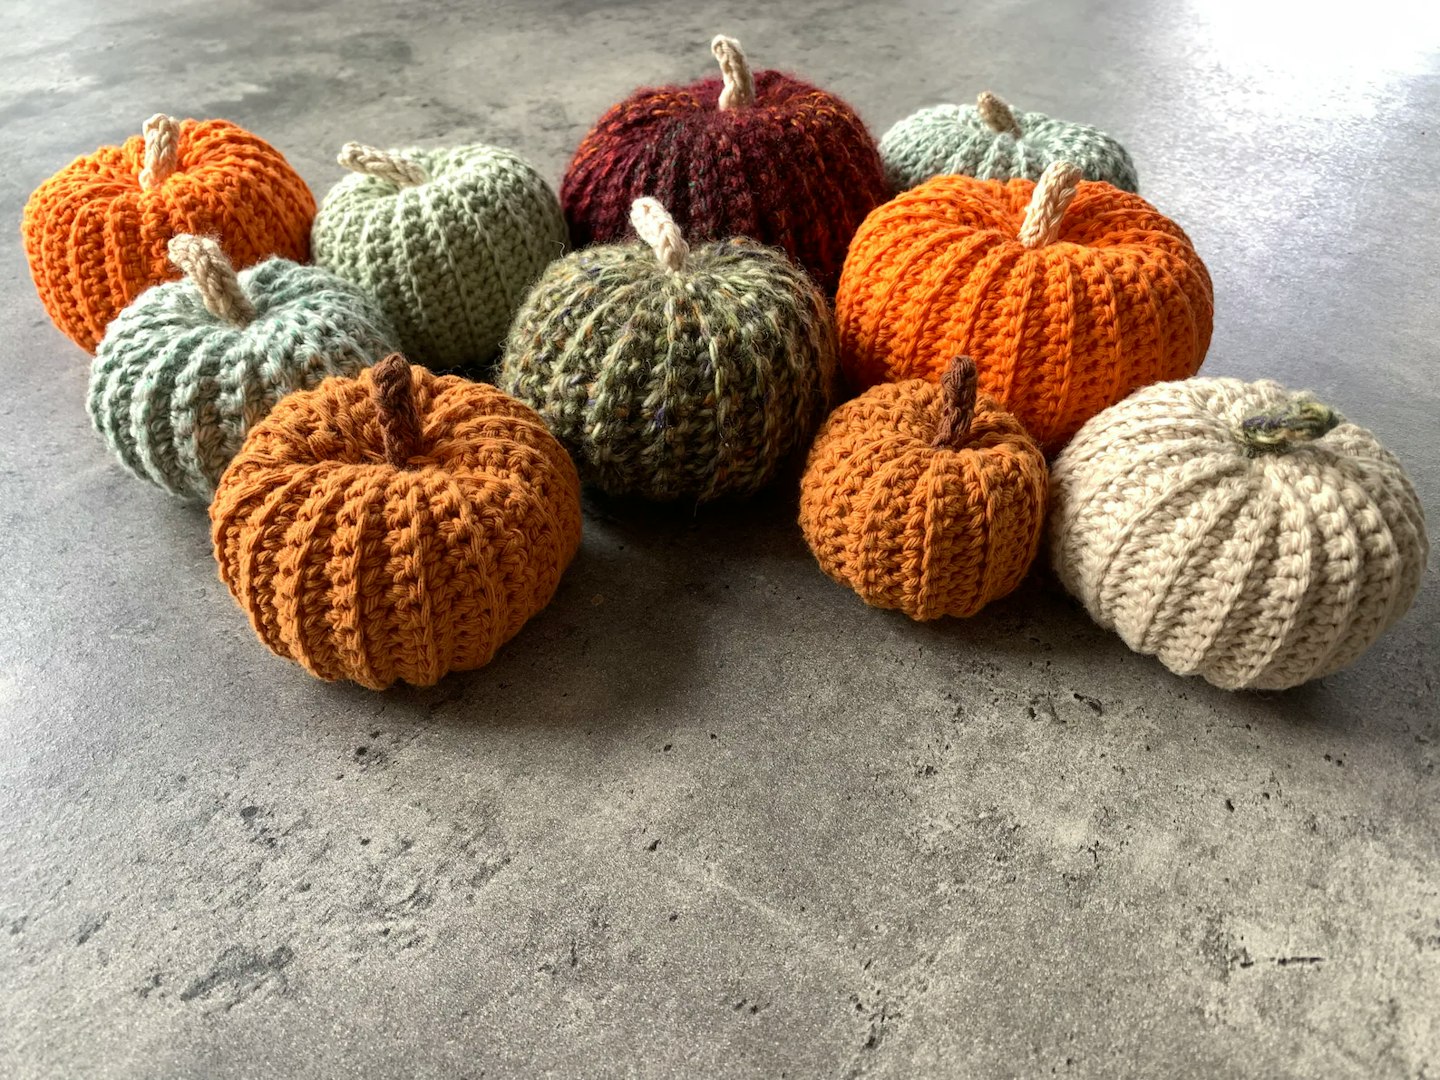
www.etsy.com
With 13 colours to choose from including pink, sage, green marl and peach, you can find the exact pumpkin to compliment your home décor. You can even make a note of what size you would like it to be (in the 'add your personalisation box).
Cara (a reviewer) said: "I absolutely love the pumpkins I ordered! They are so cute and are such good quality. Also, there was great communication with the seller from start to finish. I can’t wait to order more!"
Pros
- Broad spectrum of colours to choose from
- Stem is crocheted too
Cons
- Exact colours may vary
Best for pumpkin décor
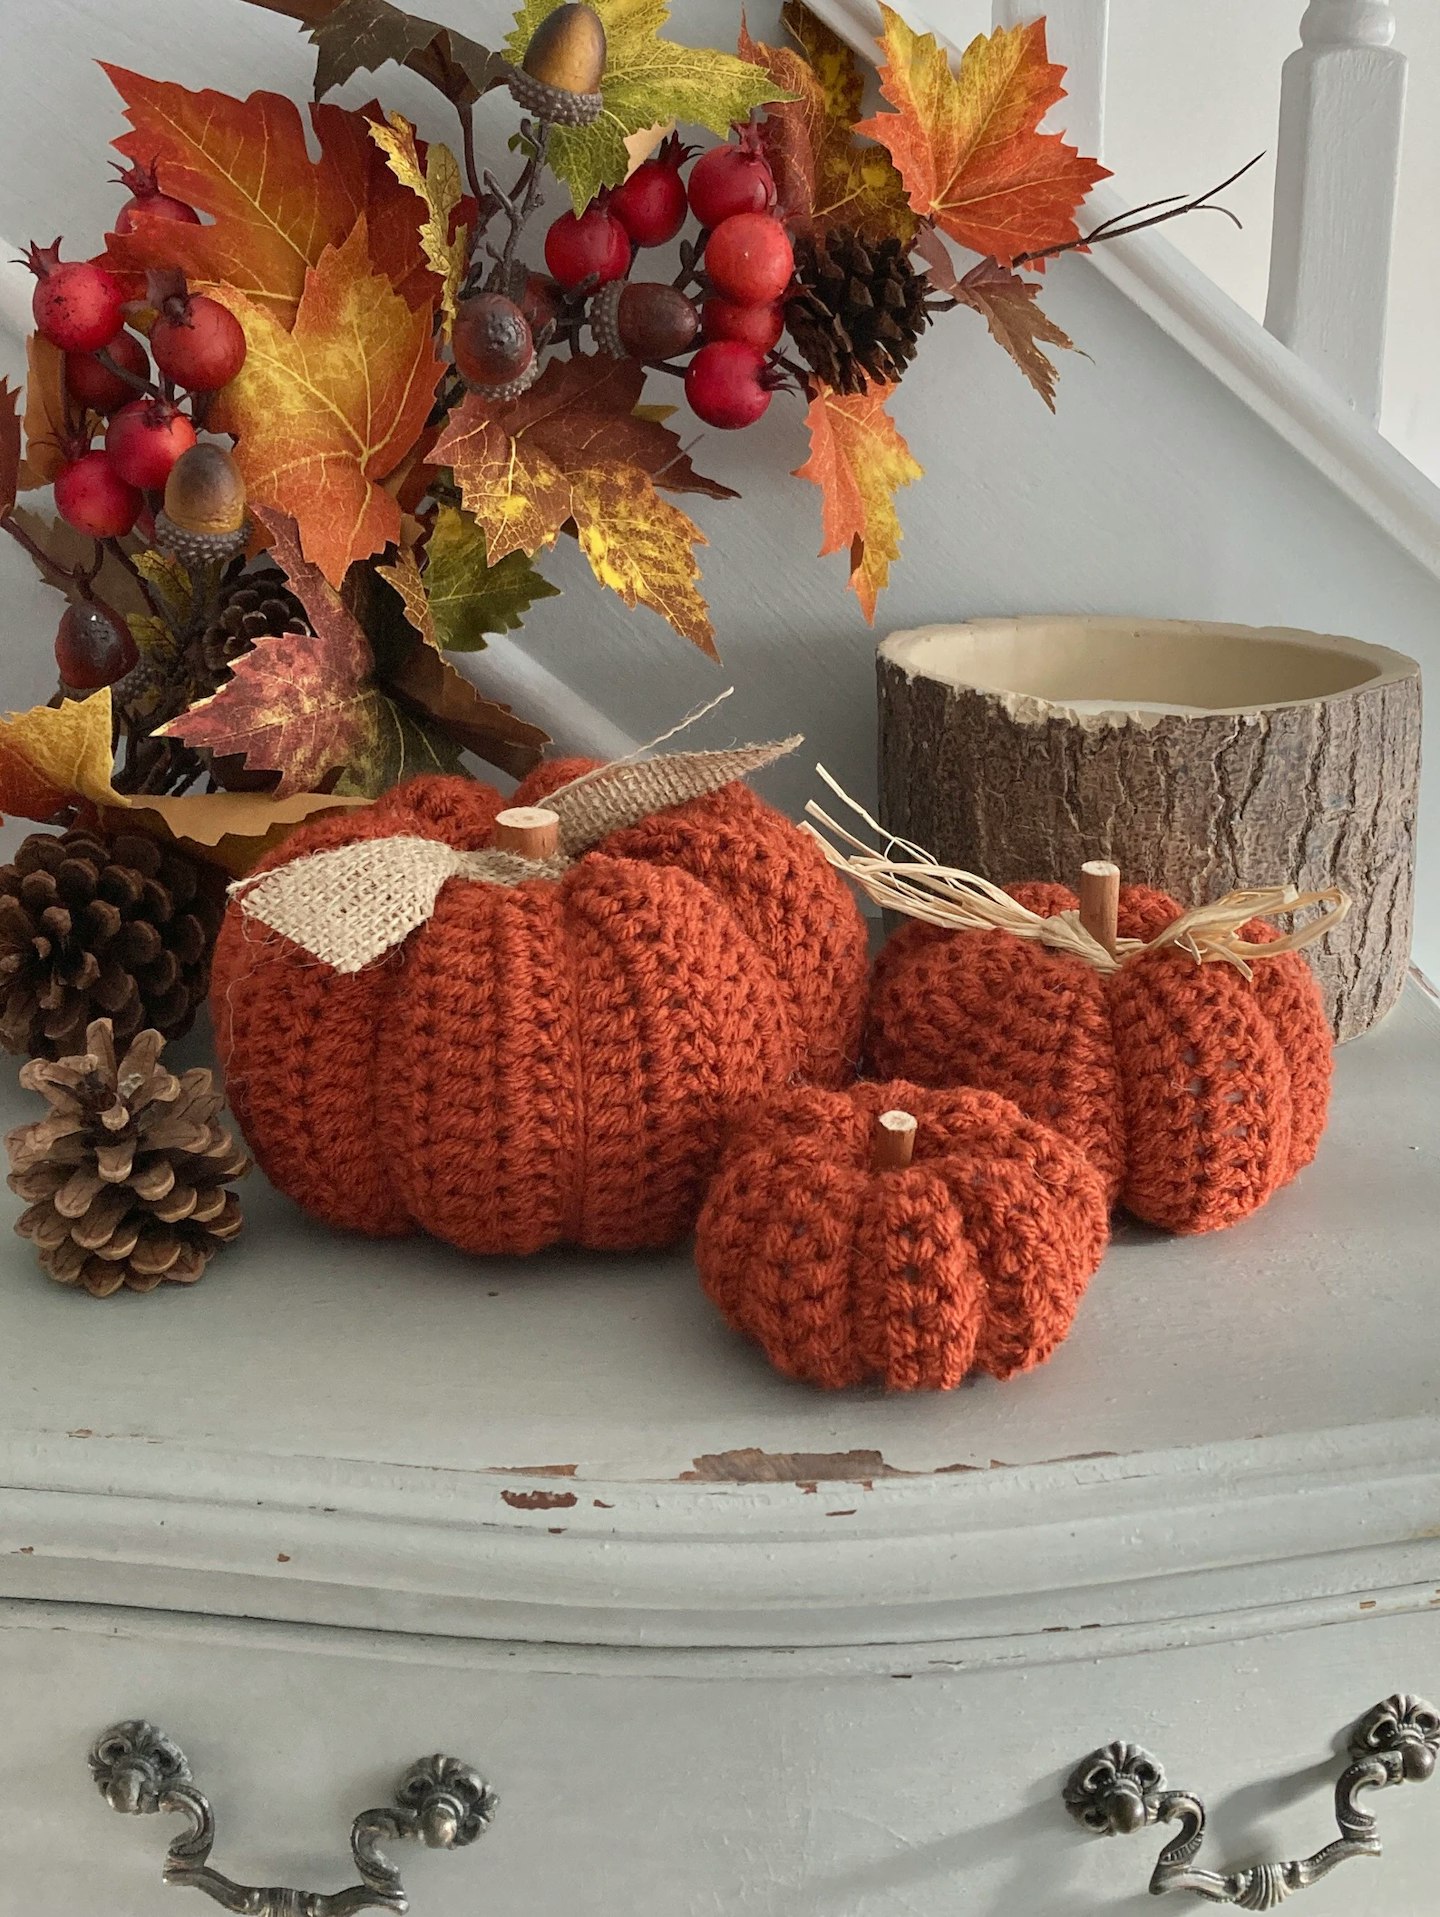
www.etsy.com
RachandNic create gorgeous pumpkins which are designed to your liking. Handmade with care, they are filled with hollow fibre stuffing which can be squidged and shaped for the ultimate Autumnal hygge display. To top it all off, there's the option to complete the pumpkin with a wooden stalk or some raffia or hessian.
One happy reviewer said: "I bought some of these pumpkins last year and everyone who saw them wanted one. So I just couldn’t resist buying a couple more to add to the collection. They look so good and the quality is excellent. Delivery was fast and everything was packaged so nicely. Can’t recommend these enough. Thank you."
Pros
- Great tactile element
- Three size options
Cons
- Slight variations may occur with the sizing
For the full details and where to find the rest of the equipment needed to make crochet pumpkins, check out Hobbycraft's How to Crochet a Collection of Pumpkins.
Arabella Horspool is a Commercial Content Writer for Mother&Baby and Yours at Bauer Media. She's a bookworm who enjoys cooking and spending time with her many pets.