Painting kitchen cupboards yourself will not only save you money, but it will allow you to get creative (and have complete control) over the finished look of your kitchen. You may already be happy with the style of your kitchen and just want to give it a quick little makeover. A fresh lick of paint is an easy way to upcycle old furniture in your house, which is cost-effective.
Once you’ve chosen a colour scheme for your kitchen, it’s best to research which type of paint will work best on your cupboards. If your cupboards are made of wood then it’s worth giving our article of the best paint for wooden furniture a quick read over.
If you’re not sure how to paint kitchen cupboards, then you’ll be pleased to know it’s pretty straight forward and we’ve got everything you need to know in our handy guide. From how to prep your cupboards to what tools you’ll need, here’s everything you need to know when it comes to painting kitchen cupboards.
How to prep your kitchen cupboards for painting
Cleaning your kitchen cupboards first is essential to make sure all dirt and grime has been removed. Spray on a good all-purpose cleaner and give it a wipe over with a warm, damp cloth.
You’ll also want to lightly sand down your kitchen cupboards as this will help the paint to grip. Aim for an even matte surface. Once you’re finished, wipe off the remaining dust with a damp cloth. Let the cupboards dry completely before starting to paint.
Painting kitchen cupboards: what you’ll need
Screwdriver - to remove your kitchen cupboard doors and any handles/knobs.
Masking tape - this is to protect the paint from getting on any bits of your kitchen that you don’t want it to. It’s especially handy if you’re not able to remove cupboard handles etc.
Paint - make sure you do your research first and that it’s suitable to use on kitchen cupboards if buying online. If you’re buying from a shop, then a shop assistant will be able to direct you towards an appropriate paint.
Primer - this is important to create the best possible surface for your paint to go on. Make sure you choose a primer suitable for your cupboards.
Paint brush/paint roller - we recommend having both. Paint rollers are useful for covering large spaces, while paint brushes are handy for smaller areas that need precision. Check out our best paint rollers and our best cutting in paint brushes.
Newspaper/old sheets - this is to cover larger areas within your kitchen — such as floors, tables, units — that you don’t want to get paint on.
Step-by-step guide to painting kitchen cupboards
You’ve already cleaned and sanded down your kitchen cupboards — excellent. Here’s how to get started with painting your kitchen cupboards:
1. Pop down masking tape to protect your floor and walls
Run the masking tape along the edge of your cabinets to protect the walls and any areas you don’t want to get paint on. Also, pop down any newspaper or old sheets that you have over larger surfaces.
2. Remove your kitchen cupboard handles, doors and draws
Take your screwdriver and remove any handles on your kitchen cupboards. This will make painting a lot easier and ensure no little area goes amiss. If you’re unable to remove the handles then pop masking tape over the areas you don’t want paint getting on. Unscrew and remove the kitchen cupboards and draws you want to paint the front of too.
3. Prime your cupboards
Apply your the paint primer suitable to your kitchen cupboards with either a roller or paint brush. Leave it to dry for the amount of time stated on the tin.
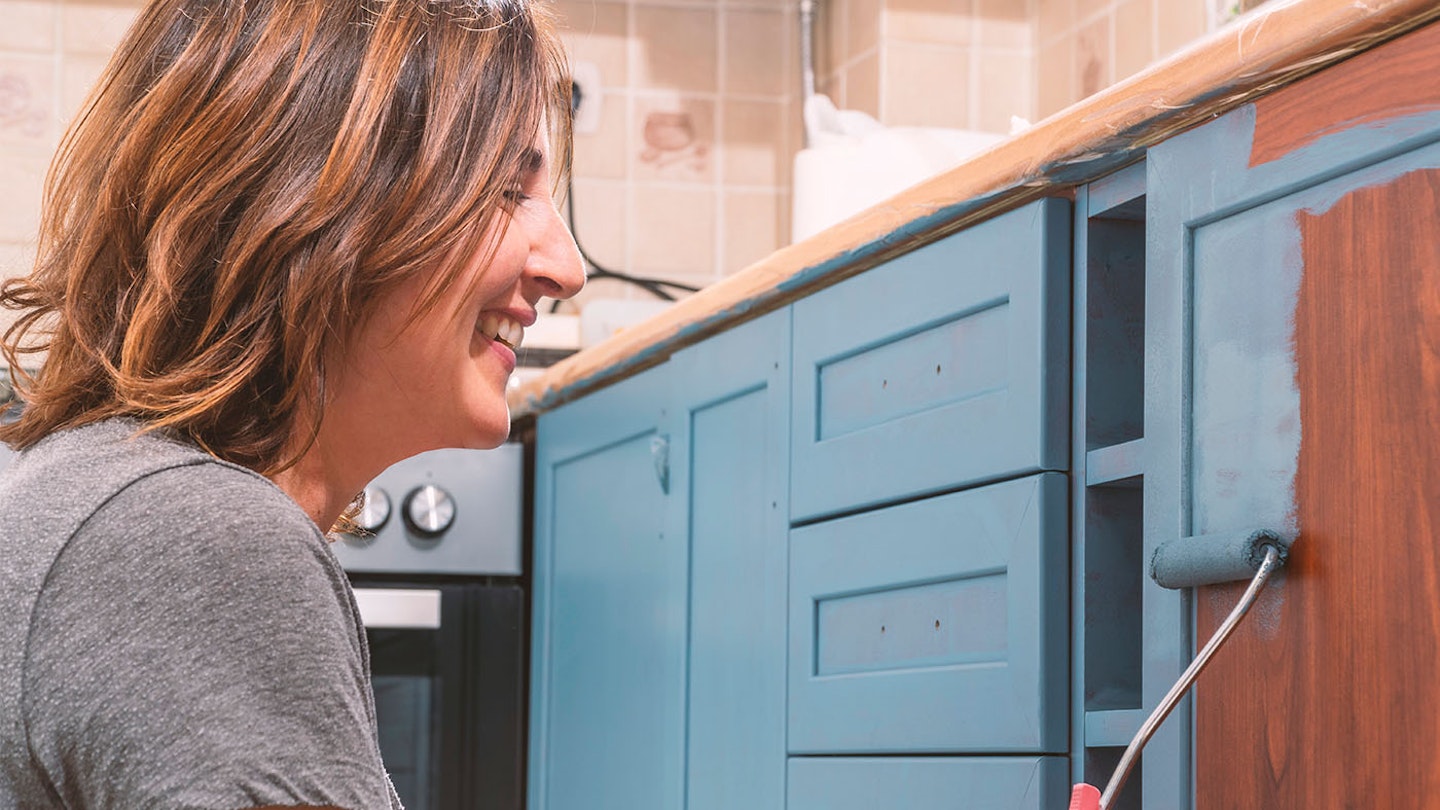
4. Begin painting your kitchen cupboards
Open you paint tin and give it a stir. Start by using a paint brush to get into any hard to reach areas and work your brush in both directions to ensure an even finish. Once you’ve applied the first coat let it dry, then go back in with a second coat. Allow your kitchen cupboards to completely dry (this could take up to two to three hours).
5. Pop everything back and you’re done
Once your cupboards have dried you can reattach the cupboard doors, pop the draws back in and reattach any handles. Carefully remove the masking tape and enjoy your freshly painted kitchen.
Top tips for painting kitchen cupboards
Set aside enough time - this is not a quick project, especially if you want a really nice finish. Take your time. Set aside enough days so you can do your layers of paint carefully.
Apply at least two coats of paint - this will ensure your kitchen cupboards get some good colour. If you’re keen to get a really solid colour then apply more.
Know what finish you want - using a paint brush will leave an artistic, potentially more rustic effect, while a foam roller will provide a flat finish that looks a little more modern and ‘clean’.
Do you need a primer when painting kitchen cupboards?
Some furniture paints won’t require a primer and if that’s the case it will be stated on the tin. However, a paint primer is used to create a flawless base for your paint and stop any blemishes coming through. If you’re still unsure whether your kitchen cupboards need a primer, just take a picture of them and show it to a shop assistant at an appropriate store and they will be able to guide you.
What is the best paint to use on kitchen cabinets?
This depends on your desired finish. A multipurpose paint that is suitable for wood, melamine and MDF is the safest to use on laminate cupboards. Wood paint is suitable for wooden, and already painted, wooden cupboards. Chalk paint can also be used, but it’s best to seal the top coat with a layer of wax or varnish, so the surface is wipeable. If you’ve never used it before, then check out our article explaining how to use chalk paint.