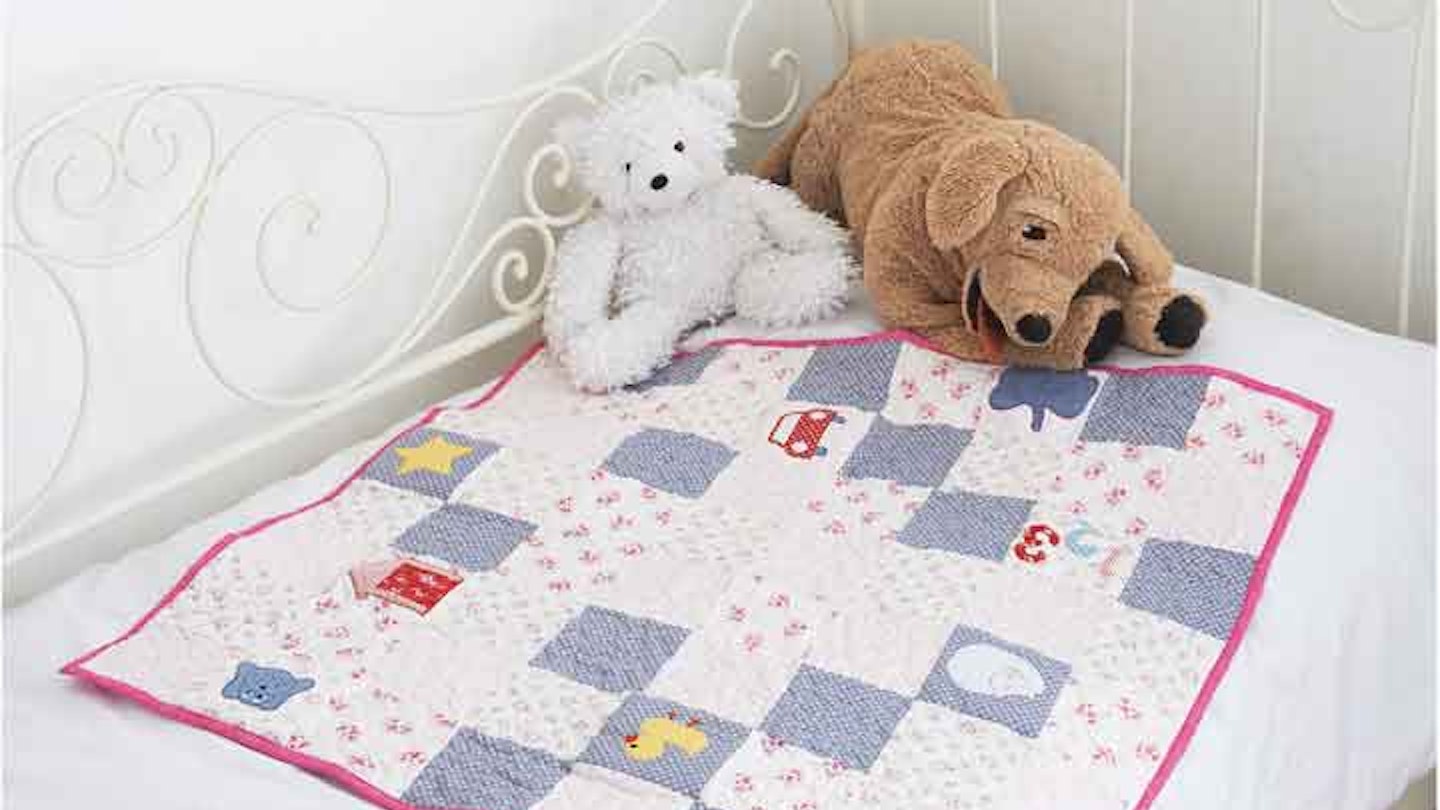
Materials needed:
-
Four fat quarters in a pattern of your choice
-
92cm (36¼in) square of wadding (batting) and same size piece of backing fabric
-
Remnants of felt and fabric to create eight or nine appliqué shapes
-
Paper-backed fusible web
-
Interfacing to back the appliqué shapes
-
Vanishing marking pen
To begin: Cut 16 squares of 12.5x12.5cm (5x5in) from each of the fat quarters, making 64 squares in total. Draw your own appliqué motifs and trace. Fuse the paper-backed webbing to the reverse of your appliqué fabrics and allow to cool. Pin or draw around the appliqué motifs on the paper backing and cut out carefully. Remember, if you are using numbers or letters you need to draw them in reverse on the paper backing so that, when turned over, they will be the right way round.
Step 1. Peel the paper backing from the appliqué shapes and fuse them to the right sides of some of your cut squares. Using a vanishing marking pen, draw any details on the shapes that will be stitched, such as facial features.
Step 2. Back these squares with interfacing and then stitch the motifs and details using your preferred appliqué method. Here we used a mixture of free-motion stitching, blanket stitch, straight stitch and satin stitch.
Step 3. With right sides together and taking a 5mm (¼in) seam allowance, sew two squares together along a side edge. Picking the squares at random, sew all the other squares together in pairs in the same way.
Step 4. Now sew two pairs, right sides together, matching the seam in the centre of the pairs first, and then matching the top and bottom of the seam. Repeat until you have sewn all the pairs into square four-patches.Sew pair after pair together, leaving a small gap between pairs but without cutting the thread. This is known as chain piecing, is quicker than sewing all the pairs individually, and saves on thread.
Step 5. Sew two four-patches together, again matching the centre seam before lining up the top and bottom of the seam. Make sure that every eight-patch features one of your appliqué squares.
Step 6. Join two eight-patches together at the sides to get a strip of eight across and two deep – make sure that you have only one appliqué each on the top and bottom rows. Repeat for the rest of the eight-patches so you have four sixteen-patch panels. Again, first pin at the centre seam, and then at the top and bottom of the seam.
Step 7. Lay all the panels on a flat surface and decide which panel to join to which along the long edges. Once you have decided, take two adjacent panels and pin right sides together, pinning at the seams first to make sure all the squares match up. If you have one or two that don’t match perfectly, match the seams, then clip two or three times into the seam allowance of the shorter one so that you can gently stretch it a little to make it fit. Sew the seam. Continue in this manner until all the panels are joined into one piece. Press all the seams
Step 8. Lay the backing fabric wrong side up on a flat surface. Add the wadding (batting) and then centre the pressed patchwork panel on top, right side up. The backing and wadding (batting) should extend approximately 2cm (¾in) beyond the panel. Anchor the layers together with pins, or by hand-basting (tacking), starting at the centre and working out to the edges, smoothing the layers as you go.
Step 9. Quilt the layers together: set your machine for free-motion stitching, attach the free-motion or darning foot and stitch all over the mat, except for the appliqué squares. We used a meandering stitch, but you could choose straight lines or other quilting methods.
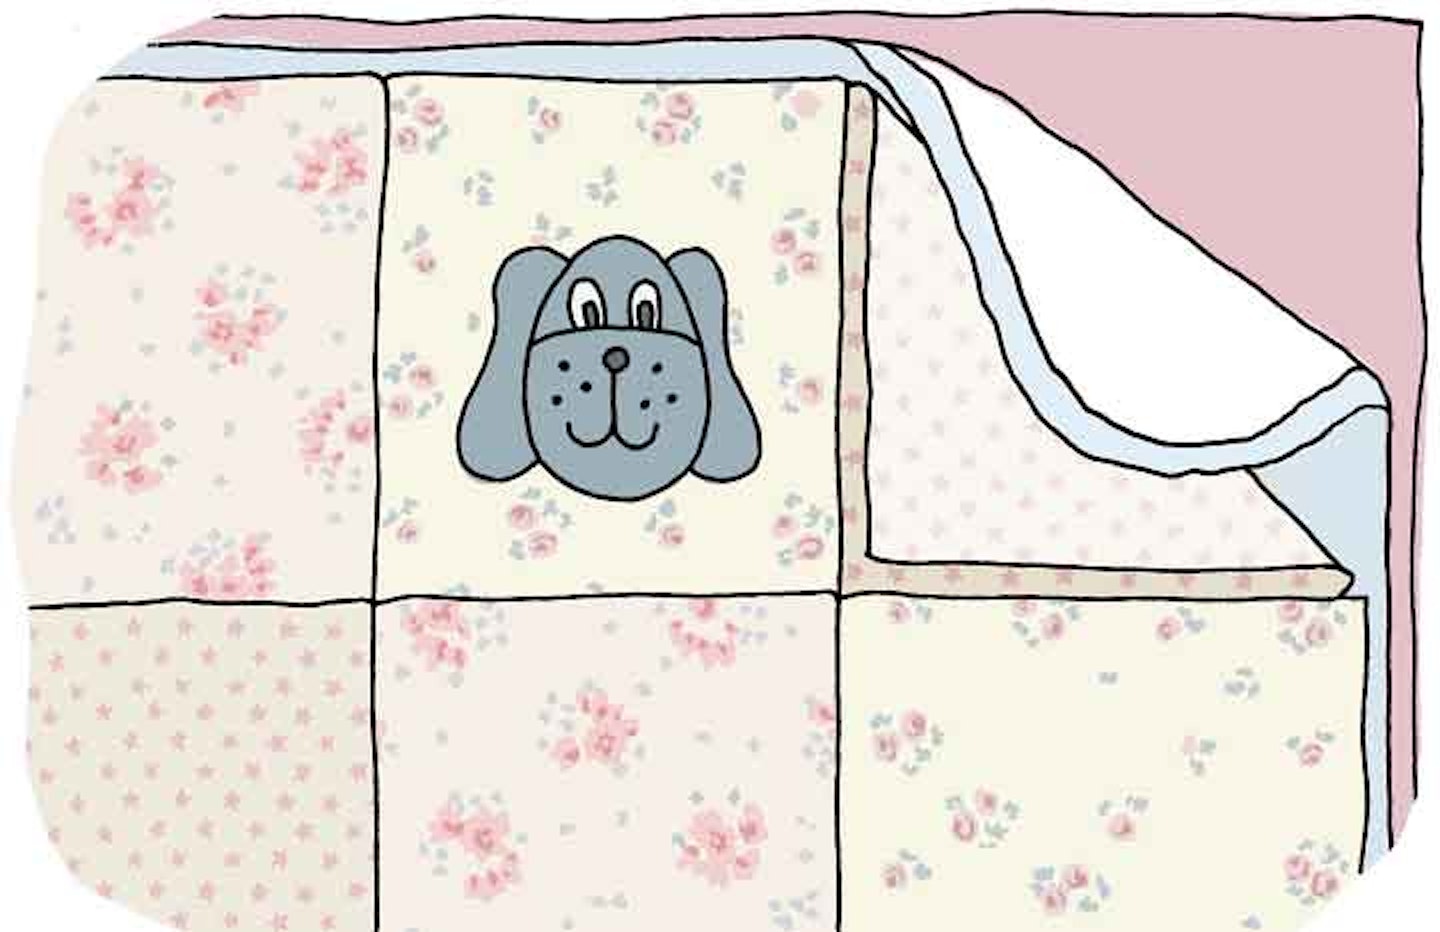
Step 10. If necessary, trim the wadding (batting) down close to the panel, and trim the backing so it is 2cm (¾in) larger than the panel. Press up a 1cm (½in) hem, then turn this over again by 1cm (½in) so that it wraps over the front edges of the patchwork by 1cm (½in).
.jpeg?auto=format&w=1440&q=80)
Step 11. At the corners, unfold the double-pressed edge, cut off the corner diagonally across where the first two fold lines cross. Fold the corner in along the second interlocking crease, then refold the edges so that the corner mitres neatly (see right). Pin in place.
Step 12. Machine stitch around the edge, stitching close to the inner edge of the ‘binding’, using a stitch length of 3. To finish, hand-stitch the diagonal fold of fabric at the corners.
Taken from Fun with Fat Quarters by Wendy Gardiner, published by Search Press, priced £9.99